Blogs
Stay updated with expert roofing tips, news, and solutions to protect your home from Central Florida’s extreme weather with Horizon West Roofing.
Our Latest Blogs

Introduction: The Double-Edged Sword of Apopka’s Greenery
Living in Apopka, the “Indoor Foliage Capital of the World,” means being surrounded by breathtaking natural beauty. Majestic oak trees draped in Spanish moss, towering pines, and lush, vibrant landscapes are hallmarks of our community. This greenery enhances our quality of life, provides shade, and creates a serene environment. For homeowners, however, this beautiful canopy presents a significant and often underestimated threat to their most important asset: their roof.
Trees and the debris they produce are one of the leading causes of roof damage in Central Florida. The danger isn’t limited to the dramatic, headline-grabbing event of a massive tree crashing through a house during a hurricane. More often, the damage is slow, subtle, and cumulative, caused by seemingly harmless branches, leaves, and pine needles.
Many homeowners fail to connect the health of their landscaping with the health of their roof. They see a branch touching the shingles or a pile of leaves in a valley as a minor housekeeping issue, not a direct threat. The reality is that this organic matter is actively working to shorten your roof’s lifespan, create leaks, and cause thousands of dollars in damage.
This guide will break down the many ways trees, branches, and debris inflict harm on Apopka homes. We will explore everything from the abrasive action of a swaying branch to the destructive power of a clogged gutter, and provide actionable steps to protect your roof from the very landscape that makes our city so beautiful.
The Obvious Threat: Direct Impact Damage
Let’s start with the most dramatic and easily understood danger: things falling from trees and hitting your roof. This is especially prevalent during Central Florida’s volatile storm season.
Catastrophic Failure from Falling Trees
During a hurricane or a severe thunderstorm with high winds, a tree’s structural integrity can fail. A large tree or a massive limb falling on your roof can cause catastrophic damage, punching through the decking and compromising the structural trusses of your home. This is a worst-case scenario that often renders a home uninhabitable until major structural and roof repairs are made.
Prevention: The only defense against this is proactive tree management. Hire a certified arborist to assess the health of large trees on your property, especially those within falling distance of your home. They can identify signs of disease, rot, or structural weakness that aren’t visible to an untrained eye. Removing a dying or dangerously leaning tree is an investment in your home’s safety.
Punctures and Bruises from Smaller Debris
You don’t need a whole tree to fall to cause significant problems. Smaller falling objects can be just as insidious.
- Branches: A branch the size of your arm, falling from 50 feet up, carries enough force to puncture an asphalt shingle roof or crack a clay tile.
- Pinecones and Nuts: In Apopka, acorns from our oaks and heavy pinecones can act like projectiles in high winds. They might not puncture the roof, but they can “bruise” an asphalt shingle. This impact crushes the shingle’s surface, dislodging the protective granules and creating a weak spot that will age much faster than the rest of the roof.
- Hail: While not tree debris, hailstorms often accompany the severe thunderstorms that knock branches loose. Hail impact creates similar bruising and can severely diminish your roof’s lifespan.
After any significant storm, it’s wise to do a ground-level inspection with binoculars. Look for signs of impact. If you see damage, it’s crucial to address it quickly before water has a chance to exploit the new weakness.
The Silent Destroyers: Slow, Cumulative Damage
While impact damage is frightening, the more common and often more costly damage comes from debris that sits on your roof over time.
The Abrasive Action of “Scrubbing” Branches
A tree branch that is touching your roof might seem harmless, but it’s a relentless agent of destruction. Every time the wind blows, that branch sways back and forth, dragging across the surface of your roof.
- On Asphalt Shingles: This constant scrubbing acts like sandpaper, scraping away the vital ceramic granules that protect the shingle’s asphalt layer from UV rays. This creates a “bald” patch that will deteriorate rapidly in the Florida sun.
- On Tile Roofs: A heavy branch can eventually wear away the glaze on a clay tile or even lift tiles out of place.
- On Metal Roofs: The branch can scratch the protective paint finish, exposing the bare metal underneath to moisture and leading to rust.
The 10-Foot Rule: A core principle of roof maintenance is to keep all tree limbs trimmed back at least 10 feet from your roofline. This creates a “defensible space” that prevents this abrasive damage.
Trapped Moisture: The Root of All Evil
The most significant threat from debris like leaves, pine needles, and Spanish moss is its ability to trap moisture. Your roof is designed to shed water quickly. When debris accumulates, it acts like a sponge, holding water against the roof surface for extended periods.
This constant dampness creates a perfect environment for rot and decay.
- In Roof Valleys: The “valleys” where two roof planes meet are natural collection points for debris. When leaves and pine needles clog a valley, they form a dam. During a rainstorm, water hits this dam and, instead of flowing down to the gutter, it pools and is forced sideways, up and under the shingles. This is one of the most common causes of roof leaks.
- Behind Chimneys and Skylights: Debris also piles up on the “uphill” side of any roof penetration. This trapped moisture will attack the flashing and sealant, causing it to fail prematurely.
- On Low-Slope Roofs: If you have a porch or patio with a low-slope roof, debris accumulation is even more dangerous as water drains more slowly.
This trapped moisture doesn’t just lead to leaks; it accelerates the aging of the roofing materials themselves, causing asphalt to soften and wood decking to rot. An example of a clean, well-maintained roof valley can be seen in our online gallery, showcasing how water should flow unimpeded.
The Biological Attack: Turning Your Roof into a Garden
A pile of damp, decomposing leaves on your roof is more than just a pile of leaves—it’s topsoil. This creates a habitat for organisms that can cause serious damage.
Algae, Moss, and Mildew
These organisms thrive in the shady, damp areas created by overhanging trees and debris.
- Algae (Gloeocapsa magma): Those ugly black streaks are a form of algae that feeds on the limestone filler in asphalt shingles. While largely cosmetic at first, a heavy infestation can hold moisture and speed up granule loss.
- Moss: Moss is far more destructive. It has root-like structures called rhizoids that dig into shingles for anchorage. As the moss grows thicker, it lifts the edges of the shingles. This breaks the watertight seal between them and creates a pathway for wind-driven rain to get underneath.
Pest Infestations
Debris on your roof provides food and shelter for pests, and overhanging branches give them a convenient bridge to get there.
- Insects: Decomposing leaves attract insects like termites and carpenter ants. The damp, rotting wood of a debris-clogged gutter or fascia board is an open invitation for them to establish a colony. From there, it’s a short journey into the main structure of your home.
- Rodents: Squirrels, rats, and raccoons will use overhanging branches as a highway to your roof. They might be attracted to the water in your clogged gutters or the nuts that have fallen. Once on the roof, they are notorious for chewing through vents, soffits, and fascia boards to gain access to the warmth and safety of your attic. A small hole chewed by a squirrel can let in gallons of water during the next rainstorm.
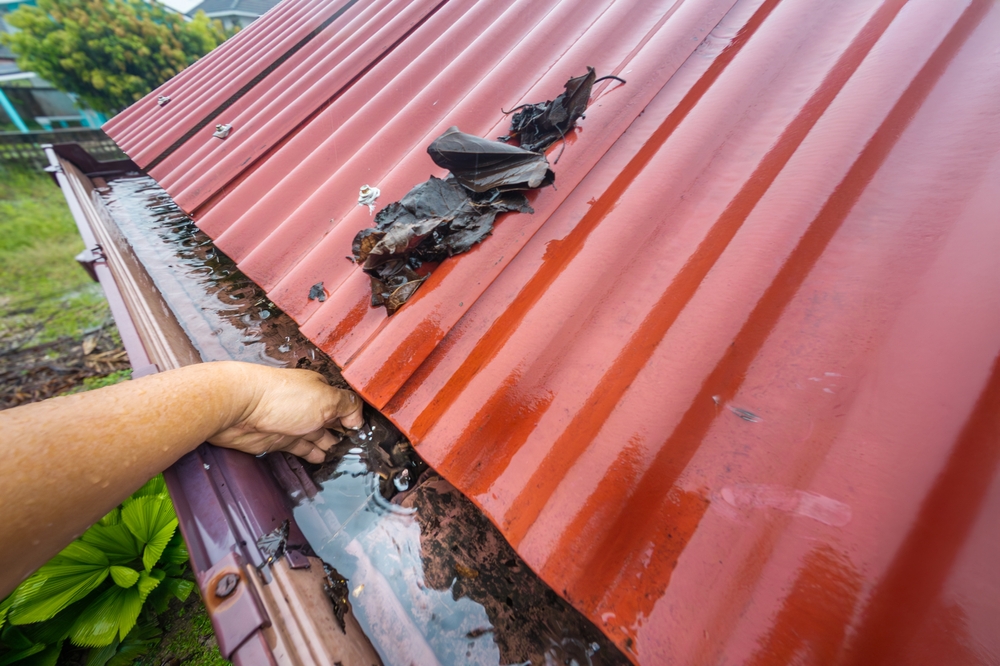
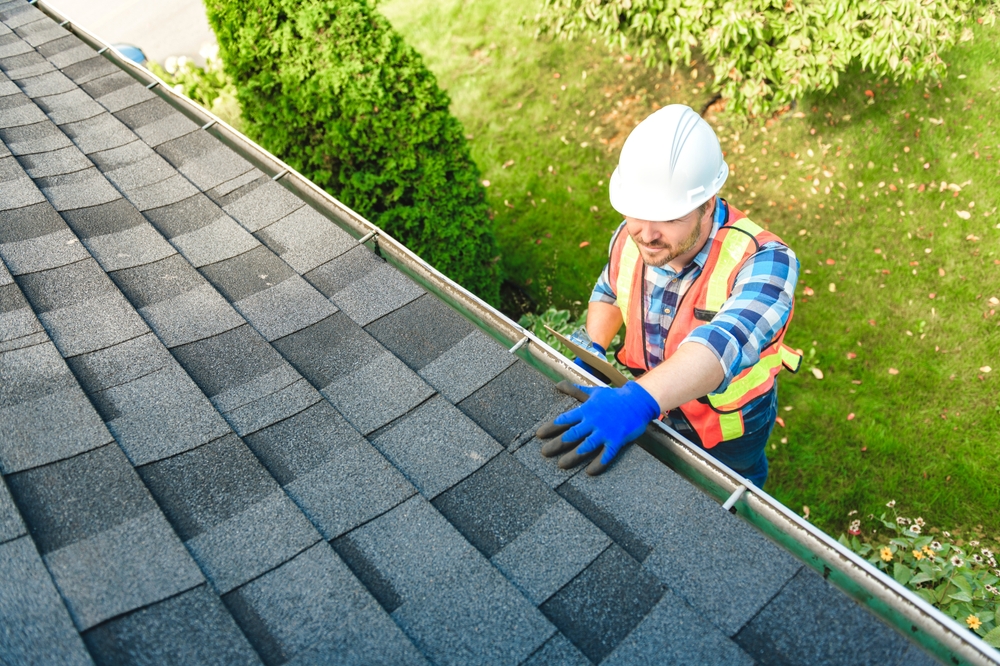
The Gutter Connection: When Debris Overwhelms Your Drainage System
The relationship between tree debris and your gutters is a critical one. Your gutters are designed to catch water from the roof and channel it safely away from your home’s foundation. When they become clogged with leaves, pine needles, and twigs from surrounding trees, they cease to function.
This failure has a direct and devastating impact on your roof.
- Water Backup: A clogged gutter fills with water. This water has nowhere to go but up and over the back edge of the gutter.
- Fascia and Soffit Rot: The water spills onto the wooden fascia board (the board the gutter is attached to) and the soffit (the underside of the roof overhang). Constant saturation causes this wood to rot.
- Deck Damage: As the water backs up, it seeps under the first few courses of shingles. This rots the edge of the plywood roof deck. Rotted decking is soft and pulpy; it can no longer hold the nails that secure your shingles in place.
- Gutter Failure: The weight of water and soggy debris is immense. It can cause gutters to sag, pull away from the house, or rip off entirely, often taking the rotted fascia board with them.
In Apopka’s climate, gutter cleaning isn’t an optional chore; it’s an essential part of roof preservation. For homes surrounded by trees, this may need to be done as often as four times a year. The cost and effort of cleaning are minuscule compared to the cost of the structural roof repairs caused by neglect.
Apopka-Specific Tree and Debris Guide
The types of trees common in our area each present unique challenges.
Oak Trees
- The Debris: Large leaves, acorns, and abundant Spanish moss.
- The Threat: Oak leaves are large and can quickly clog gutters. Acorns can bruise shingles on impact. Spanish moss, while not parasitic, holds a tremendous amount of moisture and can smother sections of your roof, preventing them from drying out.
Pine Trees
- The Debris: Pine needles and cones.
- The Threat: Pine needles are the worst offenders for clogging gutters. They interlock to form dense mats that are highly resistant to water flow. The sticky sap can also act as a glue, holding debris to the roof surface.
Palm Trees
- The Debris: Fronds.
- The Threat: While they don’t create much small debris, the large, heavy fronds can become dangerous projectiles in high winds. They can damage shingles or tiles on impact and their fibrous nature makes them difficult to clear from gutters.
Your Proactive Defense Plan: A Checklist for Homeowners
You can’t stop the wind from blowing or trees from shedding, but you can take proactive steps to mitigate the damage.
1. Implement a Regular Trimming Schedule
- Hire a professional, insured arborist every 2-3 years to trim your trees.
- Enforce the “10-foot rule,” ensuring no branches are touching or hanging directly over your roof.
- Prioritize the removal of dead or dying limbs, which are the most likely to break off in a storm.
2. Commit to Debris Removal
- After a major storm, or at least once a season, clear any significant accumulation of debris from your roof surface. This can often be done with a leaf blower from a secure ladder (do not walk on a steep or wet roof).
- Pay special attention to valleys and the areas around skylights and chimneys.
3. Make Gutter Cleaning a Priority
- Clean your gutters thoroughly at least twice a year (late spring and late fall).
- If you have heavy tree cover, especially pines, increase this to four times a year.
- Ensure downspouts are clear and flowing freely.
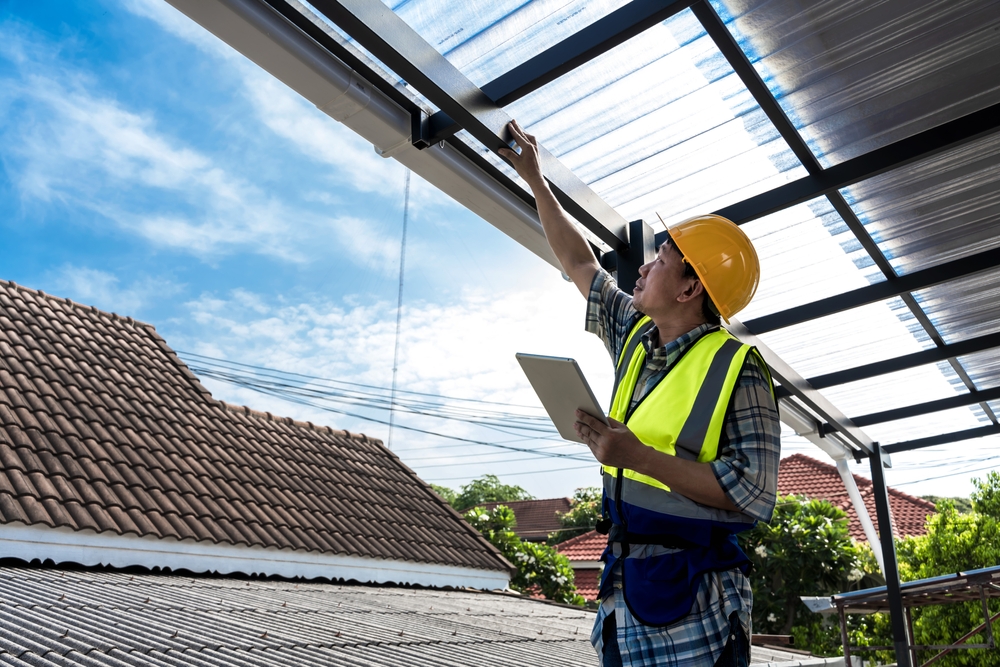
4. Schedule Professional Roof Inspections
- Have a professional roofing contractor, like HW Roof, inspect your roof annually. We know exactly where to look for the subtle signs of debris-related damage.
- An expert can spot issues like granule loss from abrasion, soft spots in the decking from trapped moisture, or compromised flashing that an untrained eye would miss.
What to Do When You Find Damage
If your proactive checks uncover a problem, acting quickly is key to minimizing the cost.
- A few cracked or missing shingles: This can often be a simple repair. The danger is leaving the underlying materials exposed to the elements.
- A leak in a valley: This indicates water is getting under the shingles due to a debris dam. The repair might involve removing the shingles in the valley, replacing any rotted decking, installing a new ice and water shield, and then replacing the shingles.
- Rotted fascia or soffits: This is a sign that your gutters have been overflowing for some time. The wood will need to be replaced, and the root cause (the clogged gutters) must be addressed.
Ignoring these problems is never the answer. A small leak today will never be smaller or cheaper to fix tomorrow. If you find something concerning, it’s time to call in the experts. Don’t hesitate to contact us for a professional assessment and an honest quote for any necessary repairs.
Conclusion: Harmonizing Your Home with Apopka’s Nature
The trees of Apopka are a treasure, but they demand respect and responsible management from homeowners. By understanding the direct and indirect ways that trees and their debris damage your roof, you can shift from a reactive to a proactive mindset.
Your roof’s longevity is not a matter of luck; it’s a matter of maintenance. A simple plan of regular trimming, consistent debris removal, and diligent gutter cleaning is your most powerful weapon against the slow, silent destruction that our beautiful landscape can cause. This routine doesn’t just prevent costly repairs; it extends the life of your entire roof system, protecting your investment for years to come.
Take a walk around your property this weekend. Look up. Are branches touching your roof? Are your gutters overflowing with leaves? What you see could be a warning sign. Heeding that warning today can save you from a disaster tomorrow.
Introduction: The Temptation of a Quick Clean
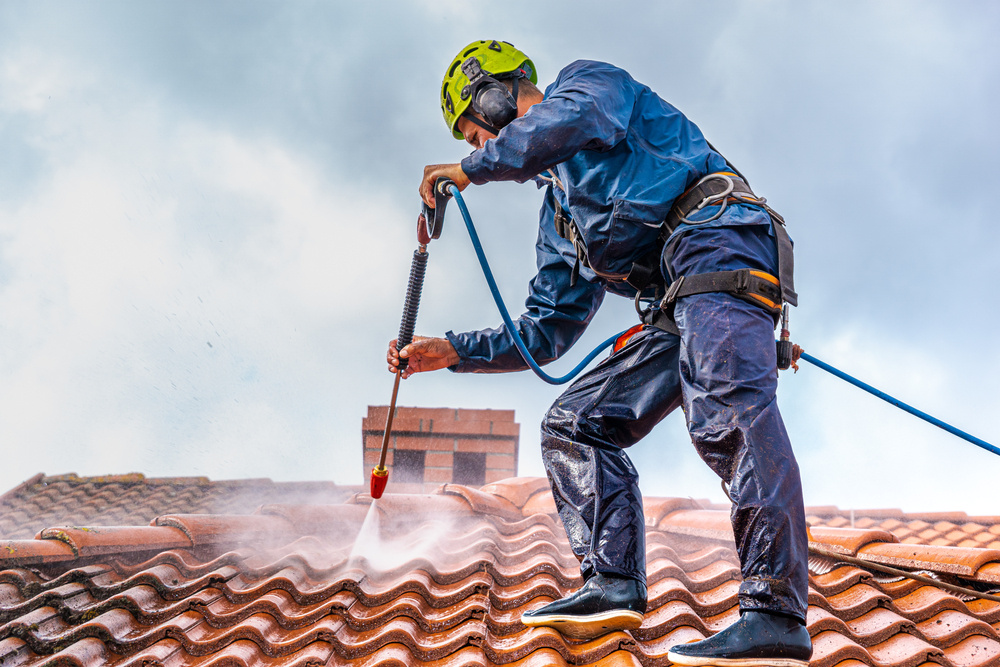
Living in Florida means dealing with a climate that encourages things to grow—everywhere. Your lawn, your garden, and unfortunately, the roof over your head. Those unsightly black streaks and green patches of algae, moss, and mildew that appear on your roof can make an otherwise beautiful home look old and neglected. It is tempting to look for a quick, powerful solution to restore your roof’s appearance, and for many homeowners, that solution seems to be a pressure washer.
The logic is simple: if high-pressure water can strip grime from a concrete driveway, surely it can blast away the algae on your shingles. The idea of a fast, transformative clean is incredibly appealing. However, when it comes to your roof, what seems like a quick fix can cause irreversible damage, void your warranty, and lead to thousands of dollars in premature repairs.
The question isn’t just if pressure washing damages a roof, but how and why—and what Florida homeowners should do instead. Your roof is a complex system designed to shed water, not to withstand a direct, high-pressure assault.
In this definitive guide, we will explore the significant risks of pressure washing your roof in Florida. We will explain the damage it causes to different roofing materials, introduce safer and more effective cleaning methods, and provide the knowledge you need to make an informed decision that protects your home’s most critical asset.
The Science of Roof Damage: Why High Pressure is the Enemy
To understand the danger, you must first understand what you’re cleaning. An asphalt shingle, the most common roofing material in Florida, is not a solid, impervious slab. It is a multi-layered product.
The Anatomy of an Asphalt Shingle
- The Mat: The base of the shingle is a fiberglass mat that provides structural integrity.
- The Asphalt: This mat is saturated with asphalt, which provides the waterproofing.
- The Granules: The top surface is covered with a dense layer of ceramic-coated mineral granules.
Those tiny granules are the most important part of the shingle. They are not just for color. Their primary job is to protect the asphalt layer from the sun’s relentless UV rays. Without this granular shield, the asphalt would quickly dry out, become brittle, and crack, leading to leaks and shingle failure.
What Pressure Washing Does to Shingles
When you hit a shingle with a high-pressure water stream (typically 1,500 to 3,000 PSI), you are essentially sandblasting it. The force of the water strips away the granules, a phenomenon known as “granule loss.” You might see these granules as a dark sludge washing off the roof and into your gutters.
Every granule that is blasted away is a patch of asphalt now exposed to the sun. This causes accelerated aging, dramatically shortening the lifespan of your roof. A roof that should have lasted 20 years might now fail in 10. This kind of damage is not covered by any manufacturer’s warranty; in fact, using a pressure washer on an asphalt shingle roof will almost certainly void your warranty.
Furthermore, the high-pressure stream can lift the edges of the shingles, breaking the tar seal that bonds them together. This allows wind and rain to get underneath, leading to leaks and potential “wind uplift,” where entire sections of the roof can be peeled back during a storm.
The Risk Isn’t Limited to Asphalt Shingles
While asphalt shingles are particularly vulnerable, no roofing material is completely safe from the destructive force of a pressure washer when used improperly.
Damage to Tile Roofs (Clay and Concrete)
Tile roofs are common in Florida for their durability and classic look. The tiles themselves are strong, but the system is delicate.
- Cracking and Chipping: While concrete tiles can handle some pressure, old clay tiles are very brittle. A direct blast can easily crack or chip a tile. A single cracked tile creates a direct entry point for water.
- Dislodging Tiles: The pressure can get underneath the lip of a tile and shift it out of place, breaking the interlocking system.
- Destroying the Underlayment: The biggest risk is to the underlayment. The tiles on your roof are the primary water-shedding layer, but the felt or synthetic underlayment beneath them is the true waterproofing barrier. High-pressure water can force its way through the gaps between tiles and blast holes in this critical membrane. You might not see this damage, but it will cause slow leaks that rot your roof deck from the inside out.
Damage to Metal Roofs
Metal roofs are known for their toughness, but their protective coatings are not invincible.
- Stripping the Finish: Most metal roofs have a painted finish (like Kynar 500) that protects the metal from oxidation and provides color. A pressure washer can strip this paint, exposing the bare metal to the elements and leading to rust.
- Forcing Water into Seams: Standing seam metal roofs have intricate, interlocking seams. High pressure can force water into these seams and screw-down panels have rubber washers that can be damaged, compromising the roof’s water-tightness.
- Denting Panels: A powerful, concentrated stream can dent softer metals like aluminum.
The bottom line is clear: pressure washing is a high-risk, low-reward activity for any roof type. The potential for causing expensive, irreversible damage far outweighs the benefit of a temporarily clean surface. To see what a properly maintained roof looks like, browse our gallery of completed projects.
The Root of the Problem: What Are You Actually Cleaning?
The ugly black streaks on your Florida roof are not dirt. They are a living organism called Gloeocapsa magma, a type of algae that thrives in hot, humid climates. It feeds on the limestone filler used in asphalt shingles. Because it is alive, simply blasting it with water is not a permanent solution.
Even if you manage to remove the visible algae without causing significant granule loss, you are leaving behind the microscopic root structures. With the next rain and dose of Florida sunshine, the algae will simply grow back, often thicker and faster than before.
Pressure washing only removes the symptom (the black streaks), not the cause (the living organism). It is like mowing a weed instead of pulling it out by the root.
The Safer, More Effective Alternative: Soft Washing
If pressure washing is off the table, how do you safely and effectively clean your roof? The answer, endorsed by the Asphalt Roofing Manufacturers Association (ARMA) and professional roofers, is soft washing.
What is Soft Washing?
Soft washing is a cleaning method that uses low pressure—about the same as a garden hose—to apply a specially formulated, biodegradable cleaning solution. This solution does the real work. It is designed to kill the algae, moss, and mildew at a biological level, destroying the root of the problem.
The process typically involves three steps:
- Application: The cleaning solution is sprayed onto the roof surface using low-pressure pumps.
- Dwell Time: The solution is left to sit on the roof for a period of time, allowing it to penetrate and kill the organisms.
- Rinsing: The roof is gently rinsed with clean, low-pressure water, washing away the dead organic matter and cleaning solution.
Why Soft Washing is Superior
- It’s Effective: By killing the organisms at the root, soft washing provides a longer-lasting clean. The algae will not grow back immediately.
- It’s Safe: The low pressure does not strip granules from shingles, break tiles, or damage metal coatings. It cleans without causing harm.
- It Protects Your Warranty: Soft washing is the method approved by major roofing manufacturers and will not void your warranty.
- It Protects Your Landscaping: A professional soft washing company will pre-soak all plants and landscaping around the home and use gutter diversions to ensure the cleaning solution does not harm them.
Can You DIY a Roof Cleaning?
The availability of “roof wash” products at hardware stores might tempt you to try cleaning the roof yourself. However, this is one home maintenance task where hiring a professional is strongly recommended.
The Dangers of DIY Roof Work
- Personal Safety: Walking on a roof is dangerous. A roof surface, especially when wet and covered in slippery algae, is a serious fall hazard. Professionals have the training, safety harnesses, and insurance to work at height safely.
- Chemical Handling: The effective cleaning solutions used in soft washing are professional-grade chemicals that require proper handling, mixing, and application techniques to be both effective and safe for your home and the environment.
- Risk of Damage: An inexperienced user can still cause damage, even with a low-pressure system. Incorrect application can lead to streaking, and failure to properly rinse can damage landscaping.
A reputable roofing company, like HW Roof, has the expertise to assess your roof’s condition and determine the appropriate cleaning method. Sometimes, what looks like a dirty roof is actually a roof at the end of its life, and cleaning it would be a waste of money. An honest professional can tell the difference.
What If the Damage is Already Done?
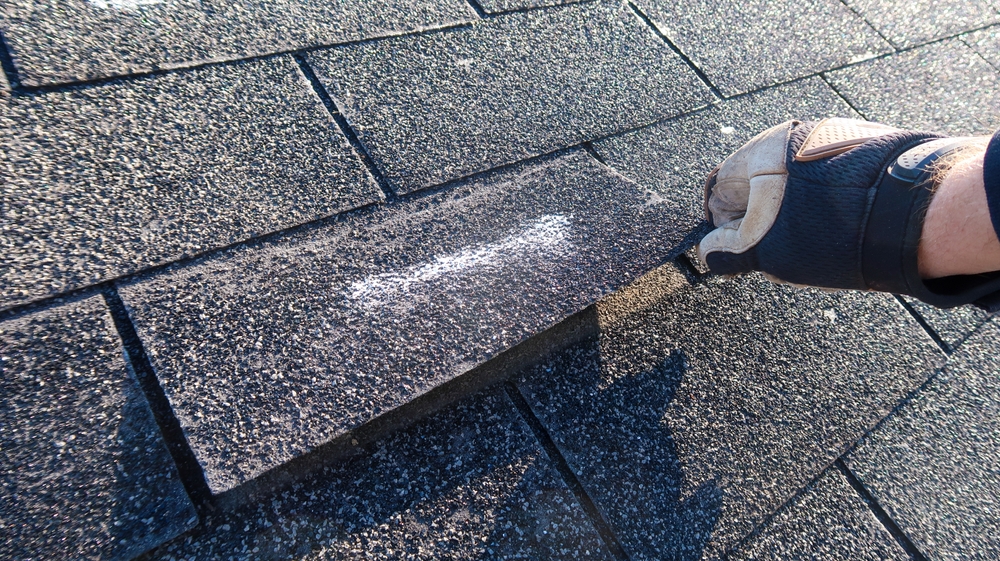
Perhaps you are reading this after you or an inexperienced contractor has already pressure washed your roof. What should you do?
First, assess the situation. Look in your gutters and at the base of your downspouts. Do you see an excessive accumulation of shingle granules? From the ground, use binoculars to look for “bald spots” on the shingles or areas where the color looks uneven and faded.
If you suspect damage has occurred, the next step is to schedule a professional inspection. A qualified roofer can get on the roof and perform a detailed assessment to determine the extent of the granule loss and whether the structural integrity of the shingles has been compromised.
Depending on the severity, you may be facing a few outcomes:
- Minor Granule Loss: If the damage is minimal, you may simply have to accept that you’ve shortened your roof’s lifespan. You’ll need to monitor it closely for signs of leaks or cracking.
- Significant Damage: If the granule loss is severe and widespread, you may need to start budgeting for a premature roof replacement.
- Active Leaks: If the pressure washing created immediate leaks by breaking seals or cracking tiles, you will need to schedule roof repairs right away to prevent water damage to your home’s interior.
Ignoring the problem will not make it go away. An exposed asphalt shingle is a ticking clock. If you have any concerns, it is best to contact us for an honest and thorough evaluation.
Prevention: The Best Long-Term Strategy
While cleaning a dirty roof is sometimes necessary, the best approach is to prevent the algae from taking hold in the first place.
- Trim Overhanging Trees: Algae thrives in shady, damp areas. Trimming back tree branches allows more sunlight to reach your roof, which helps it dry out faster and naturally inhibits algae growth.
- Keep Gutters Clean: Clogged gutters create a damp environment along the roof edge, which is often where algae problems begin.
- Install Zinc or Copper Strips: Installing strips of zinc or copper along the ridge of the roof can provide long-term algae prevention. As rain washes over the metal, it releases ions that are toxic to algae, preventing it from growing down the slope of the roof.
- Choose Algae-Resistant Shingles: When it comes time to replace your roof, ask your contractor about algae-resistant (AR) shingles. These are shingles manufactured with copper-infused granules that provide built-in, long-term protection against ugly black streaks.
Conclusion: Clean Smarter, Not Harder
The desire to maintain your home’s appearance is understandable, but when it comes to your roof, the “quick and powerful” solution of pressure washing is a trap. It is an aggressive method that causes hidden, cumulative damage, stripping years from the life of your roof and voiding the very warranty meant to protect it.
Remember these key takeaways:
- Pressure washing causes irreversible damage by stripping the protective granules from asphalt shingles and breaking tiles.
- The black streaks on your roof are living algae, which requires a targeted chemical treatment, not just brute force, to remove effectively.
- Soft washing is the industry-approved method that cleans your roof safely and provides longer-lasting results.
- DIY roof cleaning is risky. For safety and effectiveness, always hire a licensed and insured professional.
Your roof is a significant investment. Protecting that investment means using the right maintenance techniques. Don’t sacrifice the long-term health of your roof for the short-term satisfaction of a power spray. If your roof is showing signs of algae growth, choose the smart, safe, and effective solution.
If you are concerned about the appearance of your roof or suspect that improper cleaning has caused damage, reach out to the experts. We can provide a comprehensive inspection and recommend the right course of action, whether it’s a professional soft wash, a targeted roof repair, or planning for a future replacement.
Introduction: Your Roof’s Battle Against the Florida Climate
A new roof is one of the most significant investments you will make in your home. It provides security, enhances curb appeal, and protects everything you own from the elements. In Central Florida, however, a roof’s job is exceptionally challenging. It endures a relentless barrage of intense UV radiation, torrential downpours, high humidity, and the ever-present threat of hurricane-force winds.
The manufacturer’s warranty might say your roof should last 20, 30, or even 50 years, but that number is not a guarantee—it’s a best-case scenario. The actual lifespan of your roof is determined by a combination of material quality, installation expertise, and, most importantly, proactive maintenance. Simply installing a roof and forgetting about it is a recipe for premature failure.
Many homeowners feel helpless against the forces of nature, but you have more control than you think. By understanding the specific threats your roof faces in Central Florida and taking strategic, preventative steps, you can significantly extend its service life. This means pushing a costly replacement further into the future, saving you tens of thousands of dollars.
This guide will provide actionable strategies specifically for Central Florida homeowners. We will cover everything from routine maintenance to strategic landscaping and material-specific care, giving you the power to maximize the lifespan of your roof.
Understanding the Enemies of Your Central Florida Roof
Before you can fight back, you must know your enemy. A roof in Orlando, Kissimmee, or Apopka faces a different set of challenges than a roof in a milder, drier climate.
Enemy #1: The Sun (UV Radiation and Heat)
The “Sunshine State” nickname is well-earned, but that constant sun is your roof’s primary adversary.
- UV Degradation: Ultraviolet rays break down the chemical bonds in roofing materials. For asphalt shingles, this means drying out the oils, making the shingles brittle and prone to cracking.
- Thermal Shock: Your roof can heat up to over 150°F during a summer day. When a classic Florida thunderstorm rolls in, the temperature can drop by 50 degrees in minutes. This rapid expansion and contraction cycle, known as thermal shock, causes materials to warp, crack, and pull apart at the seams.
Enemy #2: Water (Rain and Humidity)
Florida is one of the wettest states in the country. This constant moisture attacks your roof in multiple ways.
- Driving Rain: Our storms don’t just drizzle; they come with high winds that drive water sideways. This tests every seal, nail hole, and piece of flashing on your roof.
- Humidity: The high ambient humidity slows the drying process. A roof that stays damp is a roof that will rot. It creates the perfect environment for biological growth.
Enemy #3: Biological Growth (Algae, Moss, and Fungus)
The combination of heat and humidity makes Central Florida a petri dish for organisms that feed on your roof.
- Gloeocapsa Magma: Those ugly black streaks on your roof are a type of blue-green algae. While mostly cosmetic, it feeds on the limestone filler in asphalt shingles, slowly deteriorating them.
- Moss and Lichen: These organisms are more destructive. They have root-like structures that anchor into shingles, lifting them and trapping moisture against the surface, which accelerates rot.
Enemy #4: Wind and Debris
From afternoon thunderstorms to full-blown hurricanes, wind is a constant threat.
- Wind Uplift: Wind flowing over a roof creates negative pressure, or suction, which can lift shingles and peel them back.
- Projectile Debris: High winds turn loose branches, pinecones, and outdoor furniture into projectiles that can puncture or bruise your roofing material.
By understanding these four enemies, you can tailor your maintenance strategy to counter their specific effects.
The Foundation of Longevity: Proactive Maintenance
The single most effective way to extend your roof’s life is through a consistent maintenance schedule. Catching small problems early prevents them from escalating into system-wide failures.
The Bi-Annual Inspection Rule
In Florida, your roof should be professionally inspected at least once a year, but twice is ideal:
- Spring (Pre-Hurricane Season): In April or May, an inspection ensures your roof is “battened down” and ready for storm season. This is the time to fix any loose shingles or failing seals.
- Fall (Post-Hurricane Season): In November or December, an inspection assesses any damage sustained during the summer and fall storms.
Your DIY Inspection Checklist (From the Ground)
You can and should monitor your roof’s health between professional visits. Use a pair of binoculars to safely check from the ground.
- Shingles: Look for any shingles that are missing, cracked, or have curled edges.
- Flashing: Check the metal strips around chimneys, vents, and skylights. Do they look rusted or are they pulling away from the structure?
- Valleys: Look for accumulations of leaves and debris in the valleys where roof planes meet.
- Stains: Are there dark streaks (algae) or patches of green (moss)?
If you spot any of these issues, it is a sign that you need a professional to take a closer look. A small, inexpensive fix now can prevent a major, costly problem later. You can learn more about what these issues entail on our roof repairs page.
The Critical Role of Clean Gutters
We cannot overstate this: Clogged gutters are a primary cause of premature roof failure. When gutters are blocked, water backs up against the roof edge.
- The Damage: This standing water rots the wooden fascia board, the soffits, and, most critically, the plywood roof decking. Rotted decking cannot hold nails, leading to shingle loss and structural instability.
- The Schedule: In Central Florida, with its heavy foliage and rainfall, you should clean your gutters at least twice a year, and potentially every three months if you have large oak or pine trees nearby.
Strategic Landscaping: Creating a “Safe Zone” Around Your Roof
Your beautiful Central Florida landscaping can be a hidden threat to your roof. Smart tree management is a key part of roof preservation.
The 10-Foot Rule
Trim any tree branches so that they are at least 10 feet away from your roofline.
- Prevents Abrasion: Branches that touch the roof act like sandpaper in the wind, scraping off the protective granules from asphalt shingles.
- Eliminates Pest Highways: Branches provide a bridge for squirrels, raccoons, and ants to get onto your roof, where they can chew through vents or nest in your attic.
- Reduces Debris Load: Fewer overhanging branches mean fewer leaves and twigs falling directly onto your roof and into your gutters.
Remove Dangerous Trees
Assess the health of large trees on your property, especially tall pines or old oaks. If a tree is diseased, dying, or has a significant lean toward your house, it’s a disaster waiting to happen in the next major storm. It may be worth the cost to have it professionally removed.
Ventilation: The Secret to a Cooler, Drier Roof
One of the most overlooked aspects of roof longevity is what happens underneath it: attic ventilation. A poorly ventilated attic becomes a pressure cooker in the summer, dramatically shortening your roof’s life.
How a Hot Attic Destroys Your Roof
In the summer, an unventilated attic can reach temperatures of 150-160°F. This superheats the roof deck from below.
- Bakes Shingles: This constant, intense heat cooks the asphalt shingles from the underside, accelerating their aging process and making them brittle.
- Causes Ice Dams (in theory): While less common in Florida, the principle applies. In winter, heat escaping into the attic can create temperature differentials on the roof surface, leading to condensation issues.
- Voids Warranties: Most shingle manufacturers’ warranties are void if the attic does not have proper ventilation according to building codes.
The Balanced Ventilation System
Proper ventilation requires a balanced system of intake and exhaust.
- Intake Vents: These are located at the lowest part of the roof, typically in the soffits (the underside of the eaves). They allow cool, fresh air to enter the attic.
- Exhaust Vents: These are located at the highest point of the roof (e.g., ridge vents, box vents, or turbine vents). They allow hot, moist air to escape.
Action Step: Check your soffit vents from the outside. Are they painted over or blocked by dirt? Go into your attic. Is insulation blocking the vents from the inside? Ensuring your intake vents are clear is a simple but powerful step. If you suspect your home is under-ventilated, contact us for an assessment. Adding proper ventilation is often a straightforward and highly effective upgrade.
Material-Specific Tips for a Longer Life
How you care for your roof depends heavily on what it’s made of. Central Florida homes feature a variety of materials, each with its own maintenance needs.
Asphalt Shingle Roofs
- Combat Algae: Address black streaks with a professional soft wash using a specialized, low-pressure chemical solution. Do NOT let anyone pressure wash your shingles, as it will strip the granules and void the warranty.
- Mind Your Footsteps: Avoid walking on your shingle roof, especially on hot days when the asphalt is soft and susceptible to scuffing and granule loss.
- Replace Damaged Shingles Immediately: If a storm blows off a few shingles, get them replaced right away. The exposed underlayment is not designed to withstand direct sunlight and will degrade quickly.
Metal Roofs
- Check the Fasteners: Metal roofs are held down by thousands of screws, each with a rubber washer. The Florida sun degrades these washers over time, causing them to crack and allowing leaks. A periodic check to tighten loose screws and replace failing washers is critical.
- Prevent Scratching: Metal roofs are durable, but their protective coating can be scratched. Avoid walking on the roof with hard-soled shoes and be careful not to drag ladders or tools across the panels. A scratch that exposes the bare metal can become a rust spot.
- Keep it Clean: While metal is resistant to biological growth, a layer of dirt and leaves can trap moisture against the surface, potentially leading to corrosion over time, especially on cut edges or near fasteners.
Tile Roofs (Clay and Concrete)
- The Biggest Threat is Foot Traffic: Tiles are strong but brittle. Walking on them incorrectly will crack them. Never allow an inexperienced person (like a satellite dish installer or pressure washer) on your tile roof. A roofer knows to walk on the lower, overlapping part of the tile where it is supported by the tile below.
- Monitor for Slipped or Cracked Tiles: From the ground, look for tiles that appear out of alignment or have visible cracks. One cracked tile can let in a surprising amount of water.
- Focus on the Underlayment: The tiles themselves can last 50+ years, but the underlayment beneath them is what actually waterproofs the roof. A professional inspection for a tile roof focuses on the health of this hidden layer, especially around flashing points. A high-quality installation, like those you can see in our gallery, ensures this critical layer is done right from the start.
The Financial Argument for Proactive Care
Investing time and a small amount of money in maintenance can feel like a chore. However, the return on that investment is enormous when you consider the cost of neglect.
Let’s assume a standard asphalt shingle roof replacement costs $15,000 and has a predicted lifespan of 20 years.
- Without Maintenance: Due to the harsh Florida climate, that lifespan could be reduced to just 12-15 years.
- With Maintenance: By following the steps in this guide, you could extend that lifespan to 22-25 years.
The difference between replacing your roof in 12 years versus 22 years is a decade of not having to write a five-figure check. The few hundred dollars spent on annual inspections and gutter cleaning pales in comparison to the thousands saved by delaying a full replacement. Furthermore, a well-maintained roof adds to your home’s value and can even lower your homeowner’s insurance premiums.
When to Repair vs. When to Replace
Part of extending your roof’s life is knowing when a simple repair is sufficient and when it’s time to stop sinking money into an aging system.
- Repair It: If the damage is localized (e.g., a few missing shingles, a leak around a single pipe boot) and the rest of the roof is in good condition, a targeted repair is the smart choice. This is where an honest contractor like HW Roof can save you money by not pushing for a replacement you don’t need.
- Replace It: If your roof is more than 15-20 years old (for asphalt), showing widespread issues like curling, cracking, or severe granule loss, or has multiple active leaks, a replacement is likely the more cost-effective solution in the long run. Constantly paying for patch-up roof repairs on a failing system is known as “throwing good money after bad.”
Conclusion: Take Control of Your Roof’s Destiny
Your roof is not a passive element of your home; it’s an active system that requires your attention. In the challenging climate of Central Florida, a “set it and forget it” approach is a costly mistake. By embracing a proactive mindset, you can fight back against the sun, rain, and wind, adding years of service life to your roof.
To summarize the key strategies:
- Inspect Regularly: Perform bi-annual checks (both DIY from the ground and professional).
- Keep It Clean: Ensure gutters are clear and the roof surface is free of debris.
- Manage Your Landscape: Maintain a 10-foot “safe zone” around your roof.
- Ensure Proper Ventilation: A cool, dry attic is essential for a long-lasting roof.
- Act Quickly: Address small problems immediately before they become large, expensive ones.
Protecting your roof is protecting your home’s value and your family’s safety. If it has been more than a year since your last professional inspection, or if you’ve noticed any of the warning signs discussed here, don’t wait for a small issue to become a major headache.
Take the first step today. Contact us to schedule a comprehensive roof health assessment. Let our experts help you create a plan to ensure your roof serves you well for many years to come.
Introduction: The Unsung Hero of Your Home’s Defense
When you look at your home, your eyes probably go to the architectural details, the landscaping, or the color of the siding. You might glance at the roof to ensure the shingles look intact. But there is a narrow, metal channel running along the edge of your roofline that rarely gets the appreciation it deserves—until it fails.
Your gutters are the unsung heroes of your home’s exterior. They have one simple but critical job: to capture the thousands of gallons of water that fall on your roof during a storm and divert it safely away from your home’s structure. When they work, you don’t notice them. When they stop working, the consequences can be catastrophic.
Many homeowners view gutter cleaning as a tedious, low-priority chore. It sits on the bottom of the “to-do” list, pushed back weekend after weekend. However, ignoring this task is not just a matter of curb appeal or a minor annoyance. A clogged gutter is a ticking time bomb for your roof system.
The relationship between your gutters and your roof is symbiotic. When gutters get clogged with leaves, twigs, and debris, they stop being a drainage system and start becoming a water retention system. This creates a mechanism for destruction that attacks your roof from the edge inward.
In this comprehensive guide, we will explore exactly how neglected gutters lead to major roof damage. We will break down the mechanics of the damage, identify the warning signs, and explain why a clean gutter is the cheapest insurance policy you can buy for your roof.
The Mechanics of the Roof-Gutter Relationship
To understand why cleaning is vital, we first need to understand the engineering behind your roof’s edge. Your roof is designed to shed water. Gravity pulls rain down the slope of the shingles, over the drip edge, and into the gutter trough.
The Water Management System
Think of your roof and gutters as a single, integrated water management system.
- The Catchment Area: Your roof surface collects the water.
- The Transport: The pitch of the roof moves the water to the edge.
- The Collection: The gutters catch the high-velocity water.
- The Diversion: The downspouts move the water away from the foundation.
When this system flows smoothly, your home remains dry. But when you introduce a blockage—a pile of wet leaves, pine needles, or even a tennis ball—you disrupt the flow. Water, being fluid, will always find the path of least resistance. When the forward path (down the drain) is blocked, the water must go somewhere else. Unfortunately, “somewhere else” is often inside your roof structure.
The “Back-Up” Phenomenon: How Debris Destroys
The primary mechanism of damage caused by clogged gutters is water backup. This isn’t just about water spilling over the front of the gutter (the “waterfall” effect). The real danger is when water fills the gutter and backs up behind the gutter, toward the house.
Fascia Board Rot
The gutter is attached to a board that runs along the lower edge of the roof, known as the fascia. This board carries the weight of the gutter system. When gutters are clogged, they fill with water. Water is heavy—a gallon weighs over 8 pounds. A gutter filled with water and wet sludge can weigh hundreds of pounds.
As the water rises in a clogged gutter, it touches the fascia board. Most fascia is made of wood. Even painted or treated wood cannot withstand constant submersion. Over time, the water wicks into the wood, causing it to soften and rot.
Once the fascia board rots, the screws or spikes holding the gutter in place lose their grip. The gutter begins to pull away from the house, creating a gap where even more water can enter. If you need to see examples of what healthy roof edges look like compared to damaged ones, you can view our gallery for reference.
The Soffit Invasion
Directly underneath the roof overhang is the soffit—the vented material that allows your attic to breathe. When water spills over the back of a clogged gutter, it runs down the fascia and wraps underneath into the soffit.
Soffits are often made of vinyl, aluminum, or wood. They are not designed to be waterproof; they are designed for airflow. Water entering the soffit can travel horizontally, reaching the interior walls of your home or saturating the insulation in your attic. Wet insulation loses its R-value (thermal resistance) and becomes a breeding ground for mold, but the structural damage to the rafter tails (the ends of the roof trusses) is the more expensive issue to fix.
Damage to the Roof Deck and Shingles
While fascia and soffit damage are bad, the damage can migrate upward, affecting the roof itself. This is where the costs of neglect truly skyrocket.
Capillary Action and Shingle Saturation
When debris piles up in a gutter, it can stack high enough to touch the edge of the roof shingles. This creates a bridge. Wet leaves act like a wick, using capillary action to draw moisture up underneath the bottom edge of the shingles and the underlayment.
Roofing materials are designed to shed water running down them, not to resist water sitting against or under them. Constant moisture contact degrades the asphalt and the adhesive strips on shingles. It causes the plywood decking beneath the shingles to swell and delaminate.
Once the decking begins to rot, you no longer have a solid surface to hold nails. The structural integrity of the roof edge is compromised. In severe cases, you may step on the edge of the roof, and your foot could go right through. This type of structural rot requires invasive and expensive roof repairs that involve tearing up sections of the roof to replace the plywood.
The Winter Threat: Ice Dams (For Cooler Climates)
While Florida homeowners worry more about rain volume, if you live in an area that sees freezing temperatures, clogged gutters are the primary cause of ice dams.
- Snow melts on the warm upper roof.
- The water runs down to the cold eaves.
- If the gutter is clogged, the water pools and freezes.
- This wall of ice grows, forcing subsequent meltwater to back up under the shingles.
- This trapped water leaks directly into the attic and down interior walls.
Even in warmer climates, a “debris dam” acts similarly to an ice dam, trapping pools of water that eventually seep through nail holes and seams.
The Biological Threat: Algae, Moss, and Pests
A clogged gutter is essentially a linear swamp running along the perimeter of your house. It provides the three things life needs to thrive: water, shelter, and organic food sources (leaves).
Accelerating Algae and Moss Growth
Have you ever seen dark streaks on a roof or patches of green moss? These organisms love moisture. When gutters are clogged, moisture doesn’t evaporate quickly from the roof edge. The humidity around the eaves remains high.
This microclimate encourages the growth of algae (Gloeocapsa magma) and moss. Moss is particularly destructive to asphalt shingles. Its root-like structures (rhizoids) anchor into the ceramic granules of the shingles. As the moss grows, it lifts the edges of the shingles, allowing wind-driven rain to blow underneath. It effectively pries your roof apart in slow motion.
A Condo for Pests
The “swamp” in your gutters attracts pests that can cause significant roof damage.
- Mosquitoes: Standing water is a breeding ground.
- Termites and Carpenter Ants: These insects are drawn to wet, rotting wood (your fascia and trusses). Once they establish a colony in the wet wood near the gutter, they can easily migrate into the main structure of your home.
- Rodents: Squirrels, rats, and raccoons are attracted to the easy water source and the nesting material. If they are spending time in your gutters, they will eventually try to chew through the wet, softened wood of the fascia or soffit to get into your warm attic.
Foundation and Landscape: The Ripple Effect
While this article focuses on the roof, it is crucial to remember that the roof is connected to the rest of the house. The damage from clogged gutters trickles down—literally.
When gutters overflow, the water dumps directly onto the ground next to your foundation. This hydraulic pressure can crack foundation walls and cause basements to flood. Furthermore, the splash-back of mud and water stains your siding and rots the lower trim of your home.
It is a cruel irony: you might spend thousands on a high-quality roof to protect your home, only to have the foundation undermined because the water that the roof successfully shed wasn’t carried away properly.
How to Identify Gutter-Related Roof Issues
You don’t always need a ladder to know your gutters are threatening your roof. Often, the signs are visible from the ground if you know where to look.
1. The “Tiger Stripe” Warning
Look at the exterior of your gutters. Do you see vertical, dirty stripes running down the face of the metal? These are often called “tiger stripes.” They indicate that the gutter is overflowing. Dirty water is spilling over the lip and running down the front, carrying dirt and pollutants. This is a clear sign the channel is blocked.
2. Sagging Gutters
Look at the roofline straight on. The gutter should be a straight line (with a very slight pitch toward the downspout). If you see the gutter dipping in the middle or pulling away from the house, the fascia board behind it may already be rotting, or the weight of the debris has warped the metal.
3. Granules in the Downspout Splash Block
If you see a pile of black grit at the bottom of your downspout, your roof is shedding granules. While this happens naturally over time, clogged gutters can accelerate this by keeping the shingles wet and encouraging moss growth which loosens granules. If you see excessive granule loss, it might be time to contact us for a roof health assessment.
4. Plants Growing in the Gutter
If you look up and see a small sapling or weeds poking out of the gutter, you have a serious problem. For a seed to germinate, there must be a significant layer of soil (decomposed leaves) and constant moisture. This means your gutter has been clogged for a long time, and the “compost” inside is deep enough to support life.
The Financial Reality: Cleaning vs. Repairing
Many homeowners hesitate to hire professionals for gutter cleaning because of the cost, which typically ranges from $150 to $300 depending on the house size. They view it as an optional expense.
However, let’s compare that to the cost of the damage caused by neglect.
- Fascia and Soffit Repair: Replacing rotted wood around the eaves can cost $20 to $50 per linear foot, easily totaling $1,000 – $3,000.
- Roof Leak Repair: Fixing a leak caused by water backup involves tearing off shingles, replacing underlayment, and potentially replacing plywood decking. As detailed in our guide on roof repairs, this is labor-intensive work that can cost $500 to over $1,500 for a localized area.
- Full Roof Replacement: If the damage is systemic along the edges, or if moisture has ruined the lifespan of the shingles, you could be looking at a full replacement years earlier than expected, costing $10,000 to $30,000+.
When viewed through this lens, regular gutter cleaning is not an expense; it is a massive savings strategy. It is maintenance that protects your capital investment.
Best Practices for Gutter Maintenance
So, how do you prevent these disasters? The answer is a consistent, proactive maintenance schedule.
Frequency of Cleaning
How often you clean depends on your environment:
- The Standard: Twice a year. Once in the late spring (to clear seeds, blossoms, and pollen pods) and once in the late fall (after the leaves have dropped).
- The Pine Tree Factor: If you have pine trees near your home, you need to clean every 3 months. Pine needles shed year-round and are notorious for matting together to form dense, waterproof plugs in gutters.
- The Storm Factor: After any major storm or hurricane, check the gutters. Wind can strip leaves from trees half a mile away and deposit them on your roof.
The Cleaning Process
If you choose to do this yourself, safety is paramount.
- Ladder Safety: Use a sturdy ladder on firm, level ground. Never rest the ladder on the gutter itself if possible (use a stabilizer bar), as the weight can crush the metal.
- The Scoop: Use a small garden trowel or a specialized gutter scoop to remove the heavy debris. Wear gloves—gutter muck often contains sharp twigs, metal shards, or insects.
- The Flush: Once the solids are removed, use a garden hose to flush the gutter. This washes away the fine silt and shingle granules.
- The Downspout Check: Watch the water coming out of the downspout. If the gutter is full of water but the downspout is only trickling, you have a clog in the pipe. You may need a plumber’s snake or a pressure washer attachment to clear it.
Gutter Guards: Are They Worth It?
Many homeowners ask if installing gutter guards eliminates the need for cleaning. The answer is: mostly, but not entirely.
- Pros: High-quality guards keep out large leaves and debris, significantly reducing cleaning frequency.
- Cons: No system is perfect. Fine mesh can get clogged with pollen or algae. Pine needles can sometimes poke through. Cheap plastic covers can warp in the sun.
Even with guards, you should inspect your gutters annually to ensure water is flowing correctly.
When to Call a Professional
While gutter cleaning can be a DIY project, there are times when calling a professional is the smarter, safer choice.
Steep Pitch or Multi-Story Homes
If you have a two-story home or a roof with a steep pitch, the risk of falling increases dramatically. Professionals have the safety harnesses, stabilizers, and insurance to do the job without risking injury.
Discovery of Damage
If you are cleaning your gutters and you notice soft wood, rusted flashing, or shingles that look damaged, stop. Do not try to fix structural rot with a patch of caulk. This is the time to call a roofing expert.
At HW Roof, we often uncover these issues during routine maintenance. Because we understand the entire roofing system, we can identify whether a fascia issue is just a fascia issue, or if it’s a symptom of a larger roof leak.
The Role of Professional Roof Inspections
Cleaning gutters is the perfect time to assess the overall health of your roof. However, an untrained eye might miss the subtle signs of trouble. This is why we recommend pairing your seasonal maintenance with a professional roof inspection.
During an inspection, a roofer will check:
- The Drip Edge: Is the metal flashing properly tucked under the shingles and over the gutter? If this was installed incorrectly, water will run behind the gutter regardless of whether it is clean or not.
- Gutter Pitch: Gutters need to be sloped slightly toward the downspout (about 1/4 inch for every 10 feet). If the house has settled or the hardware has loosened, the pitch might be flat or reversed, causing water to pool even in a clean gutter.
- Fastener Security: Are the spikes or hangers pulling out of the wood? This is an early warning sign of fascia rot.
If you are unsure about the state of your roof’s drainage system, or if it has been years since your last inspection, visit our contact page to schedule an assessment.
Conclusion: Respect the Flow
Water is the most powerful force of nature your home faces. It is persistent, patient, and destructive. Your roof and gutters are designed to work in harmony to control this force. When you neglect your gutters, you break that harmony, leaving your home vulnerable to rot, mold, and structural failure.
Don’t let a pile of wet leaves be the reason you need a new roof. Make gutter cleaning a non-negotiable part of your home maintenance routine. Whether you grab the ladder yourself or hire a service, the goal is the same: keep the water moving.
If you suspect that clogged gutters have already caused damage to your home—perhaps you see water stains on your soffits or your gutters are pulling away from the house—don’t wait. The damage will not fix itself; it will only spread.
Visit HW Roof today to learn more about how we protect homes from the top down. Your roof protects your family; make sure you’re doing your part to protect your roof.
Introduction: Protecting Your Home in the Indoor Foliage Capital
Apopka is a unique place to call home. From the lush greenery that earns us the title of the “Indoor Foliage Capital of the World” to the warm community feel, living here has distinct perks. But for homeowners, our local environment also presents distinct challenges. The same climate that allows our nurseries to thrive—intense sun, high humidity, and frequent afternoon downpours—wreaks havoc on our roofs.
Owning a home in Central Florida isn’t just about enjoying the sunshine; it’s about managing the wear and tear that comes with it. Your roof is the shield that protects your family and your investment from these elements. Yet, many homeowners fall into the trap of “out of sight, out of mind.” They only think about their roof when a brown stain appears on the ceiling or a shingle lands on the driveway.
A reactive approach to roofing is expensive. Waiting for a leak to spring usually means you are paying for emergency repairs, potential water damage restoration, and the stress of an urgent fix. The alternative? A proactive roof maintenance schedule tailored specifically for the Apopka climate.
In this comprehensive guide, we will outline the ultimate maintenance calendar for Apopka homeowners. We will break down exactly what you should be doing each season, why our local weather matters, and how simple steps today can save you thousands of dollars tomorrow.
Why Apopka’s Climate Demands a Specific Schedule
You might wonder why a general maintenance guide isn’t enough. Why focus specifically on Apopka? The answer lies in our microclimate and local flora.
The Tree Factor
Apopka is incredibly green. Many properties here are surrounded by majestic oaks, tall pines, and lush landscaping. While beautiful, these trees are a roof’s natural enemy. Falling leaves, pine needles, and Spanish moss accumulate rapidly on roofs here, trapping moisture and rotting shingles faster than in less wooded areas.
The Heat and Humidity Cycle
Our summers are brutal. Roof surface temperatures can soar well above 150 degrees Fahrenheit. This heat bakes asphalt shingles, causing them to lose flexibility. When the inevitable afternoon thunderstorm rolls in, the rapid cooling causes thermal shock—expansion and contraction that can crack tiles and loosen flashing.
The Storm Season threat
We are not on the coast, but Apopka is certainly not immune to tropical weather. Hurricanes and tropical storms often maintain significant strength as they move inland, bringing wind gusts that can lift older roofs and driving rain that tests every seal on your home.
Understanding these local factors is crucial because it dictates when you perform maintenance. A schedule that works for a home in arid Arizona or snowy Michigan simply won’t work here.
The Annual Maintenance Calendar: A Season-by-Season Guide
To keep your roof in peak condition, we recommend breaking your maintenance down by season. This makes the workload manageable and addresses specific seasonal threats before they arrive.
Spring (March – May): The Pre-Hurricane Prep
Spring is arguably the most critical time for roof maintenance in Apopka. The winter dry season is ending, and the Atlantic hurricane season (starting June 1st) is looming.
1. Clear the Winter Debris
During the cooler months, deciduous trees drop their leaves and pines shed needles. By March, your valleys and gutters are likely full.
- Action: Clean all debris from the roof surface. Pay special attention to the “valleys” where roof planes meet, as debris accumulation here acts like a dam, forcing water under the shingles.
- Why: Wet leaves sitting on asphalt shingles encourage algae growth and rot. On metal roofs, trapped wet debris can accelerate rust.
2. Inspect for Animal Intrusion
Winter is when squirrels, raccoons, and rats look for warm places to nest. They often chew through soffits or fascia boards to get into attics.
- Action: Walk the perimeter of your home looking for chewed holes or loose vents. Check the attic for signs of nesting materials or light peeking through where it shouldn’t.
- Tip: If you find damage, you may need professional roof repairs to seal these entry points securely so pests can’t return.
3. Check Gutter Attachment
April showers bring May flowers, but in Florida, they bring heavy deluges. Your gutters need to be secure.
- Action: Check that gutter spikes or brackets are tight against the fascia. If you can wiggle the gutter, it won’t hold the weight of water during a heavy storm.
4. Professional Inspection
If you only get a professional inspection once a year, do it in April or May.
- Action: Hire a local roofer to check for loose shingles, cracked tiles, or failing sealant. You want your roof certified “wind ready” before June.
Summer (June – August): Vigilance During Storm Season
Summer in Apopka is hot and wet. This is not the time for major DIY projects on the roof due to safety concerns (heat exhaustion and slippery surfaces), but it is a time for vigilance.
1. Monitoring After Storms
You don’t need to climb up after every thunderstorm, but you should do a ground-level check.
- Action: After a severe storm, walk around your property. Look for shingles on the ground. Use binoculars to look for lifted tabs or missing pieces.
- Why: Wind damage is cumulative. One missing shingle might not leak immediately, but it exposes the underlayment to the sun, which will degrade it quickly.
2. Interior Ceiling Checks
Sometimes the first sign of a summer roof problem is inside, not outside.
- Action: Once a month, scan your ceilings and the top corners of your walls for discoloration. Look for faint yellow rings or bubbling paint.
- Tip: If you see a stain, don’t paint over it! It indicates an active leak. Contact us immediately to trace the source before mold sets in.
3. Manage Overhanging Branches
Trees grow fast in the summer rain. Branches that were safe in spring might be touching your roof by July.
- Action: Trim back any branches that are within 6 feet of your roof.
- Why: In high winds, branches act like whips, stripping the granules off your shingles or cracking tiles. They also provide a bridge for rodents to access your roof.
Autumn (September – November): Recovery and Protection
As hurricane season winds down (officially ending November 30th), the focus shifts to repairing any summer damage and preparing for the drier, cooler winter.
1. Clear the Gutters (Again)
Yes, gutter cleaning is a recurring theme. In Apopka, it’s a never-ending battle.
- Action: Ensure gutters and downspouts are flowing freely. Clogged gutters can cause water to back up under the eaves, rotting the wood fascia and soffits.
2. Moss and Algae Treatment
The humidity of summer often leaves roofs looking green or black with algae streaks (Gloeocapsa Magma).
- Action: If you notice significant discoloration, autumn is a good time for a soft wash.
- Warning: Do NOT pressure wash your roof. High pressure strips the protective granules from asphalt shingles and can force water under tiles. Use a specialized chemical soft wash or hire a professional who knows how to clean without damaging the material.
3. Check Flashing and Seals
The summer heat causes thermal expansion, which can cause the caulk around vents and chimneys to crack or pull away.
- Action: Inspect the “boots” around plumbing vents. These rubber gaskets typically last 7-10 years. If they are cracked or rotting, replace them now. Check the metal flashing around the chimney for rust or separation.
Winter (December – February): The Inspection Window
Winters in Apopka are mild and often dry, making it the safest and most comfortable time to do thorough inspections or larger repairs.
1. Attic Inspection
Cooler weather makes it bearable to go into your attic.
- Action: Go into the attic on a sunny day and turn off the lights. Look for “pinholes” of light coming through the roof deck. Also, check the insulation for matted or dark spots, which indicate past leaks.
- Why: Ventilation is key. Check that your soffit vents are not blocked by insulation. Good airflow keeps your roof cooler in summer and prevents moisture buildup in winter.
2. Structural Review
- Action: Look at the roof line from the street. Does it look straight? Any sagging? Sagging ridges or dips in the plane can indicate structural issues with the decking or trusses.
The “Must-Do” Checklist for Every Homeowner
Regardless of the season, there are specific components of your roof system that require regular attention. Ignoring these is the leading cause of premature roof failure in Apopka.
1. Gutters and Downspouts
We cannot stress this enough. Water is the enemy. The job of your roof is to move water away from your home. If the gutters are clogged, the water stays.
- The Danger: When gutters overflow, water pours down the side of your house, potentially damaging the foundation. Worse, the weight of wet debris can rip the gutters off the fascia board.
2. Plumbing Vent Boots
These are the unsung heroes of your roof. Every house has pipes sticking out of the roof to vent the plumbing system. They are sealed with a rubber boot.
- The Reality: In Florida sun, rubber dries out. We frequently see roofs where the shingles are in great shape, but the boots are completely rotted away, allowing water to pour directly into the bathroom walls.
- The Fix: These are inexpensive to replace and should be considered a wear-and-tear item, not a “repair.”
3. Skylights
Skylights are beautiful, but they are basically holes cut in your roof. They rely on complex flashing and seals to keep water out.
- The Maintenance: Keep the area around skylights clear of leaves. Debris traps moisture against the flashing, causing corrosion. Check the glass/plastic for cracks after hailstorms.
DIY vs. Professional Maintenance: Knowing Your Limits
We admire the DIY spirit of Apopka homeowners. However, roofing is dangerous work. Falls from roofs are a leading cause of injury. Knowing when to call a pro is part of a smart maintenance schedule.
What You Can Do Safely
- Binocular Inspections: You can spot a lot of trouble from the ground with a good pair of binoculars.
- Internal Checks: Checking your attic and ceilings is safe and vital.
- Gutter Cleaning (Low level): If you have a single-story home and a stable ladder, cleaning gutters is manageable. Always use a stabilizer bar to prevent damaging the gutter lip.
When to Call the Pros
- Steep Slopes: If your roof has a steep pitch, do not walk on it.
- Tile Roofs: Clay and concrete tiles are brittle. Walking on them incorrectly will crack them, creating leaks where there were none. Professionals know exactly where to step to distribute weight.
- Detailed Repairs: Replacing shingles, re-flashing a chimney, or fixing a valley requires technical knowledge to ensure the water-shedding capability remains intact.
- Leak Tracing: Water travels. The spot where the water drips on your ceiling is rarely directly below the hole in the roof. Professionals have the experience to trace the path of water back to the source.
If you are unsure about the condition of your roof, or if you see something that concerns you, visit our gallery to see examples of what well-maintained roofs and high-quality repairs look like. Seeing the standard can help you judge the state of your own home.
The Cost-Benefit Analysis of Regular Maintenance
Many homeowners hesitate to spend money on maintenance, viewing it as an optional expense. Let’s break down the financial reality.
The Cost of Neglect
An average asphalt shingle roof in Florida lasts 15-20 years. However, without maintenance, that lifespan can drop to 10-12 years.
- Premature Replacement: Replacing a roof is a major capital expenditure, costing anywhere from $10,000 to $30,000+ depending on size and material. Losing 5 years of roof life costs you thousands of dollars in value.
- Interior Damage: A small leak left unchecked for six months can rot truss chords, ruin drywall, destroy insulation, and damage flooring. A $300 maintenance repair can prevent $5,000 in interior damage.
The Value of Maintenance
Regular inspections and minor repairs (like resealing flashing or replacing a few shingles) cost a fraction of a full replacement.
- Extended Lifespan: A well-maintained roof can last up to 25 years or more.
- Insurance Claims: If a hurricane damages your roof, the insurance adjuster will look for signs of pre-existing damage. If they find that the damage was due to “wear and tear” or neglect (like a rotted deck from an old leak), they may deny your claim. Documented maintenance proves you did your part.
Specific Advice for Different Material Types
Apopka homes feature a variety of roofing styles. Your material dictates your schedule.
Asphalt Shingles
- Frequency: High.
- Focus: Granule loss. As shingles age, they lose the ceramic granules that protect the asphalt from UV rays. If you find piles of granules in your gutters, your roof is nearing the end of its life. Watch for curling tabs and cracking.
Metal Roofs
- Frequency: Medium.
- Focus: Fasteners. Metal expands and contracts significantly. Over time, this movement can back the screws out or degrade the rubber washers. Check for loose screws and tighten them. Look for rust on cut edges.
Tile Roofs (Clay/Concrete)
- Frequency: Low (for the material), High (for the system).
- Focus: Cracks and debris. The tiles themselves last for decades, but they can slide or crack. The biggest issue is often debris accumulating in the valleys, which forces water sideways under the tiles. Cleaning valleys on tile roofs is essential but difficult—usually a job for HW Roof.
Flat Roofs (Modified Bitumen/TPO)
- Frequency: High.
- Focus: Pooling water. Flat roofs (often on lanais or porches) must drain properly. If water sits on the roof for more than 48 hours (ponding), it will break down the material. Check seams carefully, as this is where leaks usually start.
How HW Roof Can Help Apopka Residents
At HW Roof, we understand the unique challenges of the Central Florida climate because we live and work here. We aren’t just storm chasers who show up after a hurricane; we are your neighbors dedicated to long-term home protection.
We offer comprehensive maintenance and inspection services designed to catch small problems before they become disasters. Whether you need a simple roof repair or a full assessment of your storm readiness, we are here to help.
Our Maintenance Process
When you hire us for a maintenance check, we perform a multi-point inspection:
- Debris Removal: We clear the roof surface and gutters to ensure proper drainage.
- Sealant Check: We inspect all caulk and sealants around penetrations and re-seal as needed.
- Fastener Review: We check for loose nails or screws.
- Surface Inspection: We look for bruised, cracked, or missing shingles/tiles.
- Report: We provide a clear, honest assessment of your roof’s remaining life.
Conclusion: A Small Investment for Peace of Mind
Your home is likely your biggest financial asset. Your roof is the only thing protecting that asset from the Apopka sun and storms. Adopting a proactive maintenance schedule isn’t just about checking boxes; it’s about preserving the safety and value of your home.
Don’t wait for the water to drip on your head. Take control of your home’s health today. Start with a simple visual inspection this weekend. If you see debris, clear it. If you see damage, act on it.
And if you’re not comfortable climbing a ladder—or if you want the assurance of a professional eye—we are ready to assist. You can browse our extensive resources on roof repairs to understand common issues we see in the area.
Ready to get your roof on a solid maintenance schedule? Contact us today to schedule an inspection. Let us help you ensure that your Apopka home stays dry, safe, and beautiful for years to come.
Introduction: The Reality of Roofing in the Sunshine State
Florida is famous for its beautiful weather, but for homeowners, living in paradise comes with a hidden cost. The same sun that draws tourists to our beaches is slowly baking the shingles on your roof. The sudden afternoon thunderstorms that cool off the pavement can drive water into the tiniest cracks in your flashing. And then, of course, there is hurricane season—a yearly six-month stretch where every homeowner holds their breath.
Your roof is your home’s first line of defense against these elements. Yet, most people don’t think about their roof until water is dripping onto their living room floor. By that time, the damage is done, and the repair bill is likely much higher than it needed to be.
So, the burning question for Florida residents is simple: how often should you actually get your roof inspected? Is once a year enough? Should you do it after every storm? Understanding the right schedule for roof inspections can save you thousands of dollars and extend the life of your roof significantly.
In this guide, we will break down the ideal inspection frequency for Florida homes, what inspectors look for, and how the unique Florida climate affects your roofing materials.
The Golden Rule of Florida Roof Inspections
If you are looking for a quick answer, here it is: You should have your roof professionally inspected at least once a year.
However, in Florida, “once a year” is the bare minimum. Many roofing experts recommend a bi-annual schedule—once in the spring before hurricane season begins, and once in the fall after the storm season has passed. This dual-inspection strategy ensures your roof is ready to handle high winds and heavy rains, and then verifies that it survived those conditions intact.
Why Florida is Different
If you lived in a mild climate with little rain and no extreme weather events, you might get away with inspecting your roof every two or three years. Florida is different. Our environment is hostile to building materials.
- UV Radiation: The intense UV rays break down the asphalt in shingles, making them brittle and prone to cracking.
- Thermal Shock: Roofs can reach temperatures of 150°F or higher during the day and cool rapidly during afternoon storms. This expansion and contraction cause materials to warp and separate.
- Humidity and Algae: The constant humidity encourages the growth of algae and mold, which can eat away at organic roofing materials.
- High Winds: Even tropical storms (not just hurricanes) bring wind speeds that can lift shingles and drive rain underneath protective layers.
Because of these factors, a small issue in January can become a major leak by July. Regular inspections catch these problems while they are still minor repairs rather than full replacements.
The Pre-Hurricane Season Inspection (April – May)
The most critical time to inspect your roof is right before the Atlantic hurricane season starts on June 1st. You want to know that your roof is solid before the winds start blowing.
What to Look For in the Spring
During a pre-season inspection, a professional will focus on “wind readiness.” They aren’t just looking for leaks; they are looking for loose components that could become projectiles or failure points during a storm.
- Loose Shingles: Any shingle that isn’t sealed down tight is a candidate for wind uplift. If the wind gets under one shingle, it can peel back a whole section of the roof like a zipper.
- Flashing Integrity: Metal flashing around chimneys, vents, and valleys prevents water intrusion. If this is rusted or pulling away, high winds will drive water right into the gap.
- Gutter Attachment: Heavy rains require functioning gutters. An inspector will ensure they are securely attached to the fascia so they don’t rip off under the weight of water and debris.
If you find issues during this inspection, you have time to schedule roof repairs before the busy season hits. Waiting until a storm is approaching often means you’ll be stuck on a long waiting list.
The Post-Hurricane Season Inspection (November – December)
Once hurricane season officially ends on November 30th, your roof deserves a check-up. Even if we didn’t have a direct hit from a major hurricane, months of daily thunderstorms and tropical depressions take a toll.
Assessing the Damage
The goal here is recovery and winter preparation (even if Florida winters are mild).
- Impact Damage: Falling branches or hail may have bruised your shingles. These bruises aren’t always visible from the ground but can lead to premature granule loss.
- Debris Accumulation: Leaves and pine needles trap moisture against the roof deck, leading to rot.
- Sealant Failure: The summer heat may have dried out the caulk around vents and pipes.
By catching these issues in November, you ensure your home stays dry during the winter dry season and is ready for the cycle to start again next spring.
DIY vs. Professional Inspections
Many homeowners wonder if they can just grab a ladder and check the roof themselves. While it is good to be aware of your home’s condition, a DIY inspection is rarely a substitute for a professional one.
The Limits of DIY
Walking on a roof is dangerous. It is also easy to cause damage if you don’t know where to step. Furthermore, an untrained eye often misses the subtle signs of trouble. You might see a missing shingle, but will you notice a hairline crack in the chimney flashing or a slight blistering on a modified bitumen flat roof?
What a Professional Sees
A professional roofer knows exactly where to look. They check the attic for signs of water intrusion that haven’t reached the ceiling yet. They check the soffits and fascia for rot. They assess the condition of the underlayment, not just the top layer of shingles.
If you are curious about what high-quality roofing work looks like, you can browse our gallery to see examples of pristine, well-maintained roofs. Seeing what a roof should look like can help you realize when yours isn’t measuring up.
Key Signs You Need an Immediate Inspection
While scheduling regular inspections is best, sometimes your house tells you it can’t wait. If you notice any of the following, you should contact us immediately, regardless of the time of year.
1. Granules in the Gutter
Asphalt shingles are covered in small ceramic granules that protect the asphalt from the sun. As shingles age, they lose these granules. If you clean your gutters and find a pile of what looks like black sand, your roof is shedding its protection. This is a sign that the shingles are nearing the end of their life.
2. Curling or Cupping Shingles
Shingles should lie flat. If the edges are curling upward (cupping) or the middles are coming up (clawing), the material is drying out and shrinking. These shingles become brittle and will crack easily when walked on or hit by debris.
3. Water Stains on Ceilings or Walls
This is the most obvious sign, but often the most ignored. A small brown circle on your ceiling isn’t just a cosmetic issue; it indicates water is pooling above your drywall. By the time you see the stain, the insulation above it is likely soaked, and mold may already be growing.
4. Sagging Roof Deck
If you look at your roof from the street and notice a depression or a “swayback” look, you have a serious structural issue. This could mean the decking is rotted or the foundation has shifted. This requires an immediate professional assessment.
5. Visible Light in the Attic
Go into your attic during a sunny day and turn off the lights. If you see pinpricks of sunlight coming through the roof boards, you have holes. And if light can get in, water definitely can.
How Roof Material Affects Inspection Frequency
Not all roofs in Florida are asphalt shingles. The material you have plays a role in how often you need an inspection.
Asphalt Shingle Roofs
Frequency: Every 6 to 12 months.
Asphalt is the most common material but also the most vulnerable to Florida’s heat. It degrades faster than metal or tile. Because individual shingles can lift or crack, they need frequent monitoring.
Metal Roofs
Frequency: Every 1 to 2 years.
Metal roofs are incredibly durable and resistant to wind. However, they aren’t maintenance-free. The screws that hold the panels down have rubber washers that can dry out and crack over time. An inspection will check for loose fasteners and rust spots.
Tile Roofs (Clay or Concrete)
Frequency: Every 1 to 2 years.
Tile roofs can last 50 years or more, but they are sensitive to foot traffic. The tiles can crack if walked on incorrectly. The underlayment beneath the tile is usually what fails first. An inspector will check for cracked tiles and debris buildup in the valleys that can cause water to back up.
Flat Roofs
Frequency: Every 6 months.
Flat roofs (often found on porches or commercial buildings) don’t shed water as quickly as pitched roofs. Water pooling is a major enemy here. They need to be checked frequently to ensure drains are clear and seams are sealed.
What Happens During a Professional Roof Inspection?
When you hire a professional team, like the experts at HW Roof, the process is thorough. We don’t just glance up and wave. We perform a systematic check of the entire roofing system.
Interior Inspection
We often start inside. We check the attic for:
- Proper ventilation (crucial for keeping the roof cool)
- Sagging decking
- Water stains or mold on the underside of the roof
- Insulation condition
Exterior Inspection
On the roof itself, we examine:
- The Roof Covering: Checking for missing, loose, or damaged shingles/tiles.
- Fasteners: Ensuring nails and screws are tight and not backing out.
- Flashing: Checking the metal strips around vents, chimneys, skylights, and valleys.
- Drip Edge: Ensuring water runs off the roof into the gutters, not down the fascia.
- Gutters and Downspouts: Checking for blockages and secure attachment.
The Report
After the inspection, you should receive a detailed report. If we find issues, we will explain whether they require a simple repair or if they indicate larger systemic problems. We believe in transparency, so you know exactly what you are paying for. You can learn more about our approach to roof repairs and how we handle common Florida roofing issues.
The Cost of Neglect vs. The Cost of Inspection
Some homeowners hesitate to schedule inspections because of the cost. However, compare the cost of an inspection to the cost of a premature roof replacement.
A typical roof replacement in Florida can cost anywhere from $10,000 to over $30,000 depending on the size and material. If regular maintenance can extend your roof’s life by 5 or 10 years, the savings are massive.
Furthermore, most insurance policies require you to maintain your home. If a storm damages your roof, but the insurance adjuster finds that the damage was exacerbated by years of neglect (like rotted wood or old leaks), they may deny your claim. A record of regular inspections proves you have been a responsible homeowner.
The Role of Warranties
If your roof is relatively new, you might think, “I have a 25-year warranty, so I don’t need inspections.” This is a dangerous misconception.
Most roofing warranties cover manufacturing defects. They do not cover normal wear and tear, storm damage, or lack of maintenance. In fact, many warranties have a clause stating that the warranty is void if you do not perform regular maintenance.
Think of it like a car warranty. If you never change the oil and the engine blows up, the manufacturer won’t replace it, even if the car is under warranty. Regular roof inspections are your “oil change.” They keep your warranty valid and your roof functioning.
Common Florida Roof Repair Scenarios
During inspections, we often find small issues that are easy to fix. Addressing these immediately prevents them from becoming nightmares.
Resealing Flashing
Over time, the sealant around your chimney or plumbing vents dries out. A quick re-caulking job costs very little but prevents water from rotting out your roof deck.
Replacing a Few Shingles
If a storm blew off three shingles, we can replace just those three. If you wait six months, water getting in through those gaps might rot the wood underneath, requiring us to tear up a large section of the roof to fix the structure.
Pipe Boot Replacement
The rubber “boot” that seals the plumbing vent pipes usually lasts about 7-10 years, while the shingles last 20. It is very common to replace these boots during the life of the roof. If an inspection catches a cracked boot, it’s a cheap fix. If missed, it causes a leak directly into the bathroom or kitchen.
For a deeper dive into what these repairs entail, visit our dedicated page on roof repairs. It covers everything from leak detection to structural fixes.
How to Choose a Roof Inspector in Florida
Not all roofers are created equal. When looking for someone to inspect your home, look for:
- Local Experience: Florida roofing is unique. You want someone who understands the local building codes and weather patterns.
- Licensing and Insurance: Never let anyone on your roof who isn’t fully licensed and insured. If they get hurt on your property, you could be liable.
- Good Reviews: Check online reviews and ask for references.
- Transparency: A good inspector will show you photos of the damage so you can see it for yourself.
At HW Roof, we pride ourselves on serving the https://hwroof.com/ community with integrity. We treat your home as if it were our own.
Conclusion: Don’t Wait for the Drip
Your roof works hard 24 hours a day, 365 days a year. It shields you from scorching sun, driving rain, and howling winds. In Florida, the environment is particularly harsh, making the “set it and forget it” mentality risky.
To recap:
- Inspect at least once a year.
- Ideally, inspect twice: once before hurricane season (Spring) and once after (Fall).
- Don’t ignore signs like water stains or granules in the gutter.
- Hire a professional rather than relying on DIY checks.
Preventative maintenance is the key to longevity. It keeps your family safe, saves you money in the long run, and protects the investment you’ve made in your home.
If it has been more than a year since your last roof inspection, or if you are worried about the condition of your roof after a recent storm, don’t wait. Contact us today to schedule a comprehensive inspection. Let us give you the peace of mind that comes with knowing your roof is ready for whatever Florida weather throws its way.
Frequently Asked Questions About Roof Inspections
Does a home inspection cover the roof?
When you buy a home, the general home inspector will look at the roof, but usually from the ground or with binoculars. They are generalists, not roofing specialists. A dedicated roof inspection is much more detailed and can uncover issues a general inspector might miss.
How long does an inspection take?
A typical residential roof inspection takes between 45 minutes to an hour, depending on the size and complexity of the roof.
Do I need to be home for the inspection?
While you don’t technically have to be home for the exterior check, it is beneficial. Being there allows the inspector to show you photos immediately and explain any issues they find. Plus, if they need to check the attic, they will need access to the interior.
Can a drone do the inspection?
Drone technology is becoming popular in the roofing industry. Drones can capture high-resolution images of hard-to-reach areas. However, a drone cannot lift a shingle to check the seal or feel if a section of the deck is soft. Drones are great tools, but they don’t replace a hands-on inspection entirely.
Will an inspection damage my roof?
A professional roofer knows how to walk on a roof without causing damage. They wear soft-soled shoes and know which areas to avoid (like the edges of tiles). Paradoxically, trying to inspect it yourself is more likely to cause damage than hiring a pro.
What if my roof is leaking right now?
If you have an active leak, you need more than a routine inspection—you need emergency service. Call a professional immediately to tarp the area and prevent further water intrusion. Once the weather clears, a full inspection can determine the extent of the repair needed.
Protecting your Florida home starts at the top. Make roof inspections a regular part of your home maintenance calendar, and your roof will thank you with years of reliable protection.
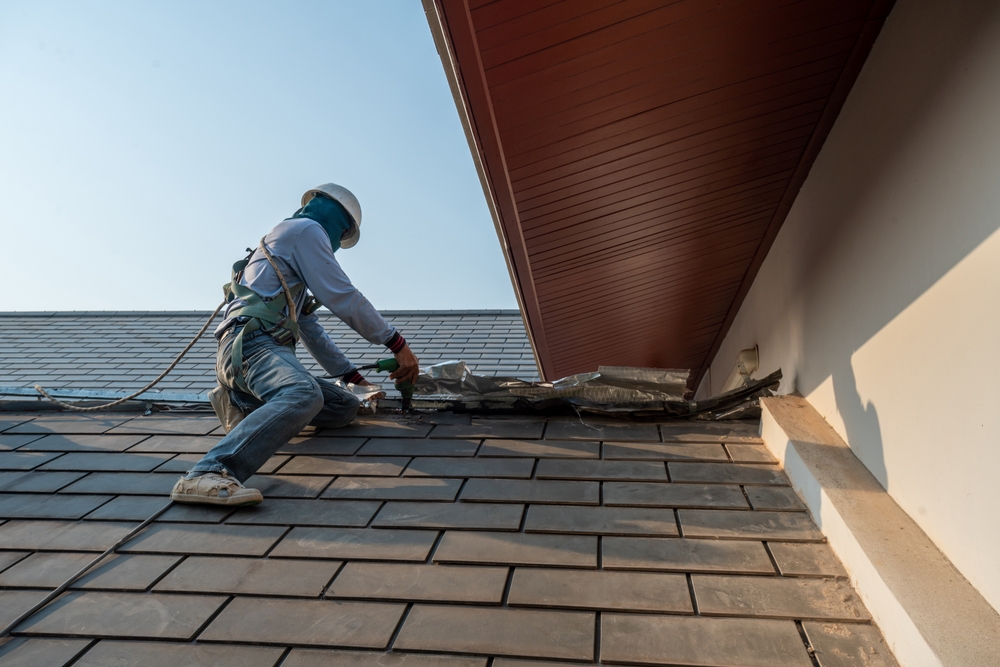
For office building owners and property managers in Central Florida, storm season is more than just a weather forecast; it’s a period of heightened risk. From June through November, the threat of tropical storms and hurricanes brings with it high winds and torrential rain, all of which target your building’s most vulnerable asset: the roof. A leak in an office building isn’t just an inconvenience. It can damage sensitive electronics, disrupt tenant operations, create safety hazards, and lead to a cascade of expensive, complex repairs.
The difference between a building that weathers the storm and one that suffers catastrophic failure often comes down to preparation. Waiting for a storm to appear on the horizon is too late. A proactive, year-round strategy is the only effective way to prevent roof leaks and protect your property, your tenants, and your bottom line.
This guide provides a comprehensive framework for office building roof maintenance ahead of and during storm season. We will cover pre-season inspections, critical maintenance tasks, emergency preparedness, and the long-term strategies that ensure your property remains secure and watertight when the winds and rain arrive.
The Unique Risks for Office Buildings in Storm Season
While all commercial properties are at risk, office buildings face specific challenges that make proactive roof care even more critical.
High-Value Interior Assets
Office spaces are filled with high-value, water-sensitive assets. A single leak over a server room, a trading floor, or a legal firm’s document storage can cause hundreds of thousands of dollars in damage. Destroyed computers, lost data, and ruined client files are consequences that go far beyond the cost of a simple roof patch.
Tenant Disruption and Liability
Your tenants rely on you to provide a safe and operational workspace. A roof leak that forces a business to close, even for a day, can lead to lost revenue for them and potential liability for you. Prolonged issues can damage tenant relationships, lead to lease disputes, and harm your property’s reputation, making it harder to attract and retain quality tenants in the future.
Complex Roof Systems
Office buildings often have complex roof layouts. They are typically crowded with HVAC units, communication equipment, satellite dishes, skylights, and elaborate ventilation systems. Every one of these penetrations is a potential failure point. The more complex the roof, the more diligent your maintenance must be.
The Hidden Danger of Wind Uplift
During a storm, it’s not just falling debris that poses a threat. High winds moving over a roof create a powerful suction force known as “wind uplift.” If the roof’s edge metal is loose or a seam is even slightly peeled back, this force can get underneath the membrane and peel it back like a can opener. What starts as a minor flaw can result in the loss of an entire roof section in a matter of minutes.
The Cornerstone of Prevention: Pre-Season Inspections
The most important step you can take to prevent roof leaks is to schedule a professional inspection well before storm season begins, ideally in the spring. A thorough inspection serves as a diagnostic check-up, identifying vulnerabilities that can be addressed under calm, dry conditions.
A professional roofing contractor should perform a detailed, multi-point inspection that covers:
1. The Roof Membrane
The inspector will walk the entire roof surface, looking for signs of wear and tear specific to your roof type (TPO, EPDM, Modified Bitumen, etc.). This includes checking for:
- Punctures, cuts, or abrasions.
- Blistering or bubbling, which indicates trapped moisture.
- Cracking or “alligatoring” on older asphalt-based roofs.
- Open seams or failing adhesion between membrane sheets.
2. Flashing and Penetrations
This is where most leaks originate. The inspector will pay close attention to the seals around every roof penetration:
- HVAC curbs and equipment stands.
- Pipes, vents, and electrical conduits.
- Skylights and roof hatches.
- Drains and scuppers.
They will look for cracked caulk, separated flashing, and any gaps that could allow wind-driven rain to enter.
3. Edge Metal and Coping
The perimeter of your roof is the first line of defense against wind uplift. The inspector will check to ensure that all edge metal, coping caps, and fascia are securely fastened. Any loose sections must be addressed immediately, as they are a primary failure point during a high-wind event.
4. Drainage Systems
A functioning drainage system is critical for handling the massive volume of water from a tropical downpour. The inspection must include:
- Clearing all drains, scuppers, and gutters of leaves, dirt, and debris.
- Ensuring drain covers are secure to prevent clogging during the storm.
- Checking for any signs of ponding water, which indicate a drainage or slope issue that needs to be corrected.
A single clogged drain on a large office roof can cause water to back up, adding immense weight and creating pressure that forces water into the building.
Upon completion, you should receive a detailed report with photographs and a prioritized list of recommended roof repairs. This allows you to address critical issues first and budget for less urgent items.
Essential Maintenance Tasks for Storm Season Roof Care
Once the inspection identifies areas of concern, the next step is to perform the necessary maintenance and repairs. Acting on these findings is what transforms an inspection from an expense into an investment.
Seam and Flashing Repair
Any identified weaknesses in seams or flashing must be professionally repaired according to manufacturer specifications. For a TPO roof, this means hot-air welding patches. For an EPDM roof, it involves using the correct primers and adhesives. Using generic sealants or “quick fixes” is a recipe for failure.
Securing Loose Items
Anything that is not securely fastened to the roof becomes a potential projectile in a hurricane. This includes:
- Loose satellite dishes or antennas.
- Temporary access ladders or stored materials.
- HVAC access panels.
Ensure all equipment is properly secured to its stand and that all panels are latched. Remove any items that do not need to be on the roof.
Pruning Overhanging Trees
Tree limbs overhanging your office building are a major threat. In high winds, they can snap and fall, puncturing the roof membrane. Before storm season, have a professional tree service trim back any branches that are close to the building.
Reviewing Your Roof’s History
Understanding your roof’s past can help predict its future. Review your records:
- When was the roof installed or last replaced?
- What is the expected lifespan of the roofing material?
- Is the roof still under warranty? What are the maintenance requirements to keep it valid?
An older roof nearing the end of its service life will require more aggressive maintenance and may be a candidate for a restorative roof coating or a full replacement. You can see examples of different types of roof work in our gallery.
Creating an Emergency Preparedness Plan
Even with perfect preparation, a severe storm can cause unexpected damage. Having a clear plan in place ensures a swift and effective response, minimizing damage and disruption.
1. Establish a Chain of Command
Who is the point person for all roof-related issues? Who has the authority to approve emergency repairs? Ensure all property management staff and key tenants know who to contact when a leak is discovered.
2. Have a Professional Roofer on Standby
Don’t wait until a storm is approaching to find a roofing contractor. By then, the best ones will already be committed. Establish a relationship with a trusted, local commercial roofing company beforehand. Provide them with access information and keep their emergency contact number readily available. After a major storm, they will prioritize existing clients. If you need a reliable partner, you can contact us to discuss setting up a pre-storm agreement.
3. Assemble an Emergency Leak Kit
Keep supplies on hand to manage an interior leak until professionals can arrive. This kit should include:
- Heavy-duty plastic tarps to cover desks, computers, and other equipment.
- Buckets and large trash cans to catch water.
- Caution tape and “wet floor” signs to secure the area.
- A wet/dry vacuum for water removal.
4. Document Everything
Before and after a storm, documentation is critical for insurance claims.
- Before: Keep all your maintenance records, inspection reports, and photos of your roof in good condition. This proves you were proactive.
- After: As soon as it is safe, take extensive photos and videos of any damage, both inside and out. Document the date and time the damage was discovered.
This evidence is invaluable when working with your insurance adjuster. A good roofing contractor can also assist by providing a professional damage assessment report.
The Long-Term Strategy: Roof Coatings and Replacement Planning
Proactive storm season roof care also involves long-term strategic planning. Two key strategies for office building owners are roof restoration coatings and proactive replacement planning.
Roof Restoration Coatings
If your office building’s roof is structurally sound but is beginning to show its age with minor leaks or surface degradation, a full replacement may not be necessary. A fluid-applied roof coating system can be an excellent alternative.
- How it Works: A silicone or acrylic coating is applied over the existing, prepared roof surface. It cures to form a seamless, white, reflective, and completely waterproof membrane.
- Benefits:
- Seamless Protection: Eliminates all seams, the most common point of failure.
- Cost-Effective: Typically costs 50-70% less than a full replacement.
- Energy Savings: The “cool roof” surface reflects UV rays, significantly lowering roof temperatures and reducing HVAC costs—a major benefit for a large office building.
- Minimal Disruption: The process is quiet and clean, with no tear-off noise or debris to disrupt your tenants.
Proactive Replacement Planning
All roofs have a finite lifespan. A key part of office building roof maintenance is knowing when your roof is nearing the end of its life and planning for its replacement. The detailed reports from your annual inspections provide the data you need to forecast this. Planning a replacement allows you to:
- Budget Appropriately: A roof replacement is a major capital expense. Planning for it years in advance avoids sudden financial shocks.
- Schedule for Minimal Disruption: You can schedule the project during a time that is least disruptive to your tenants, rather than being forced into an emergency replacement during peak business season.
- Choose the Best System: You have time to research the best roofing materials for your building’s needs and budget, rather than being forced to take whatever is available quickly.
Partnering with the Right Commercial Roofing Expert
The success of your storm preparedness strategy hinges on the expertise of your roofing partner. Not all roofers are equipped to handle the complexities of a commercial office building.
Look for Commercial Focus
Choose a company that specializes in commercial and industrial roofing. They will have the experience, equipment, and safety protocols necessary for working on large, complex properties. Check their homepage to see if their primary focus aligns with your needs.
Verify Licensing and Insurance
This is non-negotiable. Your chosen contractor must have a valid Florida roofing license and carry substantial general liability and workers’ compensation insurance. Ask for a certificate of insurance to protect your property and tenants from liability.
Ask for References and Case Studies
A reputable contractor should be able to provide you with references from other office building owners or property managers they have worked with. Ask to see case studies or examples of similar projects.
Conclusion: Turn Vulnerability into Resilience
For office building owners in Central Florida, storm season doesn’t have to be a period of anxiety. By shifting from a reactive mindset to a proactive strategy of inspection, maintenance, and preparation, you can significantly mitigate the risk of leaks and storm damage. A well-maintained roof is a resilient roof.
Protecting your investment, ensuring tenant satisfaction, and maintaining business continuity starts at the top. A partnership with a qualified commercial roofing professional is your best defense against the unpredictable forces of nature. Implement a robust plan for storm season roof care, and you can have confidence that your building is ready to stand strong, whatever the weather brings.
Don’t wait for the storm clouds to gather. If you’re ready to take proactive steps to prevent roof leaks in your office building, contact us today to schedule a comprehensive pre-season inspection.
Frequently Asked Questions (FAQs)
When is the best time to prepare my office roof for storm season?
The ideal time is in the spring (March-May). This gives you ample time to conduct an inspection, identify issues, and schedule any necessary repairs before the start of the hurricane season on June 1st.
My roof is new, do I still need an inspection?
Yes. Debris can clog drains on any roof, regardless of age. Furthermore, most manufacturer warranties for new roofs require proof of annual or semi-annual professional maintenance to remain valid. An inspection protects your investment and your warranty.
Can my in-house maintenance team handle roof inspections?
While your team can perform ground-level checks and basic housekeeping, they are not trained roofing professionals. They may miss subtle signs of weakness and lack the safety equipment for working at height. A professional inspection is critical for accurate diagnosis.
What is the most common cause of roof leaks during a storm?
While punctures from flying debris can occur, the most common causes are pre-existing weaknesses. These include failed flashing around HVAC units and vents, clogged drains causing water to back up, and loose edge metal that allows wind uplift to tear at the membrane.
What should I do if my roof is actively leaking during a storm?
First, ensure the safety of your tenants by cordoning off the area and addressing any electrical hazards. Use buckets and tarps to contain the water and protect assets. Then, call your emergency roofing contractor. Do not send anyone onto the roof during the storm.
How can I tell if my roof has suffered wind damage after a storm?
From the ground, you may see missing or bent edge metal, or sections of the membrane that appear loose or bubbled. However, much of the damage may not be visible. A post-storm professional inspection is the only way to be sure.
Is storm damage to my roof covered by insurance?
Most commercial property insurance policies cover damage from “named perils” like hurricanes and windstorms. However, they may exclude damage that results from pre-existing wear and tear or a lack of maintenance. Keeping detailed maintenance records is your best tool for a successful claim.
How much does a pre-season inspection and maintenance visit cost?
The cost varies based on the size and complexity of your roof. However, the cost of a proactive maintenance plan is a fraction of the expense of emergency roof repairs, interior water damage restoration, and business interruption losses.
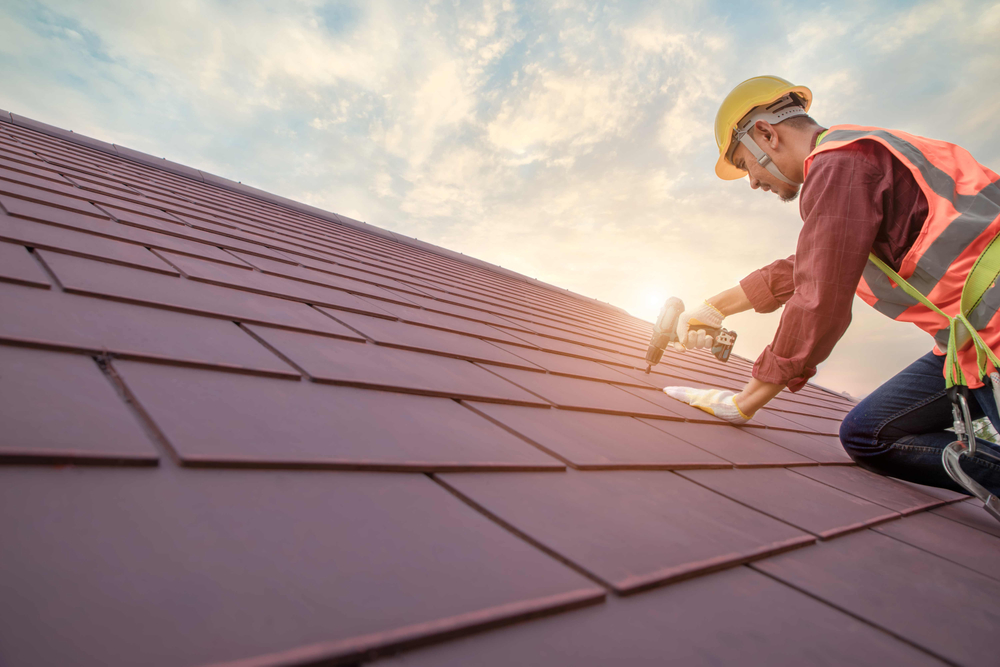
For commercial property owners in Central Florida, the roof is one of the most significant and costly assets of a building. It stands as the primary shield against relentless sun, torrential downpours, high humidity, and the ever-present threat of tropical storms. Yet, it is often the most neglected component until a leak appears, disrupting business, damaging inventory, and creating a cascade of expensive problems.
The traditional approach to roof care is reactive: you wait for something to break, then you call for help. This “run-to-failure” model is not just inefficient; it’s a financial gamble. A proactive strategy, centered around a structured roof maintenance plan, is the most effective way to protect your investment, extend the lifespan of your roof, and control long-term costs.
This comprehensive guide will explain why preventative maintenance is critical for commercial properties in Central Florida. We will detail what a quality maintenance plan includes, how it saves you money, and how it serves as your best defense against the unique weather challenges of the region.
The High Cost of Neglect: Why Reactive Roof Care Fails
Imagine driving a fleet of delivery vehicles without ever changing the oil or checking the tire pressure. The outcome is predictable: breakdowns, expensive emergency repairs, and significant operational downtime. Your commercial roof is no different. Neglecting it leads to a host of problems that are far more expensive than a simple maintenance check.
From Small Leak to Structural Disaster
A minor issue, like a small crack in a seam or a clogged drain, rarely stays minor for long in Florida.
- Water Intrusion: Rainwater will exploit any weakness. What starts as a drip can quickly saturate insulation, rendering it useless and creating a breeding ground for mold and mildew.
- Structural Damage: Once water bypasses the membrane, it begins to attack the roof deck and structural supports. Moisture can rot wood decking, rust steel components, and compromise the building’s integrity. A problem that could have been fixed for a few hundred dollars can evolve into a structural repair costing tens of thousands.
- Interior Damage: For a business, water damage inside the building is catastrophic. It can destroy merchandise, ruin expensive equipment, short out electrical systems, and create unsafe conditions for employees and customers.
The Domino Effect on Operational Costs
A damaged roof impacts more than just the structure.
- Skyrocketing Energy Bills: Wet insulation loses its R-value, meaning it no longer insulates effectively. Your HVAC system must work harder to maintain the building’s temperature, leading to a noticeable spike in energy consumption.
- Invalidated Warranties: Nearly all commercial roofing manufacturers require proof of regular, documented maintenance to keep their warranties valid. If you need to file a claim for a premature failure but have no maintenance records, the manufacturer can deny coverage, leaving you to foot the entire bill for major roof repairs.
- Unforeseen Business Interruption: A major leak can force you to close sections of your business, relocate inventory, and deal with complex insurance claims. The loss of revenue and productivity during this downtime can be immense.
What is a Commercial Roof Maintenance Plan?
A roof maintenance plan is a proactive service agreement with a professional roofing contractor to inspect, clean, and maintain your commercial roof on a scheduled basis. It’s a strategic approach to commercial roof care that shifts your focus from expensive, reactive repairs to affordable, preventative measures. Think of it as a wellness plan for your building’s most critical asset.
A quality plan is customized to your specific roof type, age, and location. However, most comprehensive plans include several core components.
1. Scheduled Semi-Annual Inspections
The cornerstone of any maintenance plan is regular professional inspections, typically performed twice a year: once in the spring to prepare for the summer rains and storm season, and once in the fall to address any damage incurred and prepare for the cooler months.
During an inspection, a technician will meticulously examine every component of your roof system, including:
- The overall condition of the roof membrane (TPO, EPDM, Mod-Bit, etc.)
- All seams, flashings, and penetration seals (around vents, pipes, and HVAC units).
- The condition of drainage systems, including drains, scuppers, and gutters.
- The integrity of edge metal and coping.
- Any signs of ponding water, blistering, or surface degradation.
2. Debris Removal and Cleaning
Debris is a primary contributor to roof problems. A maintenance visit always includes clearing the roof surface and drainage systems of:
- Leaves, branches, and pine needles.
- Trash and wind-blown debris.
- Accumulated dirt and sediment.
Keeping drains and gutters clear is vital. A single clogged drain can cause thousands of gallons of water to back up on a large commercial roof, exerting immense weight and creating leaks.
3. Minor Proactive Repairs
The goal of maintenance is to catch problems when they are small and easy to fix. During a visit, the technician will perform minor repairs on the spot as part of the service. This can include:
- Re-sealing voids in caulking around flashings.
- Tightening loose fasteners or edge metal.
- Repairing small punctures or cracks in the membrane.
- Securing drain covers and pitch pans.
Addressing these minor issues immediately prevents them from developing into major water entry points.
4. Detailed Reporting and Documentation
After each visit, you should receive a comprehensive report detailing the condition of your roof. This report is a valuable asset for your property management records. It should include:
- A checklist of all items inspected.
- Photographic documentation of the roof’s condition, highlighting any areas of concern.
- A summary of the work performed (debris removal, minor repairs).
- Recommendations for any larger repairs that may be needed, along with a cost estimate.
This documentation is your proof of proactive maintenance for warranty claims and insurance purposes. It also provides a historical record that can help you budget for future capital expenditures.
The Financial Benefits of Preventative Roof Maintenance
While a maintenance plan is a recurring operational expense, it delivers a significant return on investment by reducing or eliminating much larger, unpredictable costs.
Extend the Lifespan of Your Roof
A commercial roof is a 20- to 30-year asset. However, without maintenance, its lifespan can be cut in half. By keeping the roof clean, ensuring proper drainage, and addressing minor issues before they escalate, a maintenance plan can help you get the maximum service life out of your initial investment. Extending the life of a roof by 5-10 years can save you hundreds of thousands of dollars in premature replacement costs.
Control and Predict Your Budget
Emergency roof repairs are budget-busters. They come without warning and demand immediate, often expensive, action. A maintenance plan replaces this unpredictability with a fixed, manageable annual cost. You know exactly what you will spend on proactive care, making it easy to budget. Furthermore, the detailed reports provide a long-term view of your roof’s health, allowing you to plan and save for an eventual replacement years in advance.
Lower Repair Costs
It is always cheaper to prevent a problem than to fix it. The cost of resealing a flashing is minimal compared to the cost of repairing the rotted wood deck, saturated insulation, and damaged drywall that a failed flashing can cause. Preventative roof maintenance focuses on these low-cost, high-impact tasks that prevent expensive failures.
Reduce Energy Consumption
As mentioned earlier, wet insulation is ineffective. By ensuring your roof membrane is intact and your insulation remains dry, a maintenance plan helps maintain the thermal efficiency of your building. This keeps your HVAC system running efficiently and your energy bills under control.
Enhance Property Value and Marketability
A well-maintained building with documented service records is more attractive to potential buyers and tenants. A roof maintenance plan demonstrates responsible ownership and provides assurance that the property is in good condition. It can be a key selling point and justify higher lease rates.
You can see the difference that professional care makes by browsing our gallery of completed projects, from minor repairs to full restorations.
What a Central Florida Roof Maintenance Plan Specifically Addresses
The climate in Central Florida presents unique challenges that a good maintenance plan must specifically target.
- Hurricane and Storm Preparedness: Spring inspections are critical for ensuring your roof is ready for storm season. This includes checking for any loose materials, securing edge flashing, and ensuring drainage systems can handle torrential rainfall. A post-storm inspection is also essential to identify and address any hidden damage.
- UV Radiation Protection: The intense Florida sun degrades roofing materials over time, causing them to become brittle and cracked. Maintenance plans for systems like modified bitumen or EPDM may include reapplying protective coatings to reflect UV rays and prevent premature aging.
- Humidity and Mold Growth: High humidity creates a perfect environment for algae and mold to grow on roof surfaces and in saturated insulation. Regular cleaning removes organic matter that fuels this growth, and inspections can catch moisture intrusion before mold becomes a systemic problem.
- Thermal Shock: The rapid temperature swings between a hot sunny day and a sudden afternoon thunderstorm cause materials to expand and contract constantly. This “thermal shock” stresses seams and flashings. Regular inspections ensure these vulnerable areas remain sealed and intact.
Choosing a Partner for Your Roof Maintenance Plan
Selecting the right contractor is as important as the plan itself. You are not just hiring someone for a one-time job; you are entering a long-term partnership to protect your property.
1. Look for Commercial Specialization
Ensure the contractor specializes in commercial roofing. The materials, techniques, and safety protocols for a large, low-slope roof are completely different from those for residential roofing. A true commercial expert will understand the complexities of your system. A great place to start is their company homepage, which should clearly outline their commercial services.
2. Verify Licensing and Insurance
This is the most basic requirement. The company must hold a valid Florida roofing license and carry robust general liability and workers’ compensation insurance. Ask for a certificate of insurance to protect your business from any liability.
3. Ask About Their Process and Technology
A professional company will have a structured process for their maintenance plans. Ask what their inspection checklist includes and what kind of reporting they provide. Inquire if they use diagnostic tools like infrared thermography to detect hidden moisture when necessary.
4. Check for Manufacturer Certifications
Leading manufacturers certify contractors who are trained to install and maintain their systems correctly. A certified contractor not only guarantees quality workmanship but can also offer enhanced warranty protections.
5. Request a Custom Proposal
Avoid any company that offers a generic, one-size-fits-all plan. A true professional will want to inspect your roof first to create a proposal tailored to your building’s specific needs, roof type, and age.
If you are ready to explore a proactive approach to commercial roof care, you can contact us to schedule a complimentary assessment.
Conclusion: An Investment in Peace of Mind
Your commercial roof is a silent guardian, working 24/7 to protect your business. Leaving its health to chance is a risk that modern property owners can no longer afford. The cycle of neglect, failure, and emergency repair is a drain on your finances, your time, and your peace of mind.
A roof maintenance plan fundamentally changes this dynamic. It is a strategic investment in the longevity and performance of your property. By catching small problems early, ensuring your roof is prepared for Central Florida’s challenging weather, and providing the documentation needed to protect your warranty, a maintenance plan pays for itself many times over.
Stop waiting for the next leak. Take control of your building’s health and your long-term budget by implementing a preventative roof maintenance strategy. It is the smartest investment you can make in the security and continuity of your commercial property.
Frequently Asked Questions (FAQs)
How much does a roof maintenance plan cost?
The cost depends on the size, complexity, and accessibility of your roof. However, it is a predictable, fixed cost that is significantly lower than the unpredictable, high costs of emergency repairs. Most property owners find the ROI to be substantial.
Is a maintenance plan worth it for a brand-new roof?
Absolutely. Most manufacturers require documented annual or semi-annual maintenance to keep the warranty valid. A maintenance plan ensures you meet these requirements from day one and protects your significant investment in a new roof.
Can’t my own maintenance staff just clean the roof?
While your staff can handle basic ground-level cleaning, they are not trained roofing professionals. They may not recognize the subtle signs of a developing problem and are not equipped with the proper safety gear to work on a roof. A professional inspection is essential for proper commercial roof care.
How often should my commercial roof be inspected?
The industry standard is twice per year: in the spring before the rainy season and in the fall after the storm season has passed. An additional inspection is also recommended after any major weather event like a hurricane or severe hailstorm.
What happens if you find a major problem during an inspection?
If a maintenance inspection reveals a problem that goes beyond a minor repair, you will be notified immediately. You will receive a detailed report with photos and a proposal for the necessary roof repairs, allowing you to make an informed decision before the problem gets worse.
How long does a maintenance visit take?
For most commercial buildings, a thorough inspection and cleaning can be completed in a few hours with minimal disruption to your business operations.
Does a maintenance plan guarantee my roof will never leak?
While a maintenance plan dramatically reduces the likelihood of leaks, no roof is completely immune to damage from severe weather or unforeseen circumstances. However, a maintained roof is far more resilient, and if a leak does occur, it is likely to be less severe and identified more quickly.
What types of commercial roofs do you maintain?
We maintain all major types of commercial roofing systems, including TPO, PVC, EPDM, Modified Bitumen, Built-Up Roofing (BUR), and metal roofs. Each plan is tailored to the specific material and its unique maintenance requirements.

For owners of warehouses and retail buildings, a flat roof is a common and practical feature. It maximizes usable space, provides a convenient location for HVAC systems, and is often more cost-effective to install than a sloped roof. However, this design comes with its own unique set of challenges, with leaks being the most prominent and potentially destructive. A seemingly small drip can quickly escalate, leading to damaged inventory, structural decay, and significant operational downtime.
Understanding the vulnerabilities of your commercial flat roof is the first step toward protecting your investment. A proactive approach to maintenance and repair can mean the difference between a minor fix and a catastrophic failure that impacts your entire business.
This guide is designed for warehouse and retail property owners. We will delve into the common causes of flat roof leaks, explore modern repair techniques, discuss the “repair versus replace” decision, and outline preventative measures to ensure your building remains watertight and secure.
Why Flat Roofs Are Prone to Leaks
Flat roofs, also known as low-slope roofs, are not perfectly flat. They are designed with a slight pitch to guide water toward drains or scuppers. When this system is compromised in any way, water has nowhere to go but down. In Central Florida’s climate, with its heavy downpours and intense sun, these vulnerabilities are magnified.
1. Ponding Water
The number one enemy of a flat roof is ponding water. This occurs when water pools in low spots on the roof for more than 48 hours after rainfall. Common causes include clogged drains, structural settling, or crushed insulation. The constant weight of standing water stresses the roof structure, accelerates the deterioration of the roofing membrane, and provides a constant source of pressure to find any small crack or imperfection.
2. Membrane Damage and Punctures
The protective membrane of a flat roof is its primary line of defense. This surface is susceptible to damage from various sources:
- Foot Traffic: Maintenance workers accessing HVAC units can accidentally drop tools or scuff the surface.
- Flying Debris: During Florida’s storm season, tree branches and other wind-blown debris can puncture or tear the membrane.
- UV Degradation: The relentless sun can make older roofing materials brittle and prone to cracking over time.
3. Seam and Flashing Failures
A flat roof is not a single, monolithic sheet. It is composed of sections of material that are sealed together at the seams. Additionally, flashing is used to seal penetrations like vents, pipes, skylights, and HVAC curbs. These areas are the most common failure points. Thermal expansion and contraction cause the building to shift constantly, which can pull seams apart or break the seals around flashing, creating a direct path for water intrusion.
4. Clogged Drains and Scuppers
Your roof’s drainage system is critical. Leaves, dirt, trash, and other debris can easily clog internal drains or scuppers. When this happens, water backs up and begins to pond, leading to the issues mentioned above. A simple, blocked drain can quickly compromise an entire roofing system.
5. Poor Initial Installation
Many roofing problems can be traced back to the original installation. A contractor who cuts corners by using improper fastening techniques, failing to weld seams correctly, or using substandard materials can doom a roof to a short lifespan filled with persistent leaks. This makes choosing a reputable contractor for any roof repairs absolutely essential.
Identifying a Flat Roof Leak: Early Warning Signs
Catching a leak early is crucial for minimizing damage. For warehouse and retail managers, it’s important to train staff to recognize the warning signs.
- Interior Water Stains: Discoloration on ceiling tiles, walls, or around light fixtures is the most obvious sign.
- Musty Odors: A persistent, damp smell inside the building often indicates hidden moisture and potential mold growth within the ceiling or walls.
- Dripping or Puddles: Active drips are an emergency. Even small puddles on the floor after a rainstorm should be investigated immediately.
- Bubbling or Peeling Paint: Moisture getting behind the drywall will cause paint to bubble and peel away from the surface.
- Visible Exterior Damage: From the ground, you may see loose flashing, separated seams near the roof edge, or damaged gutters.
If you notice any of these signs, it’s time to call a professional. Delaying a flat roof leak repair will only lead to more extensive and costly problems.
Common Types of Flat Roof Systems and Their Repair Methods
Repairing a flat roof requires specific knowledge of the material used. An incorrect repair technique can cause more harm than good. Here are some of the most common systems found on warehouses and retail buildings.
TPO (Thermoplastic Polyolefin)
TPO is a single-ply, white reflective membrane that is very popular in Florida for its energy efficiency.
- Common Issues: Punctures, seam separation, and flashing failure.
- Repair Method: The primary method for repairing TPO is hot-air welding. A technician uses a specialized welder to heat both the patch material and the existing roof surface until they melt together, forming a permanent, monolithic bond. Adhesives and sealants are rarely a long-term solution for TPO.
EPDM (Ethylene Propylene Diene Monomer)
Often called a “rubber roof,” EPDM is a durable synthetic rubber membrane, usually black.
- Common Issues: Punctures, shrinkage that pulls at the seams, and adhesive failure.
- Repair Method: EPDM repairs involve using special primers to clean and prepare the surface, followed by applying seam tape or patches with a strong bonding adhesive. Unlike TPO, EPDM cannot be heat-welded.
Modified Bitumen (Mod-Bit)
This is an asphalt-based system that comes in rolls, often with a granular surface. It is known for its toughness and puncture resistance.
- Common Issues: Blistering, cracks from age and UV exposure, and seam separation.
- Repair Method: Repairs can be done using cold-process adhesives to embed a new patch, or by using a torch to heat-weld a patch into place. Torch-down applications require extreme care and are best left to experienced professionals due to the fire risk.
Built-Up Roofing (BUR)
The traditional “tar and gravel” roof, a BUR system consists of multiple layers of asphalt and reinforcing fabric.
- Common Issues: Blisters (trapped moisture), alligatoring (cracking that resembles alligator skin), and flashing problems.
- Repair Method: Finding the source of a leak on a BUR roof can be difficult, as water can travel between layers before appearing inside. Repairs involve removing the gravel surface, cutting away the damaged layers, patching each layer, and then re-applying the top coat and gravel.
You can see examples of our work on these various roof types in our gallery.
The Repair Process: What to Expect
When you engage a professional for a warehouse roof repair, the process should be transparent and methodical to ensure minimal disruption to your operations.
Step 1: Thorough Inspection and Diagnosis
A qualified roofing contractor will begin with a comprehensive inspection. This includes a visual check of the entire roof surface, seams, flashing, and drainage systems. They may also use advanced diagnostic tools. Infrared (IR) thermography can detect trapped moisture beneath the membrane, which is invisible to the naked eye. Core samples may be taken to examine the layers of the roof and the condition of the insulation.
Step 2: A Detailed Proposal
Following the inspection, you should receive a detailed written proposal. This document should include:
- Photographic evidence of the damage.
- A clear scope of work outlining the proposed repairs.
- The specific materials to be used.
- A transparent cost breakdown.
- An estimated timeline for completion.
Step 3: Site Preparation and Safety
On a commercial site, safety is the top priority. The crew will establish clear safety zones to protect your employees, customers, and property. This may involve caution tape, flag lines, and ground-level spotters. Equipment and inventory near the work area will be protected.
Step 4: Executing the Repair
The technicians will proceed with the repair according to manufacturer specifications for the specific roofing material. This is crucial for the longevity of the repair and for maintaining any existing warranties. Quality workmanship ensures the patch is integrated seamlessly with the existing roof.
Step 5: Final Inspection and Cleanup
Once the work is complete, a supervisor should perform a final walkthrough to ensure the repair meets quality standards. The work area should be thoroughly cleaned, and all debris and equipment removed from the site.
Roof Restoration Coatings: A Cost-Effective Alternative to Replacement
For roofs that are structurally sound but are suffering from widespread aging, leaks, or surface degradation, a full replacement isn’t the only option. Roof restoration with a liquid-applied coating can extend the life of your existing roof by 10-15 years at a fraction of the cost.
How Do Roof Coatings Work?
A coating system involves applying a liquid silicone or acrylic formula directly over the existing cleaned and prepped roof surface. This liquid cures to form a seamless, flexible, and fully waterproof membrane.
Benefits for Warehouse and Retail Buildings:
- Seamless Protection: Because it is applied as a liquid, the coating eliminates all seams, which are the most common point of failure on a flat roof.
- Cost Savings: A restoration project is typically 50-70% cheaper than a full tear-off and replacement.
- Minimal Disruption: The application process is quiet and clean, with no noisy tear-off or heavy debris. This means your business can continue operating without interruption.
- Energy Efficiency: Highly reflective “cool roof” coatings can lower the roof surface temperature significantly, reducing the load on your HVAC system and lowering your energy bills.
- Tax Benefits: In many cases, a roof coating can be classified as a maintenance expense and fully deducted in the current tax year, rather than being capitalized as a new roof.
To find out if your building is a candidate for a restoration system, it’s best to contact us for a professional evaluation.
Preventative Maintenance: Your Best Defense Against Leaks
The most effective way to manage retail building roof maintenance and avoid emergency repairs is through a proactive maintenance plan. Just like the other critical equipment in your facility, your roof requires regular attention to perform optimally.
A comprehensive maintenance plan should include:
- Semi-Annual Inspections: A professional should walk the roof every spring and fall to look for early signs of trouble.
- Debris Removal: Clearing leaves, trash, and other blockages from drains, gutters, and scuppers is vital to ensure proper drainage.
- Minor Proactive Repairs: Addressing small issues like caulking voids, resealing minor cracks, or tightening loose flashing before they become major leaks.
- Detailed Documentation: Keeping a logbook with inspection reports, photos, and records of all repairs performed. This is often required to keep manufacturer warranties valid.
Investing in a maintenance plan is an operational expense that provides a massive return by preventing capital-intensive failures and protecting the valuable inventory and equipment inside your building.
Choosing the Right Commercial Roofing Partner
Not all roofing companies are equipped to handle the scale and complexity of large commercial flat roofs. Choosing the right partner is critical for a successful outcome.
Look for Specialization
Choose a contractor who specializes in commercial roofing, not just a residential roofer who occasionally works on commercial projects. They will have the right equipment, safety protocols, and expertise with flat roofing materials.
Verify Licensing and Insurance
This is non-negotiable. The contractor must have a valid state license and carry substantial general liability and workers’ compensation insurance. Ask for proof of insurance to protect your business from liability.
Check for Manufacturer Certifications
Top-tier manufacturers (like GAF, Carlisle, Johns Manville) certify contractors who have undergone extensive training on their products. A certified contractor can often offer enhanced warranties that provide better long-term protection.
Review Their Portfolio and References
A reputable company will be proud to share its work. Ask to see case studies or examples of similar warehouse roof repair projects. Looking at their online presence, such as their homepage, can give you a sense of their professionalism and scope.
Conclusion: Protect Your Business from the Top Down
For the owner of a warehouse or retail building, the roof is more than just a cover; it’s a critical asset that protects everything your business relies on. From inventory and equipment to employees and customers, a sound roof ensures safety and operational continuity. In a climate as demanding as Central Florida’s, ignoring your flat roof is a risk you cannot afford to take.
By understanding the common causes of leaks, recognizing the early warning signs, and committing to a program of regular retail building roof maintenance, you can prevent minor issues from becoming major disasters. Whether you need an emergency flat roof leak repair, are considering a life-extending roof coating, or want to establish a proactive maintenance plan, partnering with an experienced commercial roofing specialist is your best course of action.
Don’t wait for a water stain to appear on your ceiling. If you have concerns about the condition of your roof or want to schedule a professional inspection, contact us today. We are here to provide the expertise and service you need to keep your business secure and dry.
Frequently Asked Questions (FAQs)
Why is my “flat” roof holding water?
Ponding water is usually due to clogged drains, sagging of the building’s structure, or compressed insulation creating low spots. Any water that remains for over 48 hours needs to be addressed by a professional.
Can I just use caulk or sealant to fix a leak on my TPO roof?
While sealants can provide a very temporary stop-gap in an emergency, they are not a permanent solution for TPO or PVC roofs. These materials must be hot-air welded to create a durable, watertight bond. Using the wrong sealant can interfere with a proper repair later.
How long does a typical flat roof leak repair take?
A simple patch for a puncture can often be completed in a few hours. More complex repairs involving wet insulation or large sections of membrane may take one to two days. Your contractor should provide a clear timeline.
Will a roof repair disrupt my retail or warehouse operations?
Professional commercial roofers work to minimize disruption. They will coordinate with you to schedule noisy work during off-hours if possible and will always prioritize the safety of your staff and customers.
Is a roof coating as good as a new roof?
A roof coating is not a new roof, but it is an excellent restoration solution for a roof that is structurally sound. It creates a new, seamless waterproof layer that can add 10-15 years of life to the existing system for much less than the cost of a replacement.
How much does warehouse roof repair cost?
The cost varies greatly depending on the roof type, the extent of the damage, and accessibility. However, the cost of a proactive repair is always significantly less than the cost of damaged inventory, structural repairs, and business downtime from a major leak.
How often do I need to clean my roof drains?
In a leafy area, drains should be checked and cleaned quarterly. At a minimum, they should be inspected and cleared as part of a semi-annual maintenance plan.
My roof is old. Should I repair or replace it?
If your roof is nearing the end of its warrantied lifespan and has multiple leaks, a replacement or a restoration coating is likely more cost-effective than continuing with frequent repairs. A professional inspection can provide the data needed to make an informed decision.
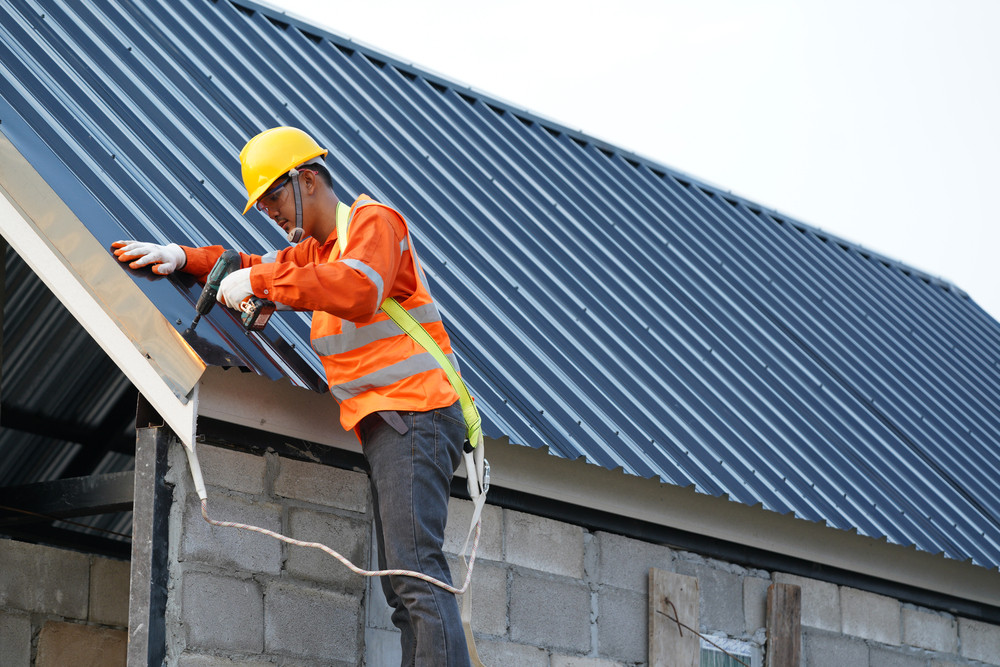
Managing a commercial property in Apopka comes with a specific set of challenges. Between the intense Central Florida sun, sudden afternoon thunderstorms, and the occasional tropical system, your building’s roof takes a beating year-round. For business owners, the roof is often “out of sight, out of mind”—until water starts dripping onto expensive equipment or inventory.
Ignoring your roof isn’t just a gamble; it’s a liability. A compromised roof can disrupt operations, damage assets, and create safety hazards for employees and customers. Understanding the basics of commercial roof repair is crucial for protecting your bottom line.
This guide covers what every Apopka business owner needs to know about maintaining a watertight facility. We will explore common roofing problems, the repair process, preventative maintenance, and how to select a partner you can trust.
Why Timely Commercial Roof Repair Matters in Apopka
In Apopka, the weather doesn’t wait for you to be ready. The unique climate here accelerates the aging process of roofing materials. While a small leak might seem manageable today, Florida’s humidity and frequent rain can turn that drip into a disaster overnight.
Protecting Your Assets and Inventory
Water is the enemy of commercial interiors. Whether you run a retail store, a warehouse, or an office building, water intrusion can ruin drywall, ceiling tiles, flooring, and merchandise. For businesses with sensitive electronics or machinery, a leak can lead to catastrophic equipment failure. Addressing issues immediately through professional roof repair services minimizes these risks.
Avoiding Structural Damage
It isn’t just about cosmetic damage. Prolonged exposure to moisture can rot wood decking and rust steel structural components. Over time, this weakens the integrity of the building. What starts as a minor repair job can escalate into a full-scale structural renovation if ignored.
Energy Efficiency and Cost Savings
A damaged roof is often an inefficient one. Gaps in the membrane, wet insulation, or damaged flashing allow conditioned air to escape and hot, humid air to enter. This forces your HVAC system to work overtime, driving up energy bills. Repairing these issues restores the thermal envelope of your building, keeping utility costs predictable.
Common Commercial Roofing Problems in Central Florida
Knowing what to look for can help you catch problems early. Commercial roofs in Apopka face specific threats due to the local environment.
1. Ponding Water
Flat roofs are common in commercial construction, but “flat” is a bit of a misnomer. They should have a slight slope to drain water. When drains clog or the structure settles, water can pool. If water stands on your roof for more than 48 hours, it’s called ponding. This standing water adds immense weight to the structure and accelerates the deterioration of roofing membranes.
2. Blistering and Bubbling
The Florida sun is relentless. When moisture gets trapped beneath the roof membrane, the heat causes it to expand, creating blisters or bubbles on the surface. If these blisters pop, they leave the roof vulnerable to leaks. This is a clear sign that your roof system needs attention.
3. Flashing Failures
Flashing is the material used to seal edges, corners, and penetrations (like vents or HVAC units). Due to the expansion and contraction caused by temperature fluctuations, flashing can pull away or crack. This is one of the most common entry points for water.
4. Storm Damage
Apopka isn’t immune to high winds and flying debris during storm season. Even if a hurricane doesn’t hit directly, tropical storms can lift membrane edges, tear off shingles, or damage gutters. After any major weather event, a professional inspection is vital.
5. Poor Installation
Unfortunately, not all roofs are installed correctly from day one. Poor workmanship can lead to premature failure, adhesion problems, and persistent leaks. This emphasizes the importance of choosing a reputable contractor for commercial roof repair Apopka business owners can rely on.
The “Repair vs. Replace” Dilemma
One of the biggest questions business owners face is whether to repair a section of the roof or replace the entire system. While a replacement is a significant capital expenditure, endless repairs can also drain your budget.
When to Repair
- The roof is relatively new: If the roof is well within its expected lifespan, repairs are usually the best route.
- Damage is localized: If the issue is isolated to a specific area (like a puncture from debris), a patch is often sufficient.
- Insulation is dry: If the underlying insulation hasn’t been saturated by water, you can often save the existing roof system.
When to Replace
- The roof is old: If your roof is nearing the end of its 20 or 30-year warranty, sinking money into repairs might be a poor investment.
- Widespread damage: If leaks are popping up everywhere or the membrane is brittle and cracking across the entire surface, replacement is likely necessary.
- Moisture saturation: Once the insulation layer gets wet, it loses its R-value and can harbor mold. In these cases, the affected areas usually need to be torn out.
Consulting with experts can help you make this decision. You can check out examples of both repairs and replacements in our gallery to see the quality of work required for different scenarios.
The Commercial Roof Repair Process
Understanding what happens during a repair project can help you plan accordingly and minimize disruption to your business operations.
Step 1: Detailed Inspection
Every successful repair starts with a diagnosis. A qualified roofer will walk the roof, checking for visible damage, drainage issues, and weak points. They may also use technology like infrared moisture scans to see what’s happening beneath the surface.
Step 2: Detailed Assessment and Quote
After the inspection, you should receive a report detailing the findings. This will include photos of the damage, a proposed plan of action, and a transparent cost estimate. This is the time to ask questions about materials and timelines.
Step 3: Site Preparation
Safety is paramount on a commercial site. The crew will set up safety perimeters and ensure that your employees and customers are safe from falling debris. They will also protect landscaping and building facades.
Step 4: Execution of Repairs
Whether it involves patching a TPO membrane, resealing flashing, or replacing damaged shingles, the crew will execute the work according to manufacturer specifications. High-quality materials are essential here to ensure the repair lasts.
Step 5: Final Inspection and Clean-up
Once the work is done, a supervisor should inspect the repairs to ensure they meet quality standards. The site should be left clean, with all debris removed.
If you suspect your building needs attention, don’t wait. You can contact us to schedule an assessment.
Types of Commercial Roofs We Repair
Commercial roofing isn’t one-size-fits-all. Different buildings utilize different materials, and each requires specific repair techniques.
TPO and PVC (Thermoplastic Single-Ply)
These white, reflective membranes are popular in Florida because they reflect UV rays and keep cooling costs down. Repairs typically involve heat-welding patches over cuts or punctures. Because these materials rely on hot-air welded seams, they are generally very durable, but older roofs can suffer from seam failure.
EPDM (Rubber Roofing)
EPDM is a durable synthetic rubber roofing membrane. It is often black, though white versions exist. It is excellent at handling hail and thermal shock. Repairs usually involve using specific primers and adhesives to bond patches to the existing rubber.
Modified Bitumen
Mod-bit roofs are asphalt-based and designed for low-slope structures. They are tough and multi-layered. Repairs might involve applying cold adhesives or torch-down techniques to seal cracks or open seams.
Metal Roofing
Metal roofs are incredibly durable but can suffer from rust, loose fasteners, or leaking seams. Repairing a metal roof often involves tightening or replacing screws, applying sealants to seams, or treating rust spots with specialized coatings.
Built-Up Roofing (BUR)
These are the traditional “tar and gravel” roofs. They are composed of alternating layers of bitumen and reinforcing fabrics. Finding a leak on a BUR roof can be tricky because water can travel between layers. Repairs involve removing the gravel, patching the layers, and re-coating.
Preventative Maintenance: The Key to Longevity
The most cost-effective way to handle roof repairs is to prevent them from becoming emergencies. A proactive maintenance plan extends the life of your roof and keeps your warranty valid.
Why Maintenance Plans Work
Most manufacturers require documented maintenance to keep warranties active. If you file a claim for a leak and can’t prove you’ve maintained the roof, the manufacturer may deny the claim.
A maintenance plan typically includes:
- Bi-annual inspections: Usually in the spring and fall.
- Debris removal: Clearing leaves and trash from drains and gutters to prevent ponding.
- Minor repairs: Fixing small issues like caulking voids or loose flashings before they grow.
- Documentation: Keeping a history of the roof’s condition for insurance and resale purposes.
Think of it like an oil change for your car. You wouldn’t drive 100,000 miles without changing the oil; you shouldn’t let your roof go 20 years without a check-up.
How to Choose a Commercial Roofing Contractor in Apopka
Not all roofers are equipped to handle commercial projects. Commercial systems are complex and require specialized knowledge distinct from residential roofing. Here is what you should look for when hiring a partner for business roof maintenance and repair.
1. Local Experience
Choose a company that knows Apopka and Central Florida. They will understand the specific weather challenges and building codes relevant to the area. Local contractors are also more likely to be around if warranty issues arise later.
2. Proper Licensing and Insurance
This is non-negotiable. Ensure the contractor holds a valid Florida roofing license and carries both general liability and workers’ compensation insurance. This protects you from liability if an accident occurs on your property.
3. Manufacturer Certifications
Leading roofing manufacturers (like GAF, Carlisle, or Firestone) offer certifications to contractors who meet strict training and quality standards. Hiring a certified contractor often allows you to access better warranties.
4. References and Portfolio
Ask for examples of similar work. A reputable contractor should be proud to show you their past projects. Reviewing their gallery can give you confidence in their capabilities.
5. Detailed Written Estimates
Avoid contractors who give you a price on the back of a napkin. You need a detailed scope of work that outlines exactly what will be done, what materials will be used, and the total cost. This prevents surprise charges down the road.
Emergency Roof Repair: What to Do When Disaster Strikes
Sometimes, despite your best efforts, a severe storm or sudden failure creates an emergency. If water is pouring into your building:
- Ensure Safety: If water is near electrical panels or equipment, evacuate the area and shut off power if safe to do so.
- Protect Assets: Cover merchandise and equipment with plastic tarps.
- Contain the Water: Use buckets or trash cans to catch the water.
- Call a Professional: Contact a roofing company that offers emergency services immediately.
- Document: Take photos of the damage for your insurance claim.
Do not attempt to go up on the roof during a storm. It is extremely dangerous. Wait for professionals who have the proper safety gear.
The Role of Coatings in Roof Repair
In some cases, you can extend the life of your commercial roof by 10 years or more without a full replacement by using a roof coating system. This is often referred to as a “roof restoration.”
Silicone and Acrylic Coatings
These coatings are applied as a liquid over the existing roof surface. They cure to form a seamless, waterproof barrier.
Benefits include:
- Cost Savings: Coatings are significantly cheaper than a tear-off and replacement.
- Tax Advantages: In many cases, coatings can be expensed as maintenance rather than capitalized as a new asset.
- Cool Roof Properties: White coatings reflect sunlight, lowering roof temperatures and cooling costs.
- Minimal Disruption: The application process is quiet and doesn’t generate the noise and debris of a replacement.
Ask your roofing contractor if your roof is a candidate for restoration. It’s a smart option for commercial roof repair Apopka businesses often overlook.
Understanding Warranties
When you get a roof repair, you want assurance that it will last. There are generally two types of warranties to understand:
Manufacturer Warranty
This covers defects in the roofing materials. For repairs, this usually only applies if you are using approved materials on a roof that is already under warranty.
Workmanship Warranty
This is provided by the contractor and covers errors in installation. A strong workmanship warranty is a sign that the contractor stands behind their work. Be sure to clarify how long the repair is guaranteed.
Navigating Insurance Claims
If your roof damage is the result of a storm, it may be covered by your commercial property insurance. However, navigating commercial claims can be complex.
A good roofing contractor can assist you in this process by:
- Providing detailed damage reports.
- Meeting with the insurance adjuster on-site to ensure all damage is documented.
- Providing accurate estimates that align with industry standards.
Remember, the insurance adjuster works for the insurance company. having a professional roofer on your side ensures your interests are represented.
The Cost of Commercial Roof Repair in Apopka
Costs vary widely depending on the type of roof, the extent of the damage, and the materials required. However, business owners should view these costs in context.
A small leak repair might cost a few hundred to a few thousand dollars. Ignoring that leak can lead to tens of thousands of dollars in structural repairs, mold remediation, and lost business revenue. Investing in quality repairs is always cheaper than the alternative of neglect.
Factors influencing cost include:
- Roof Accessibility: How high is the building? Is special equipment like a crane needed?
- System Type: Some materials are more expensive than others.
- Size of Repair: Obviously, larger areas require more labor and material.
- Moisture Content: If the insulation needs replacing, costs go up.
Conclusion
Your commercial roof is a critical asset that protects your entire business operation. For business owners in Apopka, staying ahead of roofing issues is essential to avoid disruption and unnecessary expense. Whether you are dealing with a sudden leak, aging membranes, or storm damage, timely action is your best defense.
Don’t let a small drip turn into a flood of problems. Prioritize regular inspections, address repairs promptly, and partner with a trusted local professional who understands the nuances of commercial roof repair in Apopka.
If you have concerns about your roof or need to schedule a maintenance check, we are here to help. Visit our homepage to learn more about our services, or contact us today to speak with an expert. Protecting your business starts at the top.
Frequently Asked Questions (FAQs)
How often should I have my commercial roof inspected?
It is recommended to inspect your commercial roof at least twice a year, typically in the spring and fall. You should also schedule an inspection after any major storm event.
Can I fix a commercial roof leak myself?
It is not recommended. Commercial roofing systems are complex, and improper repairs can void warranties and lead to further damage. Professional roofers have the safety equipment and expertise to do the job right.
How long does a commercial roof repair take?
Most minor repairs can be completed in a single day. Larger projects or those requiring extensive material replacement may take several days. Your contractor should provide a timeline with their estimate.
Will a roof repair disrupt my business?
Professional roofers aim to minimize disruption. In many cases, repairs can be done with little noise or interference. Discuss your operating hours with your contractor to plan the work appropriately.
What is the difference between TPO and EPDM roofing?
TPO is a thermoplastic membrane that is usually white and heat-welded. EPDM is a synthetic rubber that is usually black and glued or taped. Both are excellent options, but TPO is often preferred in Florida for its reflective properties.
Does my insurance cover commercial roof leaks?
Insurance typically covers sudden and accidental damage, such as that from a storm. It usually does not cover damage resulting from wear and tear or lack of maintenance. Review your policy and consult your agent for specifics.
How do I know if I need a repair or a replacement?
If more than 25% of the roof is damaged, or if the insulation is saturated, replacement is often more cost-effective. A professional inspection involving core cuts or infrared scans can give you the data you need to decide.
What are the signs of a failing commercial roof?
Look for interior water stains, bubbling paint, musty odors, or visible damage on the roof surface like cracks, blisters, or ponding water. High energy bills can also indicate wet insulation.
Can you repair a roof while it is raining?
Permanent repairs generally require a dry surface. However, emergency temporary seals can often be applied during rain to stop water intrusion until the weather clears and a permanent fix can be made.
Why is there standing water on my flat roof?
Standing water, or ponding, is usually caused by clogged drains, sagging structures, or crushed insulation. It is a serious issue that can degrade the roof membrane and should be addressed by a professional.
Additional Resources
For more information on how we handle different roofing challenges, visit our roof repairs page. We pride ourselves on transparency and quality, ensuring your business stays dry and secure regardless of the weather.

When your roof needs attention, whether it’s a minor repair or a full replacement, you’re faced with a big decision: who do you hire? The Apopka market, like many across Florida, has a mix of options, from large, nationally recognized chain companies with slick advertising to established local businesses built from the ground up. While big chains might offer a sense of familiarity, the advantages of partnering with a local roofing company are profound, impacting everything from the quality of the work to your overall customer experience.
Choosing a roofer is about more than just shingles and nails; it’s about entrusting the safety and integrity of your home to a team of professionals. For homeowners in Apopka, the benefits of hiring a local company go far beyond a simple transaction. It’s an investment in your community, a vote for accountability, and a choice for personalized service that understands your specific needs. This guide will explore why local roofing companies in Apopka consistently deliver superior value compared to their large, impersonal chain counterparts.
Understanding the Difference: Local vs. National Chains
Before diving into the benefits, it’s important to understand the fundamental differences in their business models.
- National Roofing Chains: These are large corporations, often with a headquarters in another state and branch offices or franchise locations across the country. Their operations are standardized, their marketing budgets are huge, and they often rely on a high volume of jobs. The crews that perform the work may be subcontractors who travel from region to region, and the person you speak with on the phone might be in a call center hundreds of miles away.
- Local Roofing Companies: These are businesses owned and operated by people who live in or near the communities they serve. Their team, from the owner to the installers, is part of the local fabric. Their business model is built on reputation, word-of-mouth referrals, and a deep, personal commitment to the quality of their work. A company like HW Roofing is a prime example of a business rooted in the Central Florida community.
While both can put a roof on a house, their approach, philosophy, and ultimate value proposition are vastly different.
Benefit #1: Unmatched Local Expertise and Climate Knowledge
Apopka’s climate is a formidable adversary for any roof. The intense, year-round UV radiation, high humidity, torrential downpours, and the constant threat of hurricanes place unique demands on roofing materials and installation techniques. This is where local roofers have a distinct, undeniable advantage.
Understanding Florida’s Weather Challenges
Local roofing companies in Apopka have spent years, often decades, working under the same sun and through the same storm seasons as you. They have firsthand experience with what works and what doesn’t in our specific environment.
- Heat and UV Resistance: Local experts know which shingle brands and colors perform best under relentless UV exposure, resisting fading and premature aging. They understand the critical importance of proper attic ventilation to prevent heat buildup that can literally “cook” shingles from the inside out.
- Humidity and Moisture Control: Apopka’s humidity is a breeding ground for algae (which causes black streaks) and mold. Local roofers are familiar with the best algae-resistant shingles and the proper installation of underlayment and moisture barriers to prevent water intrusion and subsequent mold growth in your attic.
- Hurricane Preparedness: This is perhaps the most critical area of local expertise. Local roofers are intimately familiar with Florida’s stringent building codes, which are some of the toughest in the nation for wind mitigation. They know the specific nailing patterns, flashing techniques, and roofing system components required to build a roof that can withstand hurricane-force winds. A national chain might follow a generic “one-size-fits-all” installation guide, but a local expert installs a roof specifically for Florida’s reality.
A big chain might send in a crew from a state with a completely different climate. They may not have the ingrained, practical knowledge of how to fortify a roof against the specific challenges we face in Central Florida.
Benefit #2: Superior Accountability and Reputation Management
When you hire a local roofer, you are hiring a neighbor. Their name and reputation are on the line with every single job they complete in the community.
The Power of Local Reputation
A local business thrives on positive word-of-mouth and community trust. A bad review or a poorly handled job can significantly damage their business, as their customer base is concentrated in a specific geographic area. This creates a powerful incentive for them to deliver exceptional work and outstanding customer service.
- You Know Where to Find Them: If a problem arises with your roof repairs a year after the job is done, you know exactly where to go. The owner of a local company likely has a physical office in the area and a direct stake in resolving the issue to protect their reputation.
- Personal Investment: The owner of a local roofing company isn’t an anonymous corporate executive in another state. Their name is often on the truck. They attend local events, their kids might go to the same schools as yours, and they are invested in the well-being of the community. This personal connection fosters a higher level of care and accountability.
A large national chain, on the other hand, operates on a much larger scale. A negative review in Apopka is just a small drop in a very large bucket for them. The crew that worked on your house might be in another state by the time you discover an issue, and resolving a problem can mean navigating a frustrating maze of corporate call centers and bureaucratic red tape. With a local company, you can often speak directly to the owner.
Benefit #3: Personalized Service and Direct Communication
With a local roofing company, you are a valued client, not just another job number in a national database. This difference is felt most strongly in the quality of communication and the level of personalized service you receive.
A Customer-Centric Approach
- Direct Access to Decision-Makers: When you have a question or concern, you are more likely to be speaking with the project manager or even the owner of the company. They are empowered to make decisions and provide answers quickly, without needing to “check with corporate.”
- Flexibility and Customization: Local roofers can be more flexible and willing to work with you to find customized solutions that fit your specific needs and budget. A national chain often has rigid processes and service packages that allow for little deviation.
- Consistent Point of Contact: Throughout the process, from the initial inspection to the final walk-through, you will likely deal with the same small team of people. This consistency builds trust and ensures that nothing gets lost in translation, which can easily happen when a project is passed between different departments of a large corporation (sales, scheduling, installation, billing).
When you contact us at a local company, you’re starting a relationship. With a national chain, you’re often just starting a service ticket.
Benefit #4: Investing in the Local Apopka Economy
When you choose to spend your money with a local business, a significantly larger portion of that money stays within your community. This has a powerful, positive ripple effect on the local economy.
The Local Multiplier Effect
Studies have consistently shown that local businesses recirculate a greater share of their revenue back into the local economy compared to chains.
- Supporting Local Jobs: Local roofing companies hire local people—your neighbors and friends. This creates stable employment opportunities within Apopka.
- Local Supply Chains: They are more likely to use other local businesses for their needs, such as local accountants, marketing agencies, and material suppliers.
- Community Support: Local business owners are often deeply involved in the community, sponsoring local sports teams, participating in city events, and contributing to local charities.
When you hire a local roofer, you are not just fixing your roof; you are contributing to the economic health and vitality of Apopka. The profits from a national chain, conversely, are funneled back to a corporate headquarters in another state and distributed to shareholders across the country.
Benefit #5: Quality Over Quantity
The business models of local and national companies often lead to a different focus. For many large chains, the primary metric of success is volume—completing as many jobs as possible. For local companies, the focus is on quality—ensuring every job is a testament to their craftsmanship.
Focus on Craftsmanship
- Experienced, Stable Crews: Trusted local roofing experts tend to have dedicated, long-term employees rather than relying on a rotating cast of subcontractors. These experienced crews work together day in and day out, leading to better communication, efficiency, and a more consistent, high-quality result. You can see the pride they take in their work in their project gallery.
- No Rushing to the Next Job: Because their reputation is paramount, local roofers are more likely to take the necessary time to do the job right, rather than rushing to get to the next house on a long list. They will ensure flashing is meticulously installed, decking is properly inspected, and the cleanup is thorough.
- Owner Oversight: It’s not uncommon for the owner of a local company to personally visit the job site to inspect the progress and ensure their high standards are being met. This level of personal oversight is virtually non-existent in a large chain structure.
Spotting the Difference: Is That “Local” Company Really Local?
Some national chains and storm-chasing companies are skilled at appearing local. They might use a local phone number or P.O. box. Here’s how to tell the difference:
- Ask for a Physical Address: A true local business will have a physical office or workshop in the area.
- Check Their History: How long have they been serving the Apopka community? A company that has been around for 10+ years is clearly established.
- Look for Community Involvement: Check their website or social media for evidence of local engagement.
- Verify Their License: Check their Florida license details on the DBPR website. It will show their official business address.
Your Home Deserves a Local Touch
When it comes to protecting your most valuable asset, the choice is clear. While a national chain may offer a familiar logo, a local roofing company offers a superior combination of specialized expertise, direct accountability, personalized service, and a commitment to your community. They understand the unique challenges of your Apopka home because it’s their home, too.
By choosing a local company, you are investing in a higher standard of craftsmanship and a relationship built on trust. You are choosing a partner who will be there for you long after the job is done, standing behind their work and their warranty.
At HW Roofing, we are proud to be a part of the Apopka community. Our reputation is built on the foundation of every roof we have repaired and replaced for our neighbors. We combine our deep understanding of Florida’s climate with an unwavering commitment to quality and customer satisfaction. When you need a roofing partner you can trust, look no further than your own backyard. Contact us today for a free, no-obligation inspection and experience the local difference for yourself.

Hiring a contractor to repair or replace your roof is one of the most important decisions you will make for your home. Your roof is the primary shield protecting your family and your property from the elements, especially in a place like Apopka, Florida, where it must endure intense sun, torrential rain, and hurricane-force winds. The quality of that shield depends heavily on the skill and integrity of the person who installs it.
Unfortunately, many well-intentioned homeowners fall into common traps during the hiring process. These mistakes can lead to disastrous outcomes, including shoddy workmanship, voided warranties, unexpected costs, and even legal liabilities. A decision made in haste or based on the wrong criteria can turn a necessary home improvement project into a long and expensive nightmare.
This guide will illuminate the top mistakes homeowners make when hiring a roofer. By understanding these pitfalls, you can arm yourself with the knowledge to navigate the selection process confidently and choose a truly professional, reliable contractor who will protect your home for years to come.
Mistake #1: Making Price the Only Deciding Factor
It’s natural to be budget-conscious, and a new roof or a major repair is a significant investment. However, one of the most frequent and costly mistakes is choosing a contractor based solely on the lowest bid. In the roofing industry, an unusually low price is almost always a major red flag, signaling that corners are being cut somewhere.
The Hidden Costs of a “Cheap” Roof
A bid that is significantly lower than the competition often means the contractor is compromising on critical aspects of the job:
- Substandard Materials: They may be using lower-grade shingles, thinner underlayment, or cheaper flashing materials that will not stand up to Florida’s harsh climate and will fail prematurely.
- Unskilled Labor: A low price can be a sign that the contractor is using an inexperienced or untrained crew. Proper roofing installation is a craft that requires precision. Improper nailing, faulty flashing installation, and poor sealing are common with unskilled labor and are the leading causes of roof leaks.
- Lack of Insurance: This is a huge liability. A contractor who doesn’t have to pay for proper liability and workers’ compensation insurance can offer a much lower price. However, this puts all the risk directly on you, the homeowner. If a worker is injured on your property, you could be held financially responsible.
- Cutting Corners on Safety: They may not invest in proper safety equipment for their crew, creating a dangerous work environment on your property.
- No Overhead or Longevity: The roofer might be a “fly-by-night” operator working out of a truck with no physical office or support staff. They have no long-term commitment to the community and will be nowhere to be found when their cheap repair fails in a year.
The Right Approach to Cost
Instead of just looking at the bottom-line number, evaluate the overall value. A quality roof is an investment, not an expense. A slightly higher price from a reputable contractor buys you superior materials, expert installation, comprehensive insurance coverage, and a solid workmanship warranty. This is the combination that provides real, long-term value and peace of mind. A cheap roof often becomes the most expensive one when you have to pay a professional to tear it off and do the job correctly a few years later.
Mistake #2: Failing to Verify Licensing and Insurance
This is a non-negotiable step that far too many homeowners skip. They either feel awkward asking for credentials or simply assume that anyone with a truck and a ladder is a legitimate business. This assumption can have devastating consequences.
Why Credentials Are Your First Line of Defense
- State Licensing: In Florida, a roofing contractor must hold a state-certified license from the Department of Business and Professional Regulation (DBPR). This license proves the contractor has passed competency exams, demonstrated financial stability, and has a clean professional record. Hiring an unlicensed contractor is illegal and leaves you with zero recourse if the work is subpar.
- General Liability Insurance: This policy protects your property. If a roofer accidentally damages your siding, breaks a window, or causes a leak that damages your home’s interior during the job, their liability insurance covers the repair costs. Without it, you would have to pay out of pocket or file a claim on your own homeowner’s insurance.
- Workers’ Compensation Insurance: This is arguably the most critical protection for a homeowner. It covers the medical bills and lost wages of any worker injured on the job. If you hire a roofer without it and one of their employees falls from your roof, you could be sued personally and held liable for their extensive medical costs. This is a life-altering financial risk.
How to Verify Credentials
Do not just take their word for it. A professional contractor will be happy to provide documentation.
- Ask for the license number and verify it on the DBPR website.
- Request a certificate of insurance for both general liability and workers’ compensation.
- Call the insurance provider listed on the certificate to confirm the policy is active and has sufficient coverage limits.
At HW Roofing, we are a fully licensed and insured company, and we encourage all homeowners to perform this vital due diligence.
Mistake #3: Not Getting a Detailed, Written Contract
A verbal agreement or a one-page estimate with a price scrawled on it is not a contract. A vague agreement is a recipe for misunderstandings, surprise charges, and disputes. Any professional roofer will provide a comprehensive, detailed contract before any work begins.
What a Proper Contract Must Include
Your contract is a legal document that should protect both you and the contractor. Insist that it contains the following details:
- Full Scope of Work: A detailed description of all work to be performed, including tear-off of old materials, decking inspection and potential replacement costs, installation of new underlayment, shingles, flashing, and ventilation.
- Specific Materials: The contract should list the exact materials to be used, including the manufacturer, brand name, and color of the shingles and other components.
- Itemized Costs: A breakdown of costs for labor, materials, and permits.
- Payment Schedule: A clear schedule outlining when payments are due (e.g., deposit, progress payments, final payment upon completion).
- Project Timeline: An estimated start date and completion date.
- Warranty Information: Details on both the manufacturer’s material warranty and the contractor’s workmanship warranty.
- Cleanup and Debris Removal: A clause stating that the contractor is responsible for cleaning the job site and hauling away all debris.
- Proof of Insurance and Licensing: The contractor’s license number should be on the contract.
Read the entire contract carefully before signing. If you don’t understand something, ask for clarification. If a contractor is hesitant to put these details in writing, walk away.
Mistake #4: Ignoring the Importance of a Local Presence
After a major hurricane or hailstorm, you will see an influx of “storm chasers.” These are out-of-state roofing companies that travel to disaster areas, go door-to-door, and pressure homeowners into signing contracts for quick, often subpar, repairs.
The Dangers of “Storm Chasers”
- No Accountability: Once they have completed the work in an area and collected their money, they are gone. When your new roof starts leaking six months later, their phone number is disconnected, and you have no one to call.
- Lack of Local Knowledge: They are unfamiliar with Apopka’s specific building codes, permitting processes, and climate requirements.
- Warranty Issues: Any workmanship warranty they offer is worthless if the company no longer exists or is based a thousand miles away.
The Advantage of Local Roofing Experts
Choosing an established, local roofing company offers immense benefits. A contractor with a physical office and a long history in the Apopka community has a vested interest in protecting their reputation. They are your neighbors. They will be here for you years down the road to honor their warranty and answer your call if a problem arises. They understand the local environment and build roofs designed to withstand it.
Mistake #5: Disregarding Online Reviews and References
In today’s digital world, it is easier than ever to research a company’s reputation. Ignoring this valuable resource is a significant oversight.
How to Properly Vet a Contractor’s Reputation
- Check Multiple Review Sites: Look at Google, the Better Business Bureau (BBB), Yelp, and other third-party review platforms. Don’t just look at the star rating; read the content of the reviews.
- Look for Patterns: Are customers consistently praising the company’s communication, professionalism, quality of work, and cleanup? Or are there recurring complaints about missed deadlines, surprise fees, or poor service?
- Ask for References: A reputable contractor should be able to provide you with a list of recent customers you can contact. Ask these references about their overall experience, whether the job was completed on time and on budget, and if they would hire the contractor again.
- View Past Work: A portfolio of completed projects is a great way to assess the quality of a contractor’s work. A professional company will be proud to show you a gallery of their projects.
Mistake #6: Making a Large Upfront Payment
A common scam involves a “roofer” asking for a large down payment—often 50% or more—and then disappearing with the money, never to be seen again.
Safe Payment Practices
While it is standard practice for a contractor to require a deposit to cover the initial cost of materials (typically 10-30%), you should never pay the majority of the project cost upfront. The final payment should only be made after the work is 100% complete, the job site has been cleaned, and you have performed a final walk-through with the project manager and are fully satisfied. Pay with a check or credit card, not cash, as this provides a verifiable record of payment.
Your Home Deserves a Professional
Hiring a roofing contractor is a decision that will impact your home’s safety and value for decades. By avoiding these common mistakes, you can protect yourself from the stress and financial loss of a bad hire. The process is one of due diligence: take your time, do your research, and trust your instincts.
Your goal should be to find a partner for your home—a licensed, insured, and reputable local expert who uses quality materials, provides expert craftsmanship, and stands behind their work with a strong warranty.
At HW Roofing, we have built our business on a foundation of transparency, quality, and customer trust. We invite you to put us to the test. Ask us for our credentials, check our reviews, and let us provide you with a detailed, no-pressure estimate for your roof repairs or replacement. Contact us today and experience the peace of mind that comes from working with true professionals who are dedicated to protecting your Apopka home.

When you invest in a new roof or a significant roof repair for your Florida home, you are buying more than just shingles and nails; you are investing in protection and peace of mind. A crucial component of that peace of mind comes from the warranties that back the materials and the installation. However, roofing warranties can be complex documents filled with specific terms, conditions, and exclusions that are not always easy to understand.
In a state like Florida, where roofs are constantly challenged by intense UV rays, high humidity, and the annual threat of hurricanes, a strong warranty is not a luxury—it’s a necessity. Understanding how roofing warranties in Florida work is essential for protecting your investment and ensuring you have recourse if something goes wrong. A warranty is your assurance that the manufacturer and the contractor stand behind their product and their work.
This comprehensive guide will break down the different types of roofing warranties, explain what they typically cover (and what they don’t), and provide crucial tips for Florida homeowners. Knowing what to look for will help you choose a reputable contractor and ensure your warranty remains valid for its entire term, giving you confidence in the roof over your head.
The Two Pillars of Roof Protection: Types of Warranties
When you get a new roof, you are typically protected by two distinct types of warranties that work in tandem. It is vital to understand the difference between them, as each covers different aspects of your roofing system.
1. The Manufacturer’s Warranty (Material Warranty)
This warranty is provided by the company that manufactured the roofing materials, such as the shingles, tiles, or metal panels. Its primary purpose is to guarantee that the product itself is free from defects.
What Does a Manufacturer’s Warranty Cover?
A standard material warranty covers premature failure due to a manufacturing defect. For example, if a batch of asphalt shingles was produced improperly and begins to crack, curl, or lose granules excessively within the warranty period, the manufacturer would be responsible.
Key aspects of a manufacturer’s warranty include:
- Defective Materials: This is the core of the coverage. The warranty protects you if the materials themselves are faulty.
- Prorated vs. Non-Prorated Periods: Many warranties have two phases.
- Non-Prorated Period: This is the initial, “upfront” coverage period, often lasting 5 to 20 years. During this time, if there is a defect, the manufacturer may cover the full cost of new materials and sometimes even the labor to install them. This is the most valuable part of the warranty.
- Prorated Period: After the non-prorated period ends, the warranty’s value begins to decrease over time. If a defect occurs during this phase, the manufacturer will only cover a portion of the material cost, based on how long the roof has been in service. The homeowner is responsible for the remaining material cost and all labor costs.
- Wind and Algae Resistance: Many shingle warranties include specific coverage for wind damage up to a certain speed (e.g., 110 mph or 130 mph) and for algae growth (the blue-green streaks you see on some roofs) for a set number of years. These are particularly important features for Florida homeowners.
Extended Manufacturer Warranties
Leading roofing manufacturers often offer enhanced or extended system warranties when you use a contractor who is certified by them. These premium warranties can provide much more comprehensive protection. For example, an extended warranty might offer a longer non-prorated period (up to 50 years in some cases) and cover not just the shingles but the entire roofing system, including the underlayment, ridge caps, and starter strips. Crucially, these top-tier warranties often include coverage for the workmanship (labor) to fix the issue, which is a significant upgrade over a standard material-only warranty.
To qualify for these enhanced warranties, the roof must be installed by a factory-certified contractor using a specific combination of the manufacturer’s products. This is a powerful reason to hire trusted roofing experts who hold these certifications.
2. The Contractor’s Workmanship Warranty (Labor Warranty)
This warranty is provided directly by the roofing company that installs your roof. It is arguably the most important warranty for a homeowner, because government and industry data consistently show that the vast majority of roof failures and leaks are caused by improper installation, not defective materials.
What Does a Workmanship Warranty Cover?
A workmanship warranty covers any errors made during the installation process. If your roof leaks because of improperly installed flashing, incorrectly nailed shingles, or faulty sealing, the contractor is responsible for coming back to fix the problem at no cost to you.
Key aspects of a workmanship warranty include:
- Installation Errors: This covers any and all mistakes made by the installation crew. This includes everything from poor nailing to misaligned shingles and improper flashing details around chimneys and vents.
- Duration: The length of a workmanship warranty is a strong indicator of a contractor’s confidence in their own work. Warranties can range from as little as 1-2 years to 10, 25 years, or even a lifetime guarantee. A company offering a long-term warranty is showing that they build roofs to last and are willing to stand behind their quality for the long haul.
- Scope of Coverage: A good warranty will clearly state that the contractor will provide the labor and materials necessary to correct the issue and repair any interior damage that resulted directly from the installation fault.
A contractor with a strong, long-term workmanship warranty and a physical presence in the Apopka area is a contractor who is accountable. This is why choosing an established local roofing company is so critical. They have a reputation to uphold in the community and will be there to honor their warranty if you need them.
Reading the Fine Print: What to Look for in Your Florida Warranty
A warranty is a legal document. Before you sign a contract, you must read and understand the warranty terms. Don’t just take a salesperson’s word for what is covered.
Key Clauses and Exclusions to Be Aware Of:
- “Acts of God”: Standard warranties almost never cover damage from severe weather events that exceed specified limits. For example, while a shingle might be rated for 130 mph winds, a Category 4 or 5 hurricane with 157+ mph winds would be considered an “Act of God,” and the damage would fall under your homeowner’s insurance policy, not the warranty. Similarly, damage from hail, lightning strikes, or falling trees is not covered.
- Improper Maintenance: Your warranty will require you to perform reasonable maintenance on your roof. This includes keeping it clean of debris (leaves, pine needles, branches) that can trap moisture and cause premature deterioration. If you neglect your roof and damage occurs as a result, the manufacturer or contractor can void your warranty.
- Unauthorized Alterations or Repairs: If you install a satellite dish, a solar panel, or anything else that penetrates the roof membrane after the initial installation, you can void your warranty. The same goes for hiring a different, uncertified roofer to perform a repair. Any modifications or roof repairs should be done by the original, warranting contractor to keep your coverage intact.
- Improper Ventilation: Most manufacturers require that the roof have proper attic ventilation that meets building codes. An unventilated or poorly ventilated attic traps heat and moisture, which can “cook” the shingles from below and drastically shorten their lifespan. A reputable contractor will assess your ventilation and ensure it is adequate as part of the roofing project. If not, your material warranty could be void from day one.
- Transferability: If you plan to sell your home, check if the warranty is transferable to the new owner. Some warranties are, but often for a fee and with specific notification requirements. A transferable warranty can be a significant selling point for your home.
How Florida’s Climate and Regulations Impact Your Warranty
Florida’s unique environment makes a robust warranty even more vital. Here’s why:
- Hurricane-Force Winds: Florida has some of the strictest building codes in the country, especially regarding wind resistance. Your roof must be installed to meet these codes. A manufacturer’s wind warranty is only valid if the shingles are installed precisely according to their specifications for high-wind areas. This often means more nails per shingle and specific sealing techniques. A workmanship warranty is your protection against a contractor cutting corners on these critical details.
- Intense UV Radiation: The relentless Florida sun beats down on roofs, causing materials to degrade faster than in cooler climates. A good manufacturer’s warranty with a long non-prorated period gives you protection against premature aging caused by defects that are accelerated by UV exposure.
- High Humidity and Algae Growth: The humid climate is a perfect breeding ground for Gloeocapsa magma, the algae that causes unsightly black streaks on roofs. Many modern shingles come with algae-resistant technology and a warranty against this staining for a period (e.g., 10-15 years). This is an aesthetic but important feature for maintaining your home’s curb appeal, which you can see matters in our gallery of beautiful homes.
Maximizing and Maintaining Your Roofing Warranty: A Homeowner’s Checklist
You have a role to play in ensuring your warranty remains valid. Follow these steps to protect your investment:
- Hire the Right Contractor: This is the most important step. Choose a licensed, insured, and reputable local roofing company with a long track record in Apopka. Ask for proof of their certifications from manufacturers. A quality installation is the foundation of a valid warranty.
- Get Everything in Writing: Do not rely on verbal promises. Ensure that both the manufacturer’s material warranty and the contractor’s workmanship warranty are fully detailed in your contract. Keep a copy of the contract, the warranty documents, and your final paid invoice in a safe place.
- Register Your Warranty: Some manufacturers require you or your contractor to register the warranty within a specific timeframe after installation. Make sure this step is completed to activate your coverage.
- Schedule Regular Inspections: Have your roof professionally inspected every 1-2 years, and especially after a major storm. This allows you to catch small issues before they become major problems and shows that you are proactively maintaining your roof, which can be important in a warranty claim.
- Keep Records of Maintenance and Repairs: If you have your gutters cleaned or have the contractor come out for an inspection, keep the receipts. This documentation serves as proof of proper maintenance.
- Do Not Perform DIY Repairs: As tempting as it may be to fix a small issue yourself, it’s one of the fastest ways to void your warranty. If you suspect a problem, call the professional contractor who installed your roof.
- Act Quickly if You Spot a Problem: If you see signs of a leak or damage, contact us or your original installer immediately. Allowing a problem to fester can lead to more extensive damage and could potentially compromise your warranty claim by being labeled as neglect.
Your Warranty is Your Promise of Quality
A roofing warranty is more than just a piece of paper. It is a legally binding promise of quality and performance from both the material manufacturer and the installation contractor. In a challenging climate like Florida’s, this promise is your ultimate safety net, protecting you from the financial burden of premature roof failure.
By understanding the difference between material and workmanship coverage, carefully reading the fine print, and choosing a certified, reputable contractor who offers a strong labor guarantee, you can ensure your roof is protected for decades. The peace of mind that comes from a comprehensive warranty is an invaluable part of your investment in a new roof.
At HW Roofing, we are proud to be factory-certified installers for leading manufacturers, allowing us to offer our Apopka customers the best-enhanced warranties in the industry. More importantly, we stand behind every job with our own robust workmanship warranty, because we build our roofs to last. If you have questions about roofing warranties or need a professional assessment of your current roof, we are here to help.
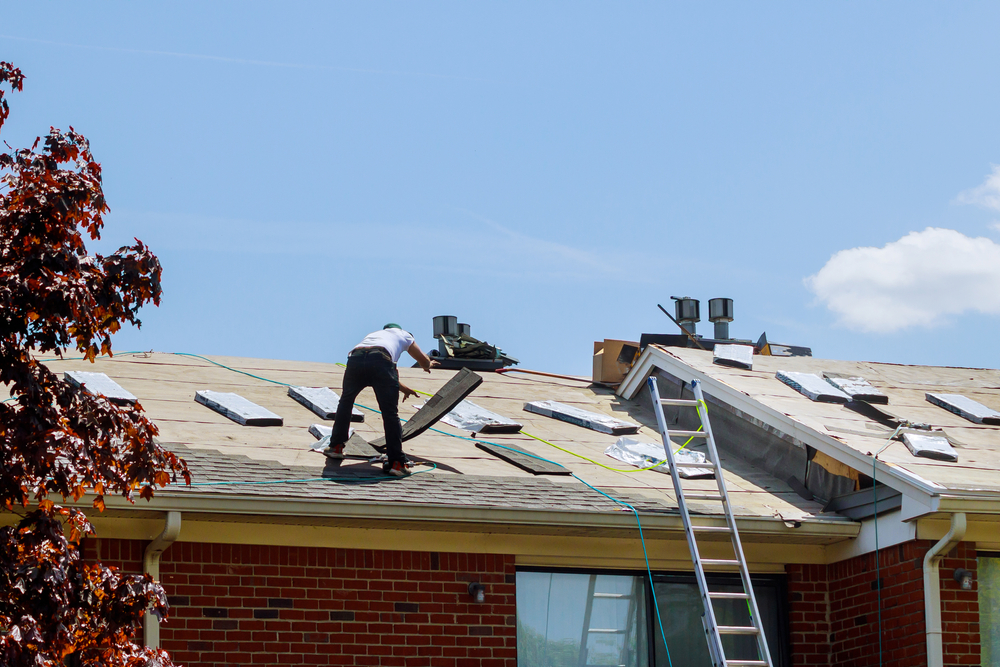
Scheduling a roof repair can feel a bit uncertain, especially if you’ve never done it before. You know there’s a problem, but what exactly will the professionals do when they arrive? Understanding the process from start to finish can demystify the experience, reduce stress, and help you know what to look for in a quality service provider. A professional roof repair isn’t just about patching a leak; it’s a systematic process designed to accurately diagnose, effectively treat, and durably protect your Apopka home.
Knowing what a professional roof repair appointment entails allows you to prepare your home, ask the right questions, and feel confident in the work being done above your head. From the initial inspection to the final cleanup, every step is crucial for a successful and lasting repair.
This guide will walk you through each phase of a typical roof repair appointment with a team of local roofing experts. We’ll cover the detailed inspection, the repair itself, and the final steps that ensure your satisfaction and your home’s long-term safety.
Phase 1: The Initial Call and Scheduling
Your experience begins the moment you realize you need help. Perhaps you’ve noticed a water stain on your ceiling, found shingle granules in your gutters, or a recent storm has left visible damage. The first step is to reach out to a trusted, local roofing company.
When you contact us, you should be prepared to provide some basic information:
- Your name, address, and contact details.
- A brief description of the problem you’ve noticed. (e.g., “I have a leak in my master bedroom,” or “I’m missing some shingles on the back of my house.”)
- The age of your roof, if you know it.
- Any immediate concerns, such as an active, severe leak.
A professional customer service representative will listen to your concerns, document the details, and schedule an appointment for an inspection. In cases of emergency, like a major leak during a storm, a reputable company will prioritize your call and try to dispatch a team as quickly as possible to perform temporary mitigation, such as tarping the roof to prevent further interior damage. This initial interaction sets the tone for the entire experience. Clear, empathetic, and organized communication from the start is a sign you’re dealing with a customer-focused company.
Phase 2: The Comprehensive Inspection
The most critical part of any roof repair process in Apopka is the inspection. A roofer who recommends a solution without a thorough assessment is simply guessing. A true professional acts like a detective, gathering clues from all over your roofing system to identify the root cause of the issue, not just its symptoms.
Here’s what a comprehensive inspection should involve:
Exterior Roof Inspection
The contractor will safely access your roof to perform a hands-on examination. They are not just looking for the obvious source of your leak; they are assessing the overall health of your entire roof.
- Surface Analysis: The inspector will walk the roof, checking for cracked, blistering, curling, or missing shingles. They’ll look for areas with significant granule loss, which indicates that the shingles are aging and becoming brittle.
- Checking Penetrations: The most common sources of leaks are the points where something penetrates the roof deck. The inspector will pay close attention to the flashing and seals around chimneys, vent pipes, skylights, and attic vents. Deteriorated or improperly installed flashing is a primary culprit for water intrusion.
- Valleys and Drip Edge: They will inspect the roof valleys (where two roof planes meet) for signs of wear, as these areas handle a large volume of water. They will also check the drip edge along the eaves to ensure it’s secure and effectively directing water into the gutters.
- Identifying Debris and Organic Growth: The inspector will note any accumulation of leaves and debris that could be trapping moisture, as well as the presence of algae, moss, or lichen, which can degrade shingle integrity over time.
Interior Attic Inspection
What happens inside your attic tells a huge part of the story. A professional will always ask to look inside your attic, as it provides undeniable evidence of a leak’s history and severity.
- Looking for Water Stains: The inspector will use a flashlight to scan the underside of the roof deck for dark stains, streaks, or discoloration, which pinpoint the area of water entry.
- Checking for Rot and Mold: They will examine the wood decking, rafters, and joists for any signs of softness, rot, or mold growth. Damp, rotting wood is a serious structural concern that must be addressed.
- Inspecting Insulation: Wet, compressed, or stained insulation is a clear sign of a leak. The inspector will check the state of your insulation, as water-damaged insulation loses its R-value and can become a breeding ground for mold.
- Assessing Ventilation: The inspector will also check for proper attic ventilation (soffit and ridge vents). An improperly ventilated attic can trap heat and moisture, leading to premature aging of your shingles and contributing to mold growth.
The Diagnosis and Recommendation
After completing the interior and exterior inspections, the professional will sit down with you to discuss their findings. This is a crucial communication point. A good contractor will:
- Show You the Evidence: They should have photos or videos of the problem areas to show you exactly what they found. This transparency helps you understand the issue and validates their recommendation.
- Explain the Problem Clearly: They will explain the root cause of the problem in simple, easy-to-understand terms, avoiding overly technical jargon.
- Present Your Options: Based on the findings, they will recommend a course of action. This could be a specific roof repair, a more extensive repair, or in cases of advanced age and widespread damage, a full roof replacement. They should explain the pros and cons of each viable option.
- Provide a Detailed Estimate: You will receive a written, itemized estimate that clearly outlines the scope of the proposed work, the materials to be used, and the total cost. There should be no hidden fees or vague line items.
This consultation is your opportunity to ask questions. Don’t hesitate to ask about the materials they plan to use, the techniques they will employ, and the warranty they offer on their work.
Phase 3: The Repair Work
Once you approve the estimate and schedule the work, the repair team will arrive to execute the plan. A professional crew operates with efficiency, safety, and respect for your property.
Preparation and Safety
Before any work begins, the crew will prepare the area.
- Property Protection: They may lay down tarps to protect your landscaping, siding, and driveway from debris. They will also take care to move or cover any patio furniture or other items near the work area.
- Safety Setup: The crew will establish a safe work zone. This includes proper ladder placement and, for steeper roofs, setting up safety harnesses and fall protection systems. Safety is the hallmark of a professional operation.
Executing the Repair
The exact steps of the repair will depend on the problem, but a typical shingle repair process looks like this:
- Removing Damaged Materials: The team will carefully remove the damaged or leaking shingles, as well as any surrounding shingles needed to access the area.
- Inspecting the Underlayment and Decking: With the shingles removed, they will inspect the underlayment and the wooden roof deck beneath. If the underlayment is torn or the decking is soft or rotted, it must be replaced. Simply putting new shingles over a rotted deck is a recipe for failure. This step is critical and is often where DIY repairs go wrong.
- Replacing Components: The crew will cut and install new decking and/or ice and water shield/underlayment as needed to create a sound, watertight foundation for the repair.
- Installing New Flashing (if necessary): If the leak was caused by faulty flashing, the old flashing will be removed and new, custom-fit flashing will be installed and sealed correctly.
- Installing New Shingles: New shingles that match your existing roof as closely as possible will be installed. A professional roofer knows the correct nailing pattern and technique to ensure the shingles are secure and properly sealed to resist wind and water.
- Sealing and Finishing: All seams and penetration points in the repair area will be professionally sealed with high-grade roofing sealant for an extra layer of protection.
Throughout this process, a professional team works efficiently and methodically. You can see examples of the clean, integrated work of a professional repair in our project gallery.
Phase 4: Communication and Final Cleanup
A job isn’t finished just because the last shingle is nailed down. The final steps are what separate a truly professional contractor from an average one.
Thorough Cleanup
A reputable roofing company respects your property and will leave it as clean as they found it, if not cleaner.
- Debris Removal: All old materials, stray nails, and project debris will be collected and hauled away.
- Magnetic Sweeping: The crew will use a powerful magnet on wheels to sweep your lawn, driveway, and walkways to pick up any stray nails that could otherwise end up in your tires or underfoot. This is a critical step for your family’s safety.
- Final Walk-Around: A final inspection of the ground area ensures that all tools and debris have been removed.
The Final Walk-Through
Once the work and cleanup are complete, the project manager or crew lead should conduct a final walk-through with you.
- Review of Work: They will show you the completed repair, explain what was done, and may provide after-photos for your records.
- Answering Questions: This is your chance to ask any final questions you might have about the repair, maintenance, or the warranty.
- Processing Final Payment: The final payment is typically collected only after you have confirmed your satisfaction with the completed job.
What to Prepare For as a Homeowner
To ensure the repair day goes as smoothly as possible, there are a few things you can do to prepare:
- Clear the Area: Move vehicles out of the driveway and clear any items like grills, toys, or potted plants away from the immediate perimeter of your house.
- Secure Pets: The noise and activity can be stressful for pets. It’s best to keep them securely inside for the duration of the work.
- Anticipate Noise: Roof repair is a noisy process. There will be banging and sounds of people walking on the roof. You may want to plan to run errands or work from a quieter part of the house if you are sensitive to noise.
- Protect Valuables Inside: The vibrations from work on the roof can sometimes cause pictures or items on shelves to shift. It’s a good idea to secure or temporarily take down any fragile items hanging on exterior walls.
The Professional Difference: Peace of Mind
Navigating a professional roof repair appointment is straightforward when you partner with a contractor who values communication, safety, and quality. From the detailed initial inspection to the meticulous final cleanup, every step is designed to provide you with a durable solution and a positive customer experience.
By understanding what to expect, you can move forward with confidence, knowing that your Apopka home is in the hands of skilled professionals. A well-executed repair by local roofing experts not only fixes the immediate problem but also protects your home’s structural integrity and your family’s safety for years to come.
If you’re facing a roofing issue, don’t settle for uncertainty or guesswork. Choose a team that provides a clear, transparent, and professional process from start to finish. Contact us today to schedule your comprehensive roof inspection and experience the peace of mind that comes with hiring true professionals.

Your roof is arguably the most important feature of your Apopka home, providing critical protection from Florida’s intense sun, heavy rains, and seasonal hurricanes. When it needs repair, the contractor you hire is just as important as the materials they use. Choosing the wrong roofer can lead to shoddy work, recurring leaks, voided warranties, and even legal trouble. The right contractor, however, will provide peace of mind, quality craftsmanship, and a durable repair that stands the test of time.
With so many options out there, how do you sort through them all to find the best roof repair contractor in Apopka? This decision shouldn’t be made lightly. You need a partner who is trustworthy, skilled, and reliable. This comprehensive guide will walk you through the essential steps to vetting and selecting a roofing professional. We will cover everything from verifying credentials to spotting red flags, empowering you to hire with confidence and protect your most valuable asset.
Why Your Choice of Contractor Matters So Much
A roof repair is not a simple commodity; it’s a professional service that requires immense skill and expertise. Apopka’s unique climate presents specific challenges that only an experienced roofer can properly address. An improperly executed repair can fail quickly, leading to more extensive and costly damage than the original problem.
Consider the consequences of a poor hiring decision:
- Failed Repairs: A quick, cheap patch job might stop a leak for a few weeks, but if the underlying issue isn’t addressed, the problem will return, often worse than before.
- Structural Damage: An unresolved leak can lead to rotted roof decking, compromised rafters, and the growth of dangerous mold within your home’s structure.
- Financial Loss: Paying for a repair that fails means you’ve wasted your money. You will then have to pay a second, reputable contractor to fix both the original issue and the faulty work of the first.
- Legal and Liability Risks: Hiring an uninsured contractor could make you financially liable for any accidents or injuries that occur on your property during the job.
Conversely, a top-tier local roofing company provides lasting value. They use correct techniques, high-quality materials, and stand behind their work, ensuring your home is secure for years to come. The goal is to find a contractor who sees the job not just as a quick fix, but as a commitment to protecting your home.
Step-by-Step Guide to Finding a Trusted Roofer
Finding the right contractor is a process of careful research and due diligence. Follow these steps to ensure you partner with a true professional.
Step 1: Start with Local Referrals and Online Research
The best leads often come from people you trust and sources that provide unbiased feedback.
- Ask for Recommendations: Talk to your friends, family, neighbors, and coworkers in the Apopka area who have recently had roofing work done. A personal recommendation from someone who had a positive experience is a powerful starting point.
- Check Online Reviews: Use trusted platforms like Google, Yelp, and the Better Business Bureau (BBB) to see what past customers are saying. Don’t just look at the star rating; read the actual reviews. Look for patterns. Are customers consistently praising the company’s communication, professionalism, and cleanup? Are recurring complaints about missed deadlines or surprise costs?
- Look for Local Experts: Focus your search on contractors who are based in or have a long history of serving Apopka and the surrounding Central Florida area. A local roofing company has a vested interest in maintaining a good reputation within the community. They are also more familiar with local building codes and the specific weather challenges our roofs face.
Step 2: Verify Credentials – The Non-Negotiables
This is the most critical step in vetting a contractor. Never hire a roofer who cannot provide proof of the following credentials. It’s not just about professionalism; it’s about protecting yourself legally and financially.
- State Licensing: In Florida, any contractor performing roofing work must be licensed by the Florida Department of Business and Professional Regulation (DBPR). A license indicates that the contractor has met the state’s requirements for experience, competency, and financial stability. You can and should verify a contractor’s license number on the DBPR website. An unlicensed contractor is operating illegally, and you have no recourse if something goes wrong.
- General Liability Insurance: This insurance protects your property in case of accidental damage during the project. If a worker drops a tool and shatters a window or damages your siding, the contractor’s liability insurance will cover the cost of repairs. Without it, that cost could fall on you.
- Workers’ Compensation Insurance: This is absolutely essential. Workers’ compensation covers the medical bills and lost wages of any employee who is injured while working on your property. If you hire a contractor without this coverage and a worker gets hurt, you could be sued and held personally responsible for their expenses. This could be financially devastating.
Actionable Tip: Ask for a copy of the contractor’s insurance certificates and call the insurance company directly to verify that the policies are current and active. A legitimate contractor will have no issue providing this information. At HW Roofing, we are fully licensed and insured for your protection and peace of mind.
Step 3: Evaluate Experience and Expertise
Not all licensed roofers are created equal. You want a team with a proven track record of handling repairs like yours.
- Years in Business: A company that has been operating in the Apopka area for many years has demonstrated stability and a commitment to its customers. They have weathered economic downturns and have built a reputation they want to protect.
- Portfolio and Past Work: Ask to see examples of their previous work. A reputable contractor will be proud to show you a gallery of completed projects. This allows you to assess the quality of their workmanship and see if they have experience with roofs similar to yours in style and material.
- Manufacturer Certifications: Top roofing material manufacturers (like GAF, Owens Corning, or CertainTeed) offer certification programs to contractors who meet their high standards for installation and professionalism. A certified contractor has been trained directly by the manufacturer on the best installation practices for their products. Hiring one often gives you access to enhanced warranties.
Step 4: The Consultation and Estimate Process
Once you have a shortlist of 2-3 qualified contractors, schedule an in-person consultation and request a detailed estimate. How a contractor behaves during this process tells you a lot about how they will operate throughout the job.
- Thorough Inspection: A professional shouldn’t just give your roof a quick glance from the ground. They should perform a comprehensive inspection, which includes getting on the roof to examine the surface and checking the attic for signs of leaks, water damage, and ventilation issues. A diagnosis without a full inspection is just a guess.
- Clear, Written Estimate: The estimate you receive should be detailed and itemized. It should clearly outline the scope of the roof repairs, the specific materials to be used (including brand and type), the cost of labor, and the projected timeline for completion. Vague or verbal estimates are a major red flag.
- Communication Skills: Did the contractor take the time to explain the problem to you in clear, understandable terms? Did they answer all of your questions patiently and professionally? Good communication is key to a smooth and stress-free repair process.
- No High-Pressure Sales Tactics: Be wary of any contractor who pressures you to sign a contract on the spot or uses scare tactics about your roof “being on the verge of collapse.” A true professional will provide you with the information you need and give you time to make an informed decision.
Step 5: Understand the Warranty
A warranty is a contractor’s promise to stand behind their work. There are two types of warranties you need to understand:
- Material Warranty: This is provided by the manufacturer and covers defects in the roofing materials themselves (e.g., shingles that fail prematurely). The length and terms can vary significantly.
- Workmanship Warranty (or Labor Warranty): This is provided by the contractor and covers any issues that arise from an installation error. This is arguably the more important warranty for a repair, as most roof failures are due to improper installation, not defective materials. Ask for the details of the workmanship warranty in writing. How long does it last? What does it cover? What is the process for making a claim?
A contractor who offers a strong workmanship warranty is confident in the quality of their work. This is a key indicator that you are dealing with trusted roofing experts.
Red Flags: Warning Signs of a Bad Contractor
Just as important as knowing what to look for is knowing what to avoid. If you encounter any of the following red flags, it’s best to walk away and find another option.
- The “Storm Chaser”: These are out-of-town companies that sweep into an area after a major storm, go door-to-door, and offer cheap, fast repairs. They often do subpar work, use low-quality materials, and are gone as soon as the work dries up, leaving you with no one to call when the repair fails. Always prioritize hiring a permanent, local roofing company.
- Requesting a Large Upfront Payment: While a deposit for materials is standard (typically 10-30%), be extremely cautious of any contractor who demands a large percentage of the total cost—or the full amount—before any work begins. This is a common tactic used by fraudulent companies who take the money and disappear.
- An Unusually Low Bid: If one contractor’s estimate is dramatically lower than all the others, it’s a major red flag. They are likely cutting corners somewhere—either by using inferior materials, hiring unskilled labor, or being uninsured. In roofing, you truly get what you pay for.
- Lack of a Physical Address: A legitimate business will have a physical office or place of business. If the contractor only has a P.O. box and a cell phone number, it could be a sign that they are not a stable, established company.
- Vague Contracts: A contract should be a detailed, professional document. If you are handed a one-page agreement with vague terms and a lack of specifics, do not sign it.
The HW Roofing Advantage: Your Trusted Apopka Partner
Choosing the right roofing contractor doesn’t have to be a stressful experience. By following a structured process of research, verification, and careful evaluation, you can confidently select a company that will deliver exceptional results. The key is to prioritize proven local expertise, verifiable credentials, and a commitment to quality.
At HW Roofing, we have built our business on a foundation of integrity, craftsmanship, and unparalleled customer service. We are a proud part of the Apopka community, and our reputation is built on every single roof we work on. We understand the trust you place in us when you hire our team to protect your home, and we take that responsibility seriously.
- We are Local: We live and work here. We understand Apopka’s climate and build our repairs to last.
- We are Vetted: We are fully licensed and insured, and we are happy to provide all our credentials for your review.
- We are Transparent: From our detailed inspections and clear, itemized estimates to our open communication throughout the project, you will always be informed.
- We Guarantee Our Work: We stand behind our repairs with a solid workmanship warranty, giving you lasting peace of mind.
Don’t leave the safety of your home to chance. If you need a roof repair, partner with the local experts who have earned the trust of homeowners throughout Apopka. Contact us today to schedule your free, no-obligation inspection. Let us show you the difference that professionalism and quality can make.
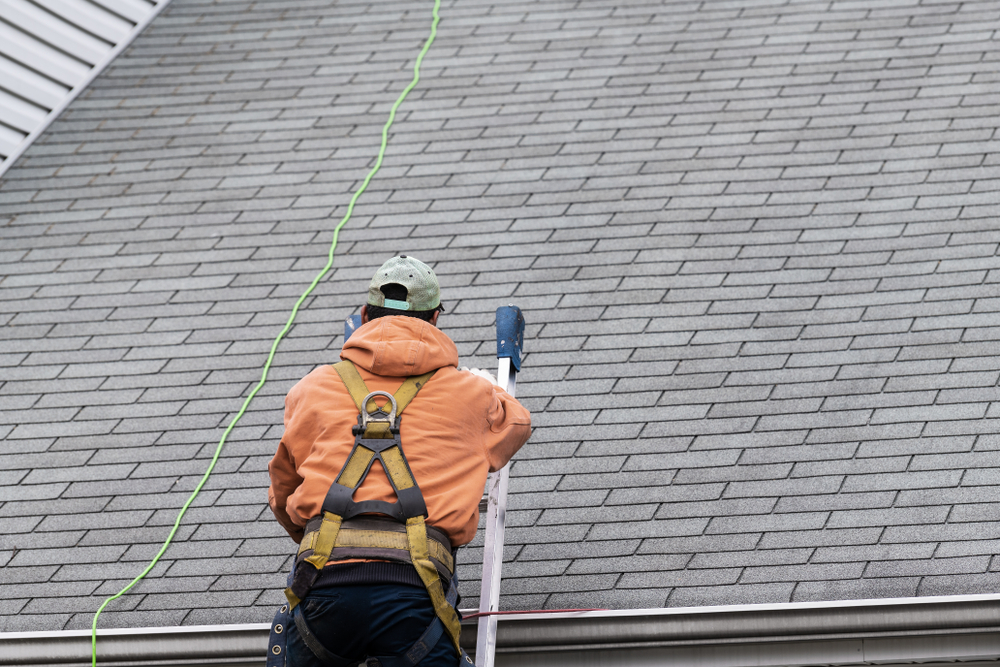
When you spot a problem with your roof—a stray shingle in the yard or a small water stain on the ceiling—the temptation to handle it yourself can be strong. Apopka homeowners are often resourceful and budget-conscious, and a quick trip to the hardware store for some sealant and a new bundle of shingles might seem like a simple, money-saving solution. The internet is filled with tutorials that make roof repair look like a weekend project.
But is tackling a roof repair yourself really the smartest move? While the appeal of saving money is understandable, the reality of DIY roof repair involves significant risks, hidden costs, and potential for long-term complications. Your roof is your home’s most important line of defense against Florida’s relentless sun and turbulent weather. A mistake made high above your head can lead to catastrophic consequences down below.
This guide will break down the true comparison between DIY roof repair and hiring a professional roofer in Apopka. We will explore the serious risks involved in DIY work, uncover the hidden costs that aren’t on the price tag at the store, and highlight the immense value that a qualified, local professional brings to the job. Before you climb that ladder, it’s crucial to understand what’s truly at stake.
The Allure of DIY: Why Do Homeowners Attempt It?
It’s easy to see why homeowners consider the DIY route. The primary motivation is almost always financial. Getting a quote for a professional roof repair in Apopka can seem expensive compared to the cost of materials alone. The thinking is straightforward: “If I can do the labor myself, I’ll save hundreds, maybe even thousands, of dollars.”
Other reasons include:
- Perceived Simplicity: The issue might look small and manageable. A single missing shingle or a small leak around a vent pipe seems like a quick fix.
- Immediate Action: You notice the problem on a Saturday morning and want it fixed by Saturday afternoon. You don’t want to wait to schedule an inspection and a repair.
- A Sense of Accomplishment: For many homeowners, there is pride in maintaining and improving their own property.
While these motivations are valid, they often overlook the complexities and dangers inherent in roofing work. What appears to be a simple fix on the surface can be a symptom of a much larger, hidden problem—one that a DIY approach is ill-equipped to diagnose or solve correctly.
The Unseen Dangers: A Deep Dive into DIY Roof Repair Risks
Working on a roof is fundamentally different from other home improvement projects like painting a room or fixing a leaky faucet. It is one of the most dangerous jobs in any industry, and for an amateur, the risks are magnified significantly.
1. The Grave Risk of Personal Injury
This is the most critical and non-negotiable factor to consider. Roofing is inherently dangerous, even for seasoned professionals with years of experience and specialized safety equipment.
- Falls from Height: According to the Bureau of Labor Statistics, falls, slips, and trips are a leading cause of workplace fatalities, with roofing contractors facing some of the highest risks. A fall from a single-story roof can result in life-altering injuries, including broken bones, spinal cord damage, or death. The risk increases with steeper roof pitches, wet surfaces, or unexpected wind gusts—all common in Apopka.
- Improper Ladder Safety: Many DIY injuries occur before the person even gets on the roof. Using a ladder that is too short, placing it on uneven ground, or failing to maintain three points of contact can lead to a serious fall.
- Electrical Hazards: Homes have electrical masts and power lines running to or near the roof. Accidental contact with a live wire can be fatal.
- Heatstroke and Sun Exposure: Florida’s intense sun can quickly lead to dehydration, heat exhaustion, or heatstroke, especially during the strenuous physical labor of a roof repair. Professionals are acclimated and know the signs to watch for, but a DIYer focused on the task at hand can easily get into trouble.
A professional local roofing contractor invests heavily in safety. Crews are trained in OSHA safety protocols, use personal fall arrest systems (harnesses, ropes, and anchors), and have the experience to navigate a roof safely. This expertise isn’t just about protecting themselves; it’s about ensuring a safe work environment around your property. The potential savings from a DIY repair are insignificant when weighed against the risk of a life-changing injury.
2. The Risk of Causing More Damage
A common outcome of DIY roof repair is making the original problem even worse. Without a deep understanding of how a complete roofing system functions, you can inadvertently create new leaks or compromise the roof’s structural integrity.
- Incorrect Nailing: There is a right and a wrong way to nail down a shingle. Over-driving nails can cause them to punch through the shingle, creating a hole for water. Under-driving them means they won’t seal properly and can be easily lifted by the wind. Using the wrong type or number of nails per shingle also voids the manufacturer’s warranty.
- Damaging Good Shingles: Walking on a hot asphalt roof can dislodge the protective granules, reducing the shingles’ lifespan. Walking on them incorrectly can also break the sealant bond between shingle layers, making them vulnerable to wind uplift.
- Improper Flashing Installation: Flashing—the metal strips around chimneys, vents, skylights, and valleys—is responsible for directing water away from the most vulnerable parts of your roof. Installing it incorrectly is one of the most common causes of serious roof leaks. It’s a precise job that requires expertise.
- Mismatching Materials: Grabbing any shingle from the hardware store that “looks close enough” is a recipe for problems. Different brands have different sealant strip locations and interlocking designs. Using incompatible materials can create a weak spot that will fail prematurely.
- Ignoring Underlayment Issues: A leak might be traced to a damaged shingle, but the real issue could be failed underlayment beneath it. A DIYer might just replace the shingle, leaving the compromised secondary water barrier in place. This means the leak will inevitably return.
A simple, “easy” repair can quickly spiral into a more complex and expensive problem. What started as a $50 DIY fix can turn into a multi-thousand-dollar professional repair to fix both the original issue and the new damage.
3. The Hidden Financial Costs of DIY
The primary motivation for DIY—saving money—can often backfire. The “real cost” of a DIY repair goes far beyond the initial material purchase.
- Tools and Equipment: Do you own a proper extension ladder, a roofing nail gun, a pry bar, a utility knife, a caulk gun, and most importantly, a safety harness? Buying or renting the correct tools can add hundreds of dollars to your project cost. Using the wrong tools (like a regular hammer instead of a roofing nailer) can lead to poor results and damage.
- Wasted Materials: An inexperienced person is likely to make mistakes, cut materials incorrectly, or damage shingles during installation. This waste adds to your total cost.
- The Cost of Corrective Repairs: As mentioned, if your DIY repair fails or causes another leak, you will have to pay a professional to fix it. This often costs more than it would have to just hire them in the first place, as they now have to undo your work before starting their own.
- Higher Insurance Premiums: If your DIY repair fails and causes significant water damage to your home’s interior, your homeowner’s insurance may not cover the claim. Insurance policies often have clauses that exclude damage resulting from faulty or un-permitted work. A failed DIY repair could leave you on the hook for drywall replacement, mold remediation, and flooring repairs—all out of pocket.
- Voided Warranties: This is a huge financial risk. Roofing materials come with a manufacturer’s warranty, but it is almost always contingent on installation by a certified professional according to strict specifications. If you perform a DIY repair, you will likely void the warranty for the entire section of your roof, if not the whole thing. This means if the materials fail prematurely, you have no recourse.
When you factor in these hidden expenses and financial risks, the initial savings of a DIY approach often evaporate, leaving you with a higher total cost.
The Value of a Professional: More Than Just a Repair
Hiring a reputable, local roofing contractor is an investment in quality, safety, and peace of mind. Professionals bring a level of expertise and resources to the table that a DIYer simply cannot match.
1. Expertise and Accurate Diagnosis
A professional roofer doesn’t just fix the symptom; they diagnose the root cause of the problem. That small water stain in your living room could be caused by a leak ten feet away, with water traveling along a rafter before it drips down.
- Comprehensive Inspection: A professional will conduct a thorough inspection of your entire roofing system, including the attic, ventilation, and decking. This holistic view allows them to identify not just the obvious damage but also any underlying issues or potential future problems.
- Knowledge of Apopka’s Climate: A professional roof repair in Apopka from a local company like HW Roofing means you’re getting service from experts who understand our specific climate challenges. They know which materials hold up best to UV exposure and humidity, and they use installation techniques designed to withstand hurricane-force winds.
- Building Code Compliance: Apopka and Orange County have specific building codes for roofing that are designed to ensure safety and storm-readiness. Professionals are up-to-date on these codes and will ensure your repair is fully compliant. A non-compliant DIY repair can cause major problems if you try to sell your home.
2. Quality Workmanship and the Right Materials
Professional roofers have the skills, tools, and access to high-quality materials to do the job right the first time.
- Superior Materials: Contractors often have access to better-grade materials than those available at a big-box retail store. They also have established relationships with suppliers, ensuring they can find the best possible match for your existing shingles.
- Proper Tools and Techniques: From pneumatic nail guns calibrated to the correct pressure to specialized flashing techniques, professionals use the right tools and proven methods to ensure a durable, watertight repair. This level of precision is difficult for an amateur to replicate. You can see the clean, seamless results of professional work in our gallery.
- Efficiency: A professional crew can often complete a repair in a matter of hours, while a DIYer might spend an entire weekend or longer on the same job. This minimizes the time your roof is exposed and the disruption to your life.
3. Safety and Liability Protection
When you hire a licensed and insured contractor, you transfer the immense risk of the job from yourself to them.
- Insurance Coverage: A reputable roofer will carry two crucial types of insurance:
- Liability Insurance: Protects your property from any damage that might occur during the repair process. If a worker accidentally damages your siding or a window, their insurance covers it.
- Workers’ Compensation: Protects you if a worker is injured on your property. Without this, you could be held personally liable for their medical bills and lost wages, a financially devastating scenario.
- Safety Protocols: Professional crews follow strict safety standards to protect both themselves and your property. This is a non-negotiable part of their daily operations.
Before hiring any contractor, always ask for proof of both liability insurance and workers’ compensation. At HW Roofing, we are fully licensed and insured for your protection.
4. Warranties and Long-Term Peace of Mind
This is one of the most significant advantages of hiring a pro. Reputable roofing companies stand behind their work.
- Workmanship Warranty: In addition to the manufacturer’s material warranty, a professional contractor will provide their own workmanship warranty. This means if the repair fails due to an installation error, they will come back and fix it at no charge. This guarantee is your assurance of quality.
- Preserved Material Warranty: By using a certified professional, you keep your manufacturer’s warranty intact. This provides crucial long-term protection against defective materials.
A DIY repair comes with no guarantees. If it fails a year later, you’re back on the ladder. With a professional repair, you have a partner you can call who is accountable for the quality of their work.
When Is a DIY Repair Ever Okay?
While professional repair is recommended for almost all roofing issues, there are a couple of extremely minor, temporary fixes a homeowner might consider while waiting for a professional.
- Applying a Tarp: If you have a severe, active leak during a storm, safely securing a tarp over the damaged area from the ground or a secure ladder (if possible) can help prevent further interior damage until a professional can arrive.
- Minor Gutter Cleaning: Clearing debris from your gutters is essential maintenance. However, if this requires getting on a steep or high roof, it’s still best left to a pro.
Any task that involves lifting shingles, applying sealants, or replacing components should be handled by an experienced roofer. The risks are simply too high.
Your Roof Deserves a Professional
Your Apopka home is your most valuable asset, and your roof is its guardian. While the idea of saving a few hundred dollars with a DIY repair is tempting, the potential costs are far greater. From the life-threatening risk of a fall to the long-term financial fallout of a failed repair, voided warranties, and insurance complications, the stakes are incredibly high.
Investing in a professional roof repair in Apopka is an investment in safety, quality, and certainty. It ensures the problem is correctly diagnosed and fixed, the work is compliant with local codes, and the repair is backed by a workmanship warranty. You get the peace of mind that comes from knowing the job was done right by an expert who is licensed, insured, and accountable.
Don’t gamble with the safety of your family and the integrity of your home. If you suspect you have a roof problem, big or small, the smartest and safest first step is to call a trusted professional. Contact us today to schedule a free, comprehensive roof inspection. Our team will provide an honest assessment and a clear, detailed estimate, empowering you to make the best decision for your home.
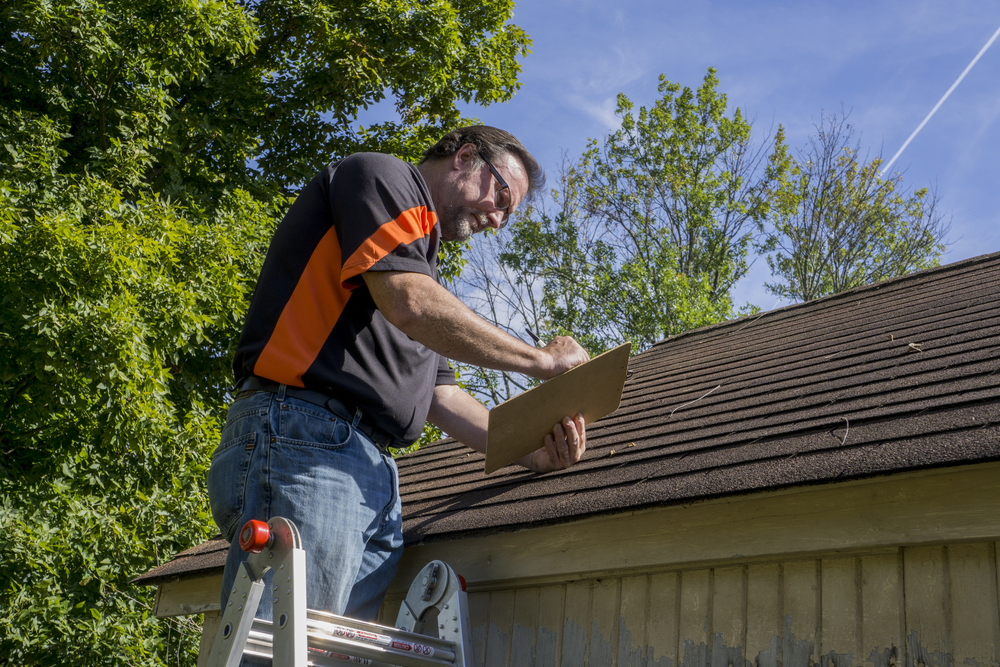
Your roof is one of the most critical components of your Apopka home, acting as the primary shield against Florida’s intense sun, heavy rains, and hurricane-force winds. When you notice a leak, missing shingles, or other signs of damage, a crucial question arises: should you opt for a roof repair or a complete roof replacement? This decision impacts not only your immediate budget but also the long-term safety and value of your property.
Making the right choice requires a clear understanding of your roof’s condition, the extent of the damage, and the pros and cons of each option. This comprehensive guide will walk you through the key factors to consider, helping you determine whether a targeted repair or a full replacement is the best solution for your Apopka home. We will explore cost, longevity, and specific scenarios to empower you with the knowledge needed to protect your investment.
Understanding the Core Differences: Repair vs. Replacement
Before diving into the decision-making process, it’s essential to understand what each service entails. While both address roofing issues, their scope, cost, and long-term implications are vastly different.
What is a Roof Repair?
A roof repair is a targeted solution that addresses a specific problem in a limited area of your roof. Think of it as a surgical procedure rather than a complete overhaul. Common repairs include:
- Replacing a few missing or damaged shingles.
- Patching a small leak or puncture.
- Sealing flashing around chimneys, vents, or skylights.
- Fixing isolated damage caused by a fallen tree limb.
Roof repairs are ideal for newer roofs that are otherwise in good condition but have sustained minor, localized damage. It’s a cost-effective way to fix a problem quickly and extend the overall life of your existing roof.
What is a Roof Replacement?
A roof replacement, or re-roofing, is a comprehensive process that involves removing the entire existing roofing system down to the deck and installing a brand new one. This includes the underlayment, flashing, shingles, and any other components. A full replacement is a major home improvement project that addresses widespread issues, old age, or catastrophic damage that cannot be resolved with simple repairs.
This option provides a complete reset for your home’s protective layer, offering maximum long-term security and peace of mind. While it is a significant upfront investment, it can be the most cost-effective solution for a roof that is nearing the end of its lifespan or has systemic problems.
Key Factors to Help You Decide
Deciding between repair and replacement isn’t always straightforward. Several factors come into play, and evaluating each one will guide you to the most logical and financially sound conclusion for your Apopka home.
1. Age of Your Roof
The age of your roof is one of the most significant indicators of whether you should repair or replace it. Most roofing materials have a predictable lifespan, especially in Florida’s harsh climate.
- Asphalt Shingles: Typically last 15-25 years. If your shingle roof is approaching the 20-year mark and showing signs of wear, a replacement is often the wiser investment. Pouring money into repairing an old roof is often a temporary fix, and you may find yourself calling for more repairs soon.
- Metal Roofs: Can last 50 years or more. An issue on a 10-year-old metal roof is almost always a candidate for repair.
- Tile Roofs: Can last 50+ years, but individual tiles can crack or break. Repairs are common, but if the underlying underlayment is failing (which has a shorter lifespan of around 20-30 years), a “lift and relay” or full replacement might be necessary.
Guideline: If your roof is more than 75% through its expected lifespan and requires significant work, replacement is generally the recommended path. If it’s relatively young and the damage is isolated, a professional roof repair in Apopka is likely sufficient.
2. The Extent and Nature of the Damage
The scope of the damage is another critical factor. A small, contained issue is very different from widespread, systemic failure.
When to Choose Repair:
- A Few Missing Shingles: If a strong gust of wind has lifted a handful of shingles, replacing them is a simple and effective repair.
- Minor Leaks: A single, small leak around a vent pipe or chimney flashing can often be sealed and resolved without tearing off the entire roof.
- Localized Physical Damage: A tree branch falling and damaging a small section is a perfect scenario for a targeted repair.
- Granule Loss in One Area: If you notice asphalt granules from your shingles collecting in one gutter, it might point to a specific area of wear that can be addressed directly.
When to Consider Replacement:
- Widespread Missing or Damaged Shingles: If you see large patches of shingles that are curling, cracked, or missing across multiple areas of your roof, it’s a sign of systemic failure.
- Multiple Leaks: Discovering leaks in several rooms of your house indicates that the problem isn’t isolated. The underlayment may be compromised, and a full replacement is the only way to ensure all vulnerabilities are addressed.
- Extensive Water Damage: Look for signs of water damage in your attic, such as damp or rotting wood, mold, or stained insulation. Widespread moisture suggests the roofing system has been failing for some time.
- Soft or Spongy Roof Deck: If walking on your roof feels like walking on a trampoline, the underlying wood deck is likely saturated with water and rotting. This is a serious structural issue that requires a full roof replacement to fix the decking.
3. Cost Analysis: Short-Term vs. Long-Term
Budget is a major consideration for every homeowner. While a repair is almost always cheaper upfront, it may not be the most economical choice in the long run.
- Short-Term Cost: A typical roof repair can cost a few hundred to a few thousand dollars, depending on the issue. A full roof replacement in Apopka is a much larger investment, often costing tens of thousands of dollars. If your budget is tight and the damage is minor, a repair is the obvious choice to stop immediate problems like leaks.
- Long-Term Value: Consider the “25% rule.” If a repair costs more than 25-30% of the price of a full replacement, and your roof is already old, replacement offers better value. Investing a large sum into an aging roof is often not a good financial decision. You could spend thousands on a major repair, only to need a full replacement two years later. A new roof, on the other hand, adds significant value to your home, improves curb appeal, and can even lower your homeowner’s insurance premiums.
Think of it as maintaining an old car. You can keep paying for frequent, costly repairs, or you can invest in a new vehicle that offers reliability and peace of mind for years to come.
4. Your Future Plans for the Home
How long do you plan to live in your Apopka home? Your answer can influence your decision.
- Selling Soon: If you plan to sell your home within the next year or two, a new roof can be a powerful selling point. It can increase your home’s market value and attract more buyers, as they won’t have to worry about a major expense shortly after moving in. Some buyers may even be unable to secure financing for a home with a roof in poor condition. In this case, a replacement could be a strategic investment.
- Staying Long-Term: If this is your “forever home,” a roof replacement is an investment in your own long-term comfort and security. It ensures you won’t have to deal with recurring roofing issues and provides decades of protection. A well-executed roof replacement in Apopka means you can rest easy through every hurricane season.
5. Aesthetic and Curb Appeal
While function is paramount, the appearance of your roof contributes significantly to your home’s overall curb appeal.
- Mismatched Shingles: A repair often involves using new shingles to patch an area of older, faded ones. This can result in a noticeable, mismatched look. While a skilled roofer will try to find the best possible match, an exact color and texture match on a weathered roof is nearly impossible. If the repair is on a highly visible part of your roof, this aesthetic issue might bother you.
- A Fresh, Uniform Look: A full replacement gives your home a clean, uniform, and updated appearance. It’s an opportunity to choose a new color or style of shingle that can completely transform your home’s exterior. You can see examples of stunning transformations in our gallery of completed projects.
The Professional Inspection: The Decisive Step
While you can spot many warning signs yourself, nothing replaces a thorough inspection by a qualified roofing professional. A trustworthy contractor will provide an honest and detailed assessment of your roof’s condition, giving you the information you need to make an informed choice.
Here’s what you can expect during a professional roof inspection from a local expert like HW Roofing:
- Exterior Examination: The roofer will inspect the entire roof surface for cracked, curling, or missing shingles; worn-out flashing around vents and chimneys; and any signs of physical damage.
- Interior Examination: The inspector will check your attic for signs of leaks, water stains, mold, rot on the decking, and proper ventilation.
- Core Sampling (if necessary): In some cases, a roofer may take a small core sample to examine the layers of your roofing system, including the underlayment and decking, to check for moisture saturation.
- Detailed Report: After the inspection, you should receive a comprehensive report with photos and a clear explanation of the findings. The roofer will then present you with their professional recommendation—whether it’s a specific roof repair or a full replacement—along with a detailed estimate.
This unbiased, expert opinion is invaluable. It removes the guesswork and ensures your decision is based on the true condition of your roof, not just what’s visible from the ground.
Why Apopka’s Climate Demands a Proactive Approach
Living in Apopka means your roof is constantly under assault from the elements. The intense UV radiation breaks down roofing materials over time, the high humidity creates a perfect environment for algae and mold growth, and the annual threat of tropical storms and hurricanes can cause sudden, severe damage.
This is why you can’t afford to ignore even small roofing problems. A tiny leak left unaddressed can lead to:
- Structural Damage: Water seeping into the roof deck, rafters, and attic joists can cause wood to rot, compromising the structural integrity of your home.
- Mold and Mildew: Trapped moisture creates a breeding ground for mold, which can spread throughout your home’s structure and HVAC system, posing serious health risks.
- Damaged Insulation: Wet insulation becomes compressed and ineffective, leading to higher energy bills as your HVAC system works harder to cool your home.
- Interior Damage: Water stains on ceilings and walls, peeling paint, and damaged light fixtures are common results of a persistent roof leak.
Choosing local roofing experts who understand the specific challenges of the Central Florida climate is crucial. An experienced Apopka roofer will recommend materials and installation techniques best suited to withstand our unique weather patterns, whether for a durable repair or a hurricane-ready replacement.
Making the Final Call: A Summary
Let’s consolidate the key points into a quick-reference guide to help you make your decision.
Choose Roof Repair If:
- Your roof is less than 15-20 years old and otherwise in good shape.
- The damage is limited to a small, specific area.
- You only have one or two minor leaks.
- The shingles are mostly flat and intact.
- Your budget is limited, and you need an immediate, cost-effective fix.
Choose Roof Replacement If:
- Your asphalt shingle roof is over 20 years old.
- You have widespread damage, such as curling or cracked shingles across the roof.
- You are dealing with multiple leaks in different areas of your home.
- There are signs of moisture, rot, or mold in the attic.
- The roof deck feels soft or spongy when walked on.
- Your repair costs would exceed 25-30% of a full replacement cost.
- You are planning to sell your home soon or want a long-term, worry-free solution.
Partner with Apopka’s Trusted Roofing Professionals
The decision between a roof repair and a roof replacement is a significant one for any homeowner. By carefully evaluating the age of your roof, the extent of the damage, your budget, and your future plans, you can make a choice that protects your home and your finances.
Ultimately, the best first step is always to schedule a professional inspection. At HW Roofing, we pride ourselves on providing honest assessments and high-quality workmanship to our neighbors in the Apopka community. Our team of local roofing experts is committed to helping you find the right solution for your specific needs, never upselling you on a service you don’t require.
Whether you need a simple, effective repair to stop a leak or a full, expertly installed roof replacement for ultimate peace of mind, we are here to help. We have built our reputation on integrity and a deep understanding of what Florida roofs endure.
Don’t wait for a small problem to become a catastrophe. Protect your biggest investment. Contact us today to schedule your free, no-obligation roof inspection and get a clear, expert opinion on the best path forward for your Apopka home.
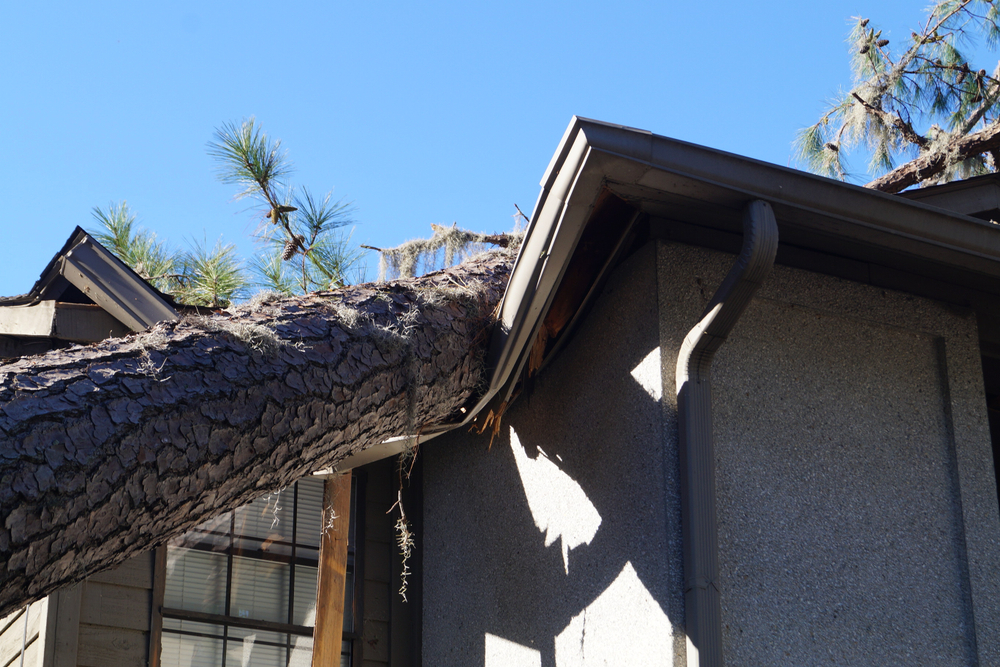
After a fierce Florida storm passes, a homeowner’s anxiety can be as high as the wind speeds were. Your roof has just endured a brutal assault from high winds, driving rain, and potentially hail. Now, in the calm aftermath, the crucial and often confusing process of assessing the damage begins. The most pressing question is: Is this damage storm-related, and will my insurance cover it?
For Florida homeowners, navigating the complexities of a roof insurance claim can be daunting. Insurance companies require clear proof that the damage was a direct result of a specific weather event, not due to pre-existing wear and tear or lack of maintenance. Making this distinction is the key to a successful claim. Misidentifying damage or failing to document it properly can lead to frustrating delays, underpaid claims, or even outright denials, leaving you to foot the bill for expensive repairs.
This guide is designed to empower you with the knowledge to identify storm-related roof damage, understand the difference between storm impact and normal aging, and take the correct steps to document everything for your insurance provider. By learning what to look for and how to proceed, you can approach the roof insurance claims process in Florida with confidence and clarity.
The First Steps: Safety and Immediate Assessment After a Storm
Before you even think about your insurance claim, your top priority must be safety. Storms can leave behind hidden dangers that need to be addressed with caution.
Prioritize Safety Above All Else
- Wait for the All-Clear: Do not venture outside until the storm has completely passed and any official warnings have been lifted. Dangers like downed power lines, unstable trees, and residual high winds can persist.
- Beware of Downed Power Lines: Treat every downed wire as if it were live. Keep a significant distance and report them immediately to your utility company.
- Never Climb on a Wet Roof: A wet roof is incredibly slippery and dangerous. Never attempt to climb on your roof, especially right after a storm. Leave the hands-on inspection to professionals with the proper safety equipment.
Conduct a Safe, Ground-Level Inspection
Once it is safe to go outside, you can begin your initial assessment from the ground. This will give you a general idea of the extent of the damage and help you determine your next steps. Walk around the entire perimeter of your home and yard, looking for:
- Obvious Damage to the Roof: Use binoculars to get a closer look. Are there entire sections of shingles missing? Do you see large dents in metal panels or cracked tiles?
- Debris in the Yard: Look for fallen shingles, tiles, or pieces of metal flashing in your yard or on your driveway. Finding these pieces is direct evidence that your roof has sustained damage.
- Damage to Gutters and Downspouts: Check if your gutters are bent, dented, or have pulled away from the house. Hail and wind can cause significant damage to these components.
- Damage to Siding and Windows: Note any cracks, holes, or dents in your home’s siding, window screens, or window frames. This can help corroborate that your property was hit by hail or wind-blown debris.
Simultaneously, conduct a quick inspection inside your home. Look for any new water stains on ceilings, active drips from light fixtures, or peeling paint near the tops of walls. Any interior signs of water intrusion are a red flag that the roof’s integrity has been breached.
Distinguishing Storm Damage from Normal Wear and Tear
This is the most critical part of an insurance claim. An insurance adjuster is trained to differentiate between acute damage caused by a storm and chronic issues resulting from age or neglect. Knowing the difference yourself will help you build a stronger case.
Identifying Hail Damage
Hail can be one of the most destructive forces a roof can face. Its impact leaves behind distinct patterns that an adjuster will look for.
- Hallmarks of Hail Damage: Hail strikes are typically random and will not be concentrated in one area. The damage often appears as dark, bruised spots or dents on asphalt shingles where the protective granules have been knocked off. On metal roofs, it causes noticeable dents. On wood shingles, it can cause splits.
- What It’s NOT: Blisters, which look like small bubbles on the shingle surface, are a manufacturing defect, not hail damage. General granule loss across the entire roof surface, especially in gutters, is a sign of old age, not a single hail event.
Identifying Wind Damage
Florida’s hurricanes and severe thunderstorms produce powerful winds that test the limits of every roofing system.
- Hallmarks of Wind Damage: The most obvious sign is missing shingles or tiles. Look for a random pattern of missing shingles across the roof plane. Wind can also lift shingles, breaking the adhesive seal underneath without completely tearing them off. This creates a “crease” or “fold” mark along the shingle that is a telltale sign of wind uplift. These lifted shingles are now compromised and will not reseal, making them highly susceptible to future leaks.
- What It’s NOT: Curled or cracked shingles are typically a sign of age and long-term sun exposure. If all the shingles are uniformly brittle and cracked, it points to the end of the roof’s lifespan, which is generally not covered as storm damage. A professional can help identify the subtle difference between an old, cracked shingle and one that was creased by wind.
The Importance of a “Before” Picture
The best way to prove storm damage is to have a clear record of your roof’s condition before the storm. If you don’t have photos from a previous inspection, make it a habit to take detailed pictures of your roof every year. This “before and after” evidence is incredibly powerful and can shut down any argument from an insurer that the damage was pre-existing. It’s a simple step that can save you thousands of dollars and immense frustration.
The Crucial Role of a Professional Storm Damage Roof Inspection
While your initial assessment is important, it is not a substitute for a professional evaluation. After a major storm, it is essential to hire a reputable local roofing contractor to perform a thorough storm damage roof inspection. This step is vital for two reasons: it ensures all damage is found, and it provides you with an expert ally in the claims process.
What a Professional Inspection Entails
A qualified roofer will conduct a detailed, multi-point inspection that goes far beyond what you can see from the ground. They will safely get on the roof and:
- Document Everything: They will take high-resolution photos and videos of every instance of damage, from creased shingles and hail impacts to damaged flashing and vents.
- Check the Entire Roofing System: A professional inspection isn’t just about the shingles. They will examine the flashing around chimneys and vents, the condition of the pipe boots, the integrity of the roof valleys, and the drip edge—all areas where wind and hail can cause critical failures.
- Assess Structural Integrity: They will look for signs of deck damage, such as spongy or soft spots, which indicate that fasteners have pulled through or the underlying wood is compromised.
- Provide a Detailed Report: You will receive a comprehensive report outlining all the findings, complete with photographic evidence and a professional assessment of the damage’s cause. This report is an invaluable tool for your insurance claim.
An Expert on Your Side
Hiring a contractor like HW Roofing before you file your claim gives you an expert advocate. The roofer’s report provides an independent, third-party assessment of the damage. This can be used to validate your claim and counter a lowball estimate from an adjuster. The contractor can also meet with the insurance adjuster on-site during their inspection to point out the damage they found, ensuring nothing is overlooked. This collaborative approach often leads to a smoother and more accurately paid claim.
Mastering the Florida Roof Insurance Claim Process
Once you have confirmed and documented the storm damage with a professional, it’s time to initiate the insurance claim. Following the correct procedure is essential.
Step 1: Review Your Policy
Before you call your insurance company, locate your homeowner’s policy and review the section on roof coverage. Understand your deductible (the amount you pay out of pocket before coverage kicks in). Note if your policy provides for Replacement Cost Value (RCV), which pays to replace the roof with new materials, or Actual Cash Value (ACV), which only pays the depreciated value of your old roof. This information will help you set realistic expectations.
Step 2: File the Claim Promptly
Most policies require you to report a claim in a timely manner. Contact your insurance agent or the company’s claims department to start the process. Have your policy number ready and provide the date of the storm. Be factual and straightforward. State that your home sustained damage during the storm on [Date] and that you have had it professionally inspected.
Step 3: Document Every Interaction
Start a claim file. Keep a log of every phone call, email, and letter you have with the insurance company. Note the date, time, the name of the person you spoke with, and a summary of the conversation. This detailed record is crucial if any disputes arise later.
Step 4: Prepare for the Adjuster’s Visit
An insurance adjuster will be assigned to your case and will schedule a time to inspect the damage. This is a critical meeting.
- Be Present: Make sure you or a trusted representative is home for the inspection.
- Have Your Contractor There: It is highly recommended to have your chosen roofing contractor present during the adjuster’s visit. Your contractor speaks the same language as the adjuster and can point out specific damage, explain why it’s storm-related, and ensure the scope of work is accurately assessed.
- Provide Your Documentation: Give the adjuster a copy of your contractor’s inspection report and photos. This shows you have done your due diligence and presents a unified, evidence-based case.
Step 5: Understand the Adjuster’s Report and Estimate
After the visit, the adjuster will provide you with a “scope of loss” report, which details the damage they are acknowledging and the estimated cost for repairs. Review this document carefully with your contractor.
- Compare Estimates: Your contractor’s estimate and the adjuster’s estimate may differ. The adjuster’s estimate might use lower-quality materials or miss certain line items (like replacing felt paper or flashing).
- Negotiate if Necessary: If the adjuster’s scope is incomplete or the estimate is too low, your contractor can submit a supplement to the insurance company, arguing for the additional items or costs based on industry standards and local building codes. This is a normal part of the process.
Temporary Repairs and Avoiding Pitfalls
While your claim is being processed, you have a duty to mitigate further damage to your home. This means taking reasonable steps to temporarily cover any holes in your roof.
Making Temporary Roof Repairs
If you have an active leak, you need to have it temporarily patched. A professional roofer can install a tarp or board-up over the damaged area to prevent more water from getting in. This is a crucial step. Insurance companies can deny claims for secondary damage (like mold or a collapsed ceiling) if you failed to mitigate the initial problem. Keep receipts for any temporary roof repairs, as these are typically reimbursable under your policy.
Beware of “Storm Chaser” Scams
After a major storm, out-of-state “storm chaser” roofing companies often flood affected neighborhoods. Be extremely cautious of anyone who:
- Knocks on your door unsolicited.
- Offers to waive your deductible or give you a “free” roof (this is insurance fraud).
- Uses high-pressure tactics to get you to sign a contract on the spot.
- Is not a licensed and insured local company with a physical address and a long-standing reputation.
Working with a fraudulent contractor can lead to shoddy work, voided material warranties, and major legal and financial trouble. Always choose a trusted, local company. You can see the quality and variety of our legitimate, professional work in our gallery.
Your Advocate for a Fair and Honest Claim
Identifying storm-related roof damage in Florida is a skill every homeowner should have. It requires a keen eye, a cautious approach, and an understanding of how storms affect your roof differently than time and sun. By safely assessing the situation, documenting everything, and partnering with a reputable local roofing professional, you can confidently navigate the insurance claims process.
Remember, the goal is not just to get a check from your insurer; it’s to ensure your home is properly and fully restored to its pre-storm condition, protecting your family and your investment. Don’t let the process intimidate you. Arm yourself with knowledge, evidence, and professional support.
If your home has been hit by a storm and you’re unsure about the extent of the damage, don’t wait for a small leak to become a major disaster. Contact us to schedule a comprehensive storm damage inspection. We can provide the expert documentation and guidance you need to secure a fair and successful insurance claim.
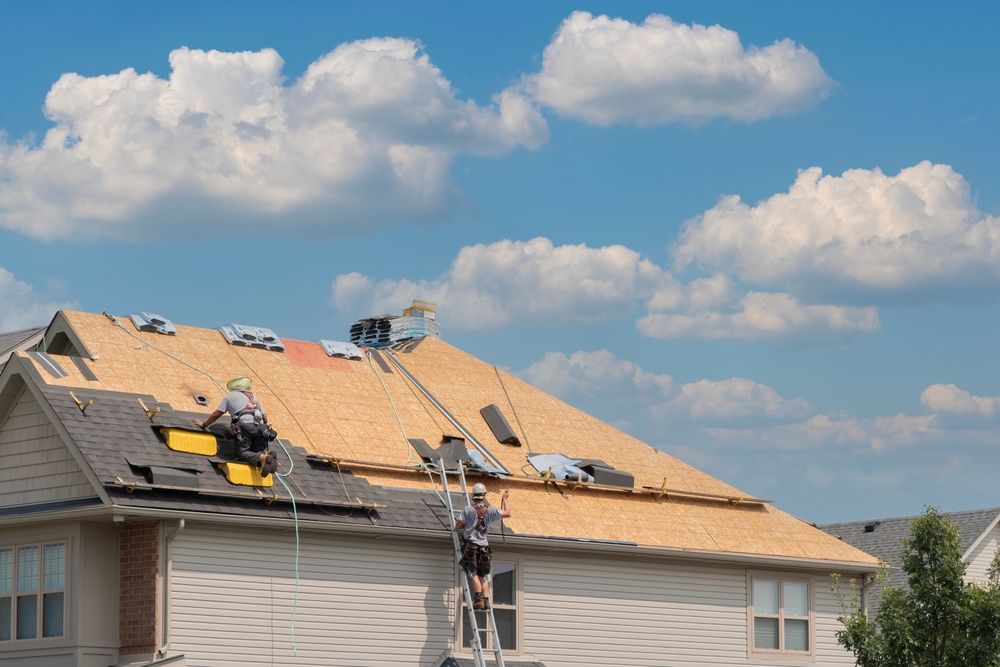
When a mysterious water stain appears on your ceiling, your first thought might be to blame the shingles or tiles. While these are important, the real culprit behind many Florida roof leaks is a less visible but critically important component: the roof flashing. This thin metal material is your roof’s secret weapon against water intrusion, but when it fails, it becomes the number one entry point for costly water damage.
For Florida homeowners, understanding the role of flashing is essential. Our state’s unique combination of intense sun, high humidity, and torrential, wind-driven rain puts immense stress on every part of a roofing system. Flashing is installed at the most vulnerable points of your roof—the joints, valleys, and penetrations where water is most likely to find a path inside. When this vital barrier is compromised, it’s not a matter of if you’ll get a leak, but when.
This article will pull back the curtain on roof flashing. We’ll explain exactly what it is, where it’s located, and why it is so frequently the source of leaks. More importantly, we’ll cover the signs of damaged flashing and explain why prompt, professional roof flashing repair in Florida is the most effective way to protect your home from the pervasive threat of water damage.
What is Roof Flashing and Why Is It So Important?
Roof flashing is a type of weatherproofing material, typically made of galvanized steel, aluminum, or copper. It is used to direct water away from critical areas of the roof where the main roofing material is interrupted or terminated. Think of it as a specialized drainage system built directly into your roof’s most complex intersections. Without flashing, these areas would be nothing more than open invitations for water to seep into your home’s structure.
These transition points are inherently weak spots. You can’t simply bend a shingle or tile to create a waterproof seal around a chimney or against a wall. Flashing bridges these gaps, creating a continuous, impenetrable barrier that channels water down to the gutters. Its proper installation is a hallmark of quality roofing work and is absolutely non-negotiable for a long-lasting, leak-free roof.
Where is Roof Flashing Located?
To appreciate its importance, you need to know where to find flashing. It is installed in several key areas that are prone to leaks:
- Roof Valleys: Where two sloping roof planes meet, they form a “V” shape called a valley. This area collects a significant volume of rainwater, making it a prime spot for leaks. Valley flashing, a large metal sheet, lines this channel to handle the heavy water flow.
- Chimneys: The intersection where a chimney penetrates the roof is one of the most complex areas to waterproof. A multi-part flashing system, including step flashing, counter flashing, and a cricket (a small peaked structure on the high side of the chimney), is required to keep this area sealed.
- Vents and Pipes: Plumbing vents, attic vents, and exhaust fans all require holes in your roof. Each of these penetrations is sealed with a flashing “boot” or collar that fits around the pipe and tucks under the shingles.
- Skylights: Similar to chimneys, skylights create large openings in the roof. They rely on an integrated flashing kit to create a watertight seal around their entire perimeter.
- Drip Edges: This is a specific type of flashing installed at the edges of the roof (the eaves and rakes). It directs water away from the fascia board and into the gutters, preventing water from seeping underneath the roofing material at the edge.
- Roof-to-Wall Intersections: Where a sloped roof meets a vertical wall (like the side of a dormer or a second story), step flashing is woven into the shingle courses to prevent water from running into the wall.
Each of these locations represents a potential failure point. That’s why the material quality and installation precision of the flashing are just as important as the shingles or tiles covering the main field of your roof.
Why Flashing Fails: Florida’s Toughest Adversaries
Roof flashing is designed to be durable, but it’s not invincible—especially in Florida. Several factors contribute to its eventual breakdown, turning this protective element into a liability. Understanding these causes can help homeowners identify potential problems before they lead to significant damage.
The Unforgiving Florida Climate
Our state’s weather is the primary antagonist in the life of any roofing material.
- Intense UV Radiation: The relentless Florida sun beats down on your roof year-round. This constant UV exposure can degrade the sealants used around flashing, causing them to become brittle, crack, and pull away. For flashing made of certain materials, it can accelerate corrosion.
- Thermal Expansion and Contraction: Florida experiences dramatic temperature swings. A roof surface can heat up significantly during the day and cool down at night. This causes the metal flashing and surrounding roofing materials to expand and contract at different rates. Over thousands of cycles, this movement can loosen fasteners and break seals, creating gaps for water.
- Salt and Humidity: For coastal homeowners, the salt-laden air is highly corrosive. It can eat away at galvanized steel flashing over time, leading to rust and deterioration. The high humidity also means that any small amount of moisture trapped under the flashing will be slow to evaporate, promoting rot in the underlying wood sheathing.
- Hurricane-Force Winds and Wind-Driven Rain: Severe storms put flashing to the ultimate test. High winds can lift and bend sections of flashing, breaking the seal. Wind-driven rain is particularly adept at forcing its way into even the tiniest pre-existing gap, turning a minor issue into a major leak in minutes.
Common Causes of Flashing Damage
Beyond climate-related wear, several other issues can lead to flashing failure.
- Improper Installation: This is a leading cause of premature flashing failure. A roofer who cuts corners might use the wrong type of flashing, fail to integrate it properly with the shingles, use an insufficient number of fasteners, or rely too heavily on sealant instead of mechanical fastening. Improperly installed flashing can leak from day one. When selecting a roofing company, it’s vital to choose one like HW Roofing that prioritizes meticulous, correct installation from the start.
- Corrosion and Rust: Galvanized steel, the most common flashing material, has a protective zinc coating. If this coating is scratched during installation or wears away over time, the underlying steel will rust. Rusted flashing becomes thin, brittle, and can develop pinholes or large cracks that allow water through.
- Physical Damage: Flashing can be damaged by falling tree limbs, foot traffic from other contractors (like HVAC or satellite dish installers), or animals attempting to chew or claw their way in.
- Old Age and Sealant Failure: Even correctly installed flashing has a limited lifespan. The metal itself can last for decades, but the caulk and sealant used to seal its edges will not. These compounds dry out and crack over 10-15 years, creating openings for water. This is why ongoing roof maintenance is so critical.
The Telltale Signs of Damaged Flashing
Because flashing is the number one cause of Florida roof leaks, knowing how to spot the signs of failure is a homeowner’s best defense. Catching the problem early can be the difference between a simple repair and a costly, whole-home restoration project.
Visual Clues from the Ground
You can often spot flashing issues without ever setting foot on a ladder. A pair of binoculars is a great tool for a safe ground-level inspection.
- Visible Rust or Stains: Look closely at the metal strips in roof valleys and around your chimney. Any visible rust is a clear indicator that the flashing is corroding and its integrity is compromised. You might also see dark stains on the roof surface below the flashing, which can be a sign of water running where it shouldn’t.
- Cracked or Missing Sealant: Check the edges of the flashing where it meets the chimney, vents, or skylights. If the caulk appears cracked, shrunken, or has pieces missing, the watertight seal is broken.
- Loose or Bent Sections: After a high-wind event, carefully inspect your roof. Look for any pieces of flashing that appear lifted, bent, or are no longer sitting flush with the roof surface. This is a five-alarm fire for your roof—a loose piece of flashing is an open door for water.
- Small Holes or Punctures: While difficult to see from the ground, any visible holes in the metal are an undeniable sign that the flashing needs to be replaced.
Interior Warning Signs
Often, the first clue of a flashing leak appears inside your home. These signs indicate that water has already breached the roof and is making its way into your living space.
- Stains on Ceilings and Walls: Leaks from flashing around chimneys, dormers, and skylights often manifest as water stains on the ceiling or walls directly below or adjacent to these features.
- Dripping in the Attic: If you can safely access your attic, it’s the best place to find evidence of a leak. During or after a rainstorm, inspect the underside of the roof deck around pipes, vents, and the chimney structure. Look for damp wood, active drips, or dark water stains.
- Mold or Mildew Growth: A musty smell in a particular room or visible mold growth near the ceiling can be caused by a slow, persistent leak from failed flashing.
- Peeling Paint: Moisture seeping into the wall cavity from a roof-to-wall flashing leak can cause the interior paint to bubble and peel.
If you spot any of these signs, it’s crucial to act immediately. A minor flashing issue can rapidly escalate. Our portfolio of completed projects in the gallery often includes work that began as a small leak but required extensive repair because it was not addressed quickly.
The Repair Process: What to Expect from Professional Flashing Repair
Repairing or replacing damaged flashing is not a simple DIY patch job. It requires skill, precision, and a deep understanding of roofing systems. Attempting to fix it with a tube of caulk is a temporary, and often ineffective, solution that can trap water and make the problem worse. Professional roof repairs are essential for a permanent solution.
Here’s what a proper roof flashing repair process involves:
1. Thorough Inspection and Diagnosis
A professional roofer will begin with a comprehensive inspection to confirm that the flashing is indeed the source of the leak and to assess the extent of the damage. This involves:
- Inspecting the flashing itself for rust, holes, or loose sections.
- Checking the condition of the surrounding shingles or tiles.
- Examining the underlying roof deck for signs of water damage or rot.
- Identifying any secondary damage inside the attic or home.
This diagnosis is critical to ensure the repair addresses the root cause and not just the symptom.
2. Removal of Old Materials
To properly replace the flashing, the surrounding roofing materials must first be carefully removed. This may involve taking up several courses of shingles or tiles around the affected area. The old, failed flashing is then pried up and removed, exposing the roof deck underneath. Any old sealant and fasteners are also completely scraped away to create a clean surface.
3. Repairing a Damaged Roof Deck
If the old flashing allowed water to sit on the roof deck, it’s highly likely that the wood sheathing is rotted. A reputable contractor will not install new flashing over soft, compromised wood. Any rotted sections of the deck must be cut out and replaced with new plywood or OSB to provide a solid, structural base for the new flashing and roofing materials. This step is non-negotiable for a lasting repair.
4. Installation of New Flashing
This is the most critical step. The contractor will custom-cut and bend the new flashing (typically high-quality, pre-finished galvanized steel or aluminum) to fit the specific area. The installation technique varies depending on the location:
- For Chimneys and Walls: Step flashing is woven into each course of shingles, with each piece overlapping the one below it, so water is shed down the roof. Counter-flashing is then installed over the step flashing and embedded into the mortar joints of the chimney to create a two-part seal.
- For Valleys: A single, continuous piece of metal flashing is installed down the center of the valley over a protective ice-and-water shield membrane.
- For Vents: A new flashing boot is fitted over the pipe, with its base sealed to the deck and its upper flange tucked under the uphill shingles.
Proper fastening and sealing are paramount. The new flashing is secured with appropriate roofing nails, and high-quality elastomeric or polyurethane sealant is applied sparingly at critical seams, not as a primary waterproofing layer.
5. Re-installing Roofing Materials
Once the new flashing is securely in place, the shingles or tiles that were removed are re-installed. The roofer will carefully integrate them with the existing roof, ensuring they overlap the flashing correctly to create a seamless, watertight system. The goal is for the finished repair to blend in perfectly with the rest of the roof, both functionally and aesthetically.
Why Proactive Maintenance is Your Best Investment
The best way to deal with a leak from failed flashing is to prevent it from ever happening. Proactive roof maintenance is the most cost-effective strategy for any Florida homeowner. Waiting until you see a water stain on your ceiling means the damage has already been done.
A scheduled annual or bi-annual roof inspection from a qualified professional can catch flashing issues in their infancy. A roofer can spot sealant that is beginning to crack, fasteners that are starting to back out, or early signs of corrosion long before they become active leaks. These minor issues can often be addressed with simple, inexpensive tune-ups, such as applying new sealant or replacing a few fasteners.
This preventative approach saves you from the huge expense and disruption of major water damage restoration, mold remediation, and structural repairs. It also extends the overall lifespan of your roof and helps you maintain your homeowner’s insurance policy, which often requires proof of regular maintenance. Investing a small amount in an annual inspection is an investment in peace of mind.
Don’t Let a Small Gap Become a Huge Problem
In the complex system that is your roof, flashing plays an outsized role in keeping your home dry and safe. Its position at the most vulnerable intersections makes it the unsung hero of a healthy roof and, when it fails, the number one cause of destructive leaks. For homeowners in Florida, where water is a constant threat, the integrity of your roof flashing cannot be overlooked.
By understanding what flashing does, knowing the signs of failure, and acting quickly at the first sign of trouble, you can protect your home from the cascade of damage that follows a leak. Never underestimate a small stain or a bit of rust; they are often the first warnings of a much bigger problem. Procrastination only allows the damage to spread and the repair costs to multiply.
If you suspect an issue with your roof flashing or want to schedule a proactive inspection to ensure your home is secure, don’t wait for the next storm. Contact us today. Our team of experts can accurately diagnose any issues and provide the professional roof flashing repair needed to safeguard your home for years to come.

Your roof is the first line of defense against Florida’s intense sun, torrential downpours, and hurricane-force winds. A small leak or a few missing shingles might seem like a minor issue you can put off until later. However, delaying roof repair in Florida is a gamble that rarely pays off. What starts as a simple, affordable fix can quickly spiral into a catastrophic and costly nightmare. Understanding the true consequences of procrastination is the first step to protecting your home and your wallet.
The “out of sight, out of mind” approach is particularly dangerous in a state with a subtropical climate. The combination of high humidity, heavy rainfall, and severe weather events creates the perfect environment for minor roof problems to escalate. Postponing necessary roof repairs doesn’t just mean the problem will be there tomorrow; it means the problem will be worse tomorrow. The real cost isn’t measured in the initial repair quote you ignored, but in the thousands of dollars in structural damage, mold remediation, and ruined personal property that follow.
This guide will break down the substantial financial, structural, and safety risks associated with delaying roof repair in Florida. We will explore how small issues compound, what signs to look for, and why prompt action is the most cost-effective strategy for any homeowner. By the end, you’ll have a clear understanding of why immediate attention to your roof is a crucial investment in your home’s longevity and your family’s safety.
The Financial Snowball Effect: How Small Costs Multiply
One of the most compelling reasons to address roof issues immediately is the financial aspect. A minor repair, like replacing a few damaged shingles or sealing some flashing, might cost a few hundred dollars. When left unattended, this same issue can lead to extensive repairs costing tens of thousands. This escalation happens because water intrusion is relentless and its damage is cumulative.
Turning Minor Fixes into Major Rebuilds
A small, persistent leak is the starting point for a cascade of expensive problems. Let’s trace the path of destruction that follows a seemingly insignificant roofing issue.
From Shingles to Structure:
Initially, water might seep under a cracked shingle or through a gap in the flashing. At first, it only soaks the underlying roof deck, which is typically made of plywood or OSB (Oriented Strand Board). This wood sheathing is not designed for constant moisture. As it becomes saturated, it begins to swell, delaminate, and rot. The structural integrity of the entire roof is now compromised. What could have been a simple shingle replacement has now become a project requiring the removal of roofing materials to replace sections of the deck.
Ceiling and Attic Damage:
Once the roof deck is saturated, gravity takes over. Water will find its way into your attic space. Here, it can soak insulation, rendering it useless. Wet insulation loses its thermal resistance (R-value), causing your energy bills to climb as your HVAC system works harder to maintain your home’s temperature. Soon after, water will stain your ceilings, creating unsightly brown spots. If the leak continues, the drywall will become soft and eventually collapse, leading to a major interior repair project that includes new drywall, painting, and potentially replacing light fixtures or ceiling fans.
From the Attic to the Foundation:
The damage doesn’t stop at the ceiling. Water can run down the inside of your walls, going unnoticed for weeks or months. This hidden moisture can lead to wood rot in wall studs, damage electrical wiring creating a serious fire hazard, and saturate flooring. Over time, persistent water intrusion can even affect your home’s foundation, leading to cracks and stability issues that require extensive and incredibly expensive foundation repair. A delayed roof repair cost can thus encompass nearly every part of your home’s structure.
The Hidden Cost of Mold and Mildew
Florida’s warm, humid climate is an ideal breeding ground for mold and mildew. When water enters your home through a damaged roof, it creates the perfect environment for mold to flourish in your attic, behind walls, and within your HVAC system.
Health Implications:
Mold is not just an aesthetic problem; it poses significant health risks. Mold spores can become airborne and circulate throughout your home, triggering allergic reactions, asthma attacks, and other respiratory issues. Certain types of mold, like Stachybotrys chartarum (black mold), produce mycotoxins that can lead to more severe health problems. The cost of delaying roof repair can therefore include medical bills and a decline in your family’s quality of life.
Remediation Expenses:
Mold remediation is a specialized and costly process. It often involves sealing off the affected areas, using air filtration devices, removing and disposing of contaminated materials like drywall and insulation, and treating the remaining structures to prevent regrowth. A professional mold remediation project can easily cost thousands of dollars, an expense that is entirely preventable with timely roof maintenance.
Skyrocketing Utility Bills
Your roof plays a vital role in your home’s energy efficiency. It works in tandem with your insulation to keep cool, conditioned air inside during the hot summer months. When a roof is damaged, this system breaks down.
Waterlogged insulation, as mentioned, loses its effectiveness. Furthermore, gaps in the roof allow hot attic air to transfer into your living spaces, forcing your air conditioner to run longer and work harder. You might notice your home feeling warmer or more humid than usual, even with the AC on full blast. This inefficiency is directly reflected in your monthly utility bills. Addressing a roof leak promptly is not just a structural repair; it’s a measure to keep your energy costs under control.
Structural Degradation: Compromising Your Home’s Skeleton
Beyond the immediate financial costs, delaying roof repair leads to the slow but certain degradation of your home’s structural components. Your home is a system of interconnected parts, and when the roof fails, the integrity of the entire structure is at risk.
Rot, Decay, and the Loss of Integrity
Wood is a primary building material in most residential construction, used for roof decking, rafters, trusses, and wall frames. While strong and durable when dry, wood is highly susceptible to rot when exposed to chronic moisture.
Roof Deck and Rafters:
The roof deck provides the surface for your shingles, tiles, or metal panels. The rafters and trusses are the skeleton that supports the deck and the weight of the roofing material. When water seeps in, it begins to rot these critical components. Rotted wood loses its strength and can no longer support the load it was designed to bear. This can lead to sagging sections of your roof, a clear visual sign that significant structural damage has occurred. In a severe storm, a roof with rotted supports is far more likely to fail completely. What starts as a sag can end in a total collapse.
Wall and Ceiling Joists:
As water moves from the roof into the attic and walls, it continues its destructive path. Ceiling joists can begin to rot and sag, eventually leading to a ceiling collapse. Wall studs can weaken, compromising the stability of your walls. This type of damage is insidious because it often happens out of sight. By the time you notice a wall feeling soft or see visible sagging, the internal damage is already extensive. The repair process is no longer about patching a roof; it’s about rebuilding sections of your home’s frame.
The Impact of Florida’s Extreme Weather
Florida is no stranger to severe weather. From intense thunderstorms to full-blown hurricanes, your roof is constantly under assault. A roof in good condition is engineered to withstand these forces, but a compromised roof is an invitation for disaster.
Hurricane Vulnerability:
Hurricanes test the limits of every building component. High winds create uplift pressure that can tear shingles from a roof. If you already have loose or missing shingles, the wind can easily get underneath the roofing material and peel back large sections, exposing your home to the full force of the storm. A small, unrepaired leak can be a critical weak point that leads to catastrophic failure during a hurricane. Proper Florida roof maintenance is essential hurricane preparation.
Wind-Driven Rain:
During a typical Florida thunderstorm, rain often comes down sideways, driven by strong winds. This wind-driven rain is particularly adept at finding its way into any small crack or opening in your roof. A tiny gap in your flashing or a single cracked tile can allow gallons of water to enter your home during a storm. Delaying these minor repairs significantly increases your risk of major water damage every time a storm rolls through.
Safety Risks and Insurance Headaches
The consequences of a failing roof extend beyond money and materials. A compromised roof can pose direct safety risks to your family and create significant complications with your homeowner’s insurance.
Physical Dangers in Your Home
A neglected roof can make your home an unsafe environment. The most obvious risk is a structural collapse. A sagging ceiling or a weakened roof structure can give way without warning, causing serious injury or worse. This is a particularly high risk during a hurricane or severe storm when the roof is under maximum stress.
Electrical hazards are another major concern. Water leaking into walls and ceilings can come into contact with electrical wiring, outlets, and fixtures. This can cause short circuits, which can lead to power outages and damage to your appliances. More alarmingly, the combination of water and electricity creates a severe risk of electrocution and fire. An electrical fire that starts within your walls can spread rapidly, putting your entire family in danger.
The Insurance Quagmire: Denied Claims and Canceled Policies
Many homeowners assume their insurance will cover any major damage. However, insurance policies have specific conditions, and neglecting routine maintenance is often a reason for a claim to be denied.
The Maintenance Clause:
Most homeowner’s insurance policies contain a clause that requires the homeowner to perform reasonable maintenance to protect the property. If you have a leak and fail to get it repaired in a timely manner, the insurance company can argue that the subsequent damage (like mold or a collapsed ceiling) is a result of your negligence, not the initial event (like a storm). They may cover the initial roof damage but deny the much larger claim for the resulting interior damage. The cost of delaying roof repair could mean you are left to pay for the most expensive repairs out of pocket.
Risk of Policy Cancellation:
Insurance companies are in the business of managing risk. A home with a visibly deteriorating roof is a high-risk property. Your insurer may conduct periodic inspections, and if they find your roof to be in poor condition, they can demand that you replace it. If you fail to comply, they can raise your premiums significantly or cancel your policy altogether, leaving you uninsured. Finding new coverage with a bad roof is extremely difficult and expensive. Proactive roof repair in Florida is key to maintaining your insurability.
Identifying the Warning Signs: A Proactive Approach
The key to avoiding the high costs of delayed repairs is to be proactive. This means regularly inspecting your roof and knowing what warning signs to look for. Catching problems early is the most effective way to protect your home.
Interior Clues
You don’t always need to climb on your roof to spot a problem. Often, the first signs appear inside your home.
- Water Stains: Look for discoloration on ceilings or walls, especially after it rains. These can be yellowish or brownish spots.
- Peeling Paint: Moisture getting into walls near the ceiling can cause paint to bubble, peel, or flake.
- Sagging Ceiling: Any noticeable dip or sag in your ceiling is a major red flag indicating a persistent leak and saturated drywall.
- Drips or Puddles: The most obvious sign is actively dripping water. Check your attic regularly, especially during and after storms.
- Unexplained Musty Odors: A persistent damp, musty smell often indicates hidden mold or mildew growth.
Exterior Clues
Performing a safe, visual inspection from the ground can reveal a lot about your roof’s condition. Use binoculars for a closer look.
- Missing or Damaged Shingles: Look for shingles that are cracked, curled, buckled, or missing entirely. Pay close attention after high-wind events.
- Granule Loss: Asphalt shingles have a layer of granules that protect them from UV rays. Check your gutters and downspouts for an accumulation of these granules. “Bald” spots on your shingles are a sign of advanced wear.
- Damaged Flashing: Flashing is the metal material used to seal joints around chimneys, vents, and skylights. Look for signs of rust, cracks, or gaps in the sealant around these areas. Damaged flashing is a top cause of roof leaks.
- Sagging Roof Deck: Any visible sagging or drooping in the roofline is a sign of a serious structural problem that requires immediate professional attention.
- Clogged Gutters: Gutters filled with leaves and debris can cause water to back up and seep under the edge of the roof, leading to rot in the fascia boards and roof deck.
The Value of Professional Inspections
While homeowner inspections are helpful, they are no substitute for a professional evaluation. A qualified roofing contractor has the training and equipment to safely inspect every part of your roof and identify subtle issues you might miss. It is recommended to have your roof professionally inspected annually and after any major storm. This small investment can save you thousands in the long run by catching problems at their earliest, most manageable stage. Our team has seen firsthand how a small, undetected issue can escalate; you can see examples of our finished work and the quality we bring in our gallery.
Taking Action: The Smart Homeowner’s Strategy
Understanding the risks is only half the battle. The next step is to take decisive action to protect your investment. A proactive strategy for roof maintenance and repair will ensure your home remains safe, secure, and structurally sound for years to come.
Don’t Wait – Investigate and Act
If you notice any of the warning signs mentioned above, do not wait. The problem will not fix itself, and every day of delay increases the potential for more extensive and expensive damage. Contact a reputable, licensed, and insured roofing contractor to perform a thorough inspection. A professional can accurately diagnose the problem, identify the source of the leak, and provide a detailed quote for the necessary repairs.
Choosing the right contractor is crucial. Look for a company with a strong local reputation, positive reviews, and proof of proper licensing and insurance. A trustworthy contractor, like HW Roofing, will provide a clear explanation of the work needed without using high-pressure sales tactics.
Budgeting for Roof Maintenance
Your roof has a finite lifespan. Instead of being caught off guard by a sudden, large expense, plan for roof maintenance and eventual replacement as part of your home budget. A good rule of thumb is to set aside 1% of your home’s value annually for general home maintenance, a portion of which should be earmarked for your roof.
This fund can cover annual inspections, minor repairs, and gutter cleaning. By treating your roof as a system that requires regular upkeep, you shift from a reactive to a proactive mindset. This approach prevents small issues from becoming budget-breaking emergencies and extends the life of your roof.
Your Roof Is Your Home’s Shield
In Florida, your roof is more than just a part of your house; it’s a critical shield that protects everything and everyone inside. The real cost of delaying roof repair is not a simple calculation. It’s a combination of escalating financial burdens, irreversible structural decay, serious safety hazards, and the potential loss of your insurance coverage. The evidence is clear: procrastination is the most expensive option.
By staying vigilant for warning signs, conducting regular inspections, and addressing issues promptly with the help of a professional, you are making the smartest possible investment in your property. You are not just fixing a leak; you are preserving the structural integrity of your home, protecting your family’s health and safety, and securing your financial well-being.
If you have any concerns about the condition of your roof, don’t hesitate. The time to act is now. Contact us today to schedule a professional inspection and ensure your home is protected from the top down.
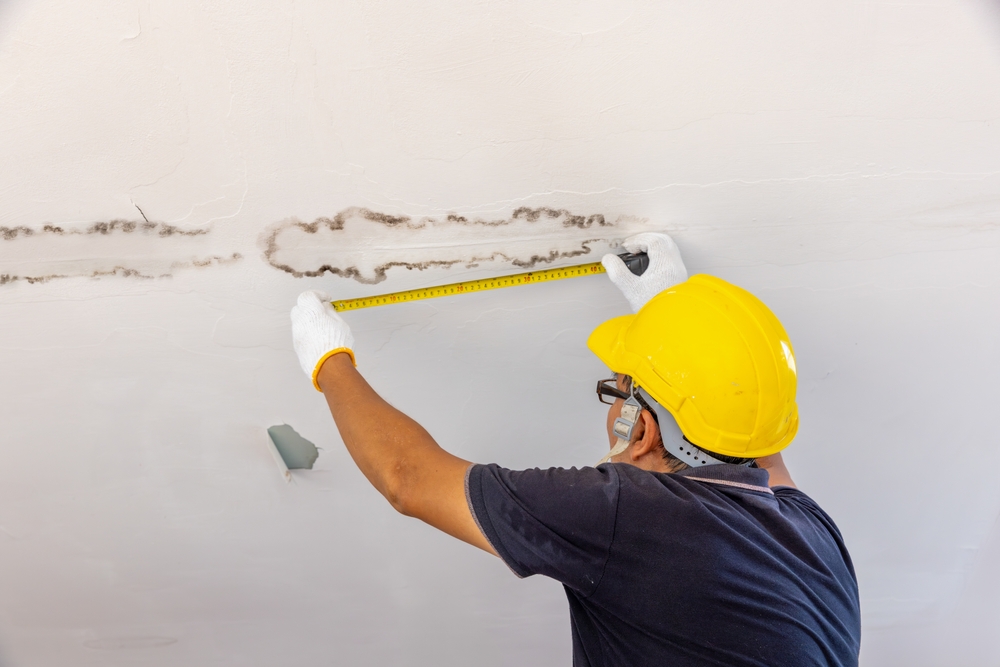
Water damage from a leaky roof is one of the most destructive and expensive problems a homeowner can face. What starts as a small, unseen drip can quietly lead to rotted structural beams, hazardous mold growth, and ruined interiors. The key to avoiding this nightmare scenario is early detection. By the time a dark water stain appears on your ceiling, the leak has likely been active for some time, causing progressive damage behind the scenes.
Fortunately, you don’t have to wait for disaster to strike. By learning how to perform regular inspections and recognize the subtle warning signs, you can identify a roof leak long before it becomes a catastrophe. Proactive homeowners can spot vulnerabilities and address them while they are still minor, affordable fixes.
This guide provides a comprehensive, step-by-step approach for homeowners to detect hidden roof leaks. We will cover how to conduct inspections from both the inside and outside of your home, detail the most common leak-prone areas, and explain why regular maintenance is your best defense against water intrusion.
The Importance of Proactive Roof Inspections
Many homeowners only think about their roof when a problem becomes obvious. However, waiting for a visible sign of failure is a reactive approach that almost always leads to more extensive and costly damage. A proactive mindset, centered on regular inspections, can save you thousands of dollars and immense stress.
Think of it like regular health check-ups. You go to the doctor to catch potential issues early, not after symptoms have become debilitating. Your roof, the primary protector of your entire home, deserves the same level of preventative care. An inspection twice a year—once in the spring after the winter thaw and once in the fall before cold weather sets in—can make all the difference.
Benefits of Early Leak Detection:
- Prevents Structural Damage: Catching a leak early stops water from rotting your roof decking, rafters, and joists, preserving the structural integrity of your home.
- Stops Mold Growth: Leaks create the damp, dark conditions where toxic mold thrives. Early detection eliminates the moisture source before mold can take hold.
- Saves Money: Fixing a few loose shingles or re-sealing flashing is a minor roof repair. Replacing rotted wood, drywall, and remediating mold is a major expense.
- Extends Roof Lifespan: By addressing small issues promptly, you prevent them from cascading into larger problems that can shorten the overall lifespan of your roofing system.
- Provides Peace of Mind: Knowing your roof is secure gives you confidence that your home is protected, no matter the weather.
Step 1: The Interior Inspection – Your First Clues
The easiest and safest place to start your search for a roof leak is from inside your home. Water that has breached the roof often leaves subtle clues in your attic and on your ceilings long before it drips onto your living room floor.
Checking the Attic: The Frontline of Leak Detection
Your attic is the best place to find direct evidence of a roof leak. If you can access it safely, grab a powerful flashlight and prepare to play detective.
Safety First: When moving around in an attic, only step on the solid wood joists or designated walkways. The space between the joists is the drywall of the ceiling below and will not support your weight.
What to Look For in the Attic:
- Dark Stains on Wood: Carefully scan the underside of the roof decking and the sides of the rafters. Look for dark, circular stains or long streaks. These are tell-tale signs that water has been present. The highest point of the stain is often near the leak’s origin.
- Damp or Compressed Insulation: Insulation should be light and fluffy. If you see areas that are matted down, compressed, or discolored, it’s a sign that they have been saturated with water. Carefully feel the insulation (wear gloves) to check for dampness.
- Signs of Mold or Mildew: Look for black, white, or greenish patches on wood surfaces. A musty, damp odor in the attic is also a major red flag for moisture and potential mold growth.
- Visible Daylight: On a bright, sunny day, turn off your flashlight and let your eyes adjust to the darkness. Scan the roof deck from below. If you see any pinpricks of light shining through, you have found a hole where water can easily enter.
- Frost on Cold Days: In the winter, inspect your attic on a very cold morning. If you see frost on the underside of the roof sheathing or on exposed nail heads, it’s a sign of attic condensation. This means warm, moist air from your home is leaking into the attic and freezing, which can lead to “attic rain” that mimics a roof leak.
Inspecting Your Ceilings and Walls
Even if you don’t have attic access, your interior walls and ceilings can signal a problem.
- Ceiling Stains: Look for any discolored rings, usually brownish or yellowish, on your ceilings. Pay close attention to the top floor of your home.
- Peeling or Bubbling Paint: Moisture behind drywall can cause paint to blister, bubble, or peel away from the wall, often near the junction where the wall meets the ceiling.
- Bulging Drywall: A bulge in the ceiling indicates that the drywall is saturated with water and is sagging under the weight. This is a sign of a significant, active leak that needs immediate attention.
Step 2: The Exterior Inspection – Spotting Trouble from the Ground
After checking for clues inside, it’s time to examine the exterior of your roof. For safety reasons, it’s best to perform this inspection from the ground using a good pair of binoculars. Leave the ladder-climbing to the professionals.
What to Look For on the Roof Surface:
- Damaged or Missing Shingles: Scan the entire surface of your roof. Are there any shingles that are cracked, curled at the edges, or missing entirely? These gaps are direct entry points for water. Pay special attention to areas that receive direct sunlight, as they tend to age faster.
- Bald Spots and Granule Loss: Look for dark patches on your shingles where the protective mineral granules have worn away. A large accumulation of these sand-like granules in your gutters is another sign that your shingles are aging and losing their defensive layer.
- Popped Nails: Look for nails that have pushed their way back up through the shingles. The raised nail head can break the seal of the shingle above it, creating a small but persistent pathway for water.
- Organic Growth: While some moss or algae can be a cosmetic issue, heavy growth can trap moisture against the shingles, accelerating their deterioration and potentially lifting their edges.
Focusing on Critical Junctions and Penetrations
Leaks don’t usually start in the middle of an unbroken shingle. Over 90% of roof leaks occur at points where the roof surface is penetrated or meets another structure. These are the areas that require your closest attention.
- Chimneys: The flashing system around your chimney is a notorious trouble spot. Look for any gaps, rust, or cracked sealant where the metal flashing meets the brick. Check the chimney masonry itself for cracked mortar joints or a cracked chimney crown.
- Vents and Pipes: Your roof has vents for plumbing, your attic, and your furnace. Inspect the rubber boots or metal collars around these pipes. Over time, the rubber can dry out and crack, and the sealant can fail, allowing water to run down the pipe and into your attic.
- Skylights: Inspect the flashing around your skylights. Look for cracked sealant or gaps. Also, check the skylight lens itself for cracks or failed seals, which can cause condensation to form between the panes.
- Roof Valleys: Valleys are the “V” shaped channels where two roof planes meet. They handle a large volume of water runoff. Look for missing shingles, heavy debris accumulation, or signs of damaged flashing in these areas.
- Dormers and Wall Intersections: Anywhere a wall intersects with a roofline is a potential leak spot. Check the step flashing that should be woven between the shingles and the siding. Look for gaps or areas where the flashing has pulled away.
Step 3: Checking Your Gutters and Downspouts
Your gutter system can also provide valuable clues about your roof’s health.
- Clogged Gutters: Gutters filled with leaves and debris can cause water to back up. This water can then flow under the edge of your shingles and rot the fascia board and roof decking.
- Granule Accumulation: As mentioned, finding a large amount of shingle granules in your gutters is a sign your roof is aging and becoming vulnerable.
- Water Stains on Siding: Look for water stains on the siding directly below the gutters. This can indicate that the gutters are clogged and overflowing.
When to Call a Professional
While a homeowner’s inspection is an invaluable tool for early detection, it has its limits. If your inspection reveals any of the red flags discussed above, or if you’re simply not comfortable or able to perform these checks yourself, it’s time to call a professional roofing contractor.
You should call for a professional inspection if:
- You find evidence of a leak (stains, dampness, etc.) but cannot locate the source.
- You see significant shingle damage, such as large areas of missing shingles or widespread curling.
- The suspected leak is around a complex area like a chimney or skylight.
- Your roof is over 15 years old and has never been professionally inspected.
- A major storm with high winds or hail has just passed through your area.
A professional roofer has the safety equipment and experience to get on your roof and perform a hands-on inspection. They can identify subtle signs of failure that are invisible from the ground and provide an accurate diagnosis of your roof’s condition. For a look at the quality work and thoroughness our teams provide, visit our project gallery.
A Maintenance Checklist to Prevent Future Leaks
The best way to identify a roof leak is to have a maintenance plan that prevents it from starting in the first place.
Twice-Yearly Checklist (Spring & Fall):
- [ ] Interior Inspection: Check your attic for any new stains, damp spots, or musty odors.
- [ ] Exterior Ground Inspection: Use binoculars to scan your roof for damaged shingles, popped nails, or problems with flashing.
- [ ] Clean Gutters and Downspouts: Remove all debris to ensure water can flow freely away from your roof and foundation.
- [ ] Trim Overhanging Trees: Cut back any branches that are touching or hanging over your roof to prevent scraping damage and reduce falling debris.
- [ ] Check for Debris: Ensure no leaves, pine needles, or branches have accumulated in roof valleys or behind the chimney.
Every 3-5 Years (or after a major storm):
- [ ] Schedule a Professional Inspection: Have a qualified roofer perform a comprehensive inspection to catch any potential issues you may have missed. This is especially important as your roof ages.
Conclusion: Your Diligence Is Your Best Defense
Your roof is a silent guardian, protecting your home day in and day out. But it can’t protect you forever without a little help. By learning how to identify a roof leak through regular, diligent inspections, you empower yourself to be a proactive defender of your own home. Catching a problem early—a cracked plumbing boot, a piece of loose flashing, a few missing shingles—can save you from the cascading consequences of water damage.
Don’t wait for the dreaded water stain to appear on your ceiling. Use this guide to create a routine inspection habit. Check your attic, scan your roof from the ground, and keep your gutters clean. And when you find something that doesn’t look right, or when it’s time for an expert eye, don’t hesitate to seek professional help. Your home is your biggest investment, and protecting it starts from the top.
If you have any concerns about your roof’s condition or want to schedule a professional inspection, contact us today. Our team at HW Roofing is dedicated to helping you keep your home safe and dry. For more information on our services, please visit our homepage.
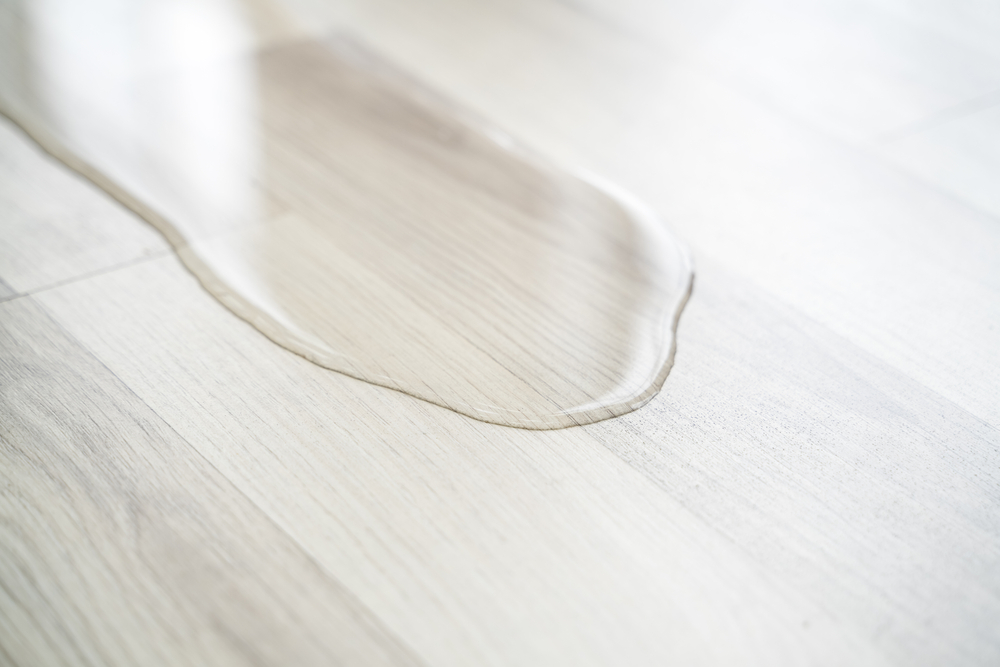
It’s a homeowner’s dreaded discovery: a discolored, brownish ring appearing on a once-pristine ceiling. A ceiling water stain is an unambiguous signal that water is getting somewhere it shouldn’t be. The immediate assumption for many is a leak in the roof, and while that is a common cause, it’s not the only possibility. The true source could be anything from a leaky pipe to attic condensation.
Regardless of the cause, a water stain is never something to ignore. It is a symptom of a hidden problem that can lead to widespread structural damage, hazardous mold growth, and costly repairs if left unaddressed. Determining the origin of the leak is the critical first step toward a lasting solution.
This in-depth guide will help you play detective, exploring the various causes of ceiling water stains, explaining how to trace the source, outlining the serious risks of inaction, and detailing the steps you should take to protect your home.
What’s Causing That Unsightly Ceiling Stain?
Water is a tricky adversary. It can travel a long way from its entry point, running along rafters, pipes, and joists before it finally soaks through your ceiling drywall. This makes identifying the source a process of elimination. The location, color, and behavior of the stain all provide valuable clues.
1. The Most Common Culprit: A Leaky Roof
Your roof is your home’s first line of defense against the elements, but over time, that defense can be breached. Roof leaks are a primary cause of ceiling water stains, especially those on an upper floor.
How Roof Leaks Happen:
- Aged or Damaged Shingles: An old roof with cracked, curling, or missing shingles is an open invitation for water. The protective granule layer may have worn away, exposing the asphalt to UV degradation and making it brittle.
- Failed Flashing: Flashing is the metal stripping that seals the joints around chimneys, skylights, vents, and valleys. If the sealant cracks or the metal corrodes or pulls away, it creates a direct channel for water to enter your attic.
- Ice Dams: In colder climates, ice dams form at the roof’s edge, preventing melting snow from draining. The water backs up under the shingles and soaks the roof decking, leading to leaks that often appear on exterior walls.
- Storm Damage: Hail can puncture shingles, and high winds can lift and tear them off, leaving the underlayment exposed.
Clues It’s a Roof Leak:
- The stain appears on the top floor of your house.
- The stain gets darker or actively drips during or after it rains.
- The stain is brownish or yellowish in color, which comes from water filtering through wood and insulation.
- You find other signs of moisture in the attic, like damp insulation or wet roof decking.
A thorough roof inspection is necessary to pinpoint the exact failure point. This type of diagnosis and subsequent fix falls under professional roof repairs.
2. Hidden Plumbing Leaks
Not all water comes from the sky. Your home is a network of plumbing pipes for water supply and drainage, and a failure in this system is another major cause of ceiling stains.
Common Plumbing Issues:
- Leaky Supply Lines: Pressurized water lines running to bathrooms, kitchens, or laundry rooms can develop slow, pinhole leaks at fittings or joints. Since they are always under pressure, they can drip continuously.
- Failing Drain Pipes: A cracked drain pipe from a toilet, shower, or sink will only leak when that fixture is used. This can make the leak intermittent and harder to diagnose.
- Worn-Out Wax Seals: The wax ring at the base of a toilet is a common failure point. A faulty seal can cause water to leak onto the subfloor and seep into the ceiling of the room below every time the toilet is flushed.
- Cracked Shower Pans or Grout: A leak from an upstairs shower might not be from the pipes at all, but from water seeping through cracked grout or a failed shower pan.
Clues It’s a Plumbing Leak:
- The stain is located below an upstairs bathroom, kitchen, or laundry room.
- The stain is constant or appears/grows when a specific fixture is used.
- The water stain may appear relatively clean if it’s from a supply line, as it hasn’t filtered through dirty attic materials.
- You hear dripping noises in the wall or ceiling, even when it’s not raining.
3. Condensation and Humidity Issues
Sometimes, the water isn’t coming from a leak at all, but from moisture that’s already inside your home. Condensation occurs when warm, moist air comes into contact with a cold surface, causing the water vapor to turn back into liquid.
Sources of Condensation Leaks:
- Attic Condensation: If your attic is poorly ventilated, warm, humid air from your living spaces (from cooking, showers, etc.) gets trapped. In winter, this moist air hits the cold underside of the roof deck and condenses, creating “attic rain.” This drips onto the insulation and ceiling, perfectly mimicking a roof leak.
- Leaky HVAC Ducts: Uninsulated or poorly sealed air conditioning ducts running through a hot attic can “sweat” profusely. This condensation can drip and create water stains.
- Clogged AC Condensate Line: Your air conditioner removes humidity from the air, channeling it away through a condensate drain line. If this line gets clogged with algae or dirt, the drain pan in your attic can overflow, spilling water onto your ceiling.
Clues It’s a Condensation Issue:
- The stain appears or worsens during periods of high humidity or extreme temperature differences (e.g., a very cold night or a very hot day when the AC is running hard).
- You notice signs of high humidity in the attic, like damp wood, musty smells, or frost on the roof sheathing in winter.
- The stain is located near an HVAC vent or below the attic unit.
Playing Detective: How to Trace the Source of the Stain
Once you spot a stain, a little investigation can help you narrow down the cause before you call a professional.
Step 1: Note the Location and Appearance
Is the stain directly under a bathroom? It’s likely plumbing. Is it on the top floor in the middle of a room? It could be a roof leak or attic condensation. Note the color—dark brown stains often suggest the water has traveled through dirty insulation or rotting wood, pointing toward a roof or attic problem.
Step 2: Check the Weather and Usage Patterns
Does the stain only appear after a heavy rain? This strongly suggests a roof leak. If it’s independent of the weather, start thinking about plumbing or HVAC. Try running the shower in the upstairs bathroom for 15 minutes and see if the leak below worsens. Flush the toilet and check again. Turn on the AC and inspect the area around the air handler in the attic.
Step 3: The Attic Inspection (If Safe to Do So)
If you can safely access your attic, it’s the best place to find evidence. On a sunny day, turn off the lights and look for any pinpricks of daylight coming through the roof—a sure sign of a hole. Use a flashlight to look for wet roof decking, damp or compressed insulation, and dark stains on the wood rafters. Follow the path of the stain uphill; water runs down, so the entry point will be higher than where the stain appears on your ceiling. Look for dripping pipes or a full AC drain pan.
Safety First: When in the attic, only step on the wooden joists. The material between them is your ceiling drywall and will not support your weight.
The Serious Risks of Ignoring a Water Stain
A ceiling water stain is your home’s early warning system. Turning a blind eye to it allows a small problem to snowball into a major catastrophe.
- Structural Damage: Persistent moisture will rot wood. This includes your ceiling joists, wall studs, and, most critically, your roof’s rafters and decking. What could have been a simple shingle replacement can become a major structural rebuild if the rot spreads. You can see examples of both minor and major projects in our gallery.
- Mold and Mildew Growth: Drywall, wood, and insulation are a buffet for mold. Once mold takes hold in a damp, dark space like an attic or wall cavity, it can flourish. Toxic black mold releases spores into your home’s air, which can cause severe respiratory issues, allergies, and other health problems, especially for children and the elderly. Mold remediation is an expensive and disruptive process.
- Compromised Electrical Systems: Water and electricity are a dangerous combination. If water comes into contact with wiring, junction boxes, or light fixtures in your ceiling, it can create a serious fire hazard or risk of electric shock.
- Damaged Insulation: Wet insulation loses its insulating properties (R-value). It becomes compressed and useless, leading to higher energy bills. Once saturated, fiberglass or cellulose insulation rarely dries out properly and usually needs to be replaced.
- Escalating Repair Costs: The longer you wait, the more damage occurs and the more it costs to fix. A small leak might require a simple patch. A long-term leak will require replacing drywall, insulation, rotted wood, and potentially dealing with mold remediation—turning a few hundred-dollar fix into a multi-thousand-dollar disaster.
What to Do When You Find a Water Stain: An Action Plan
Finding a stain can be stressful, but a calm, methodical response can save you a lot of trouble.
- Prevent Further Damage (Temporary Fixes):
- Place a bucket and towels under the dripping area to protect your floors and furniture.
- If the ceiling is bulging with water, the drywall is saturated and at risk of collapsing. Carefully puncture the center of the bulge with a screwdriver to allow the water to drain in a controlled manner. This relieves the pressure and prevents a larger section from caving in.
- If you suspect an active plumbing leak, shut off the main water supply to your house until a plumber can arrive.
- Document Everything: Take clear photos of the ceiling stain, any bulging, and any evidence you found in the attic (wet wood, dripping pipes, etc.). This documentation is invaluable for insurance claims and for communicating the problem to your contractor.
- Call the Right Professional: Your investigation should point you in the right direction.
- Roof Leak Suspected: If the stain is on the top floor and related to rain, call a reputable roofing contractor. They have the expertise and safety equipment to perform a thorough roof inspection.
- Plumbing Leak Suspected: If the stain is below a bathroom and related to water usage, call a licensed plumber.
- HVAC Leak Suspected: If the issue seems tied to your air conditioning, call an HVAC technician.
- Unsure of the Cause? A general contractor or a trusted roofing company is a great place to start. At HW Roofing, we have diagnosed countless water intrusion issues and can help determine if the roof is the source. Don’t hesitate to contact us for an expert opinion.
Long-Term Solutions: Repairing the Damage
Once the source of the water has been stopped, you can address the cosmetic damage. It’s crucial to wait until you are 100% certain the leak is fixed.
- Ensure the Area is Completely Dry: You may need to run dehumidifiers and fans to thoroughly dry out the wood joists and surrounding drywall. A moisture meter is the best way to confirm that the materials are dry enough to be repaired. Painting over a damp spot will only trap the moisture and lead to peeling paint and mold.
- Treat for Mold: If there are any signs of mold, the affected area should be treated with a bleach solution or a specialized mold killer. For widespread mold, professional remediation is necessary.
- Repair the Drywall: Small, stable stains may be covered with a stain-blocking primer and then painted. For larger stains, or if the drywall is soft, sagging, or crumbling, the damaged section will need to be cut out and replaced with a new piece of drywall, which is then taped, mudded, sanded, and primed.
- Paint: Once the repair is complete and primed, you can paint the ceiling to match. It’s often best to paint the entire ceiling from corner to corner to ensure a uniform finish.
Conclusion: A Water Stain Demands Action
A water stain on your ceiling is more than just an eyesore; it’s a critical alert. It tells you that a hidden failure in your home’s protective shell—be it the roof, plumbing, or ventilation system—is allowing water to cause silent but significant damage. By acting quickly to identify the source and engage the right professionals, you can stop the problem in its tracks.
Ignoring the stain is a gamble that almost never pays off. It allows for the progression of wood rot, the growth of harmful mold, and the risk of structural failure. The cost and complexity of repairs only grow with each passing day.
Protect your biggest investment. When you see a water stain, start your investigation, contain the immediate problem, and call for expert help. Whether you need comprehensive roof leak repair or guidance on another issue, taking decisive action is the key to preserving the safety, health, and value of your home. Visit our homepage to learn more about how we protect homes like yours.
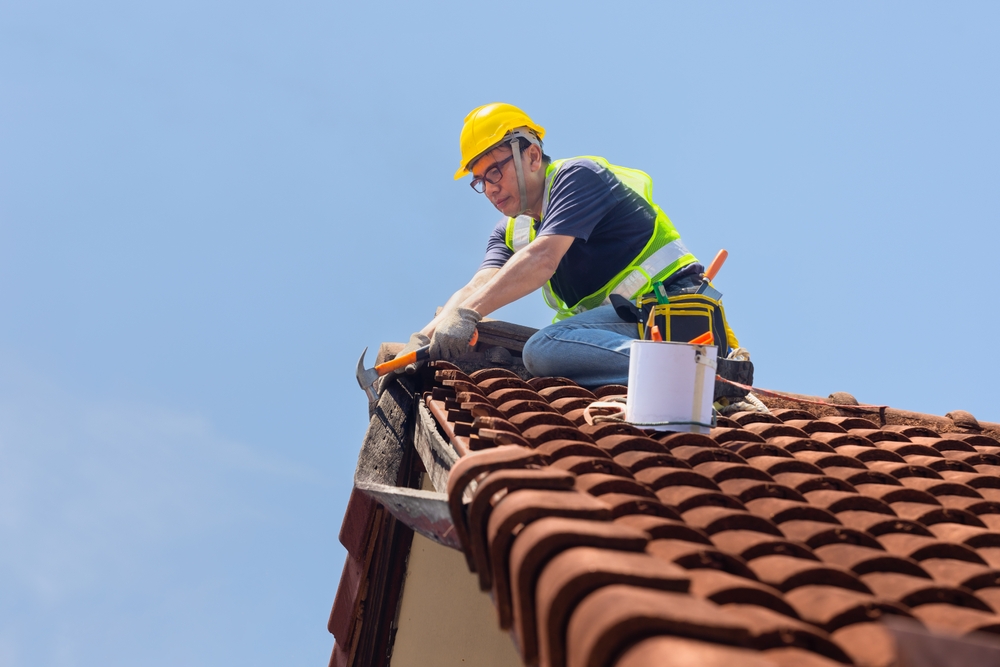
When you clean out your gutters, you expect to find leaves, twigs, and maybe a lost tennis ball. But what about that gritty, black, sand-like material collecting at the bottom of your downspouts? Those are shingle granules, and finding them can be an important clue about the health and age of your roof. While a small amount of granule loss is normal, a large accumulation can be a red flag, signaling that your roof’s primary layer of defense is wearing thin.
These tiny, ceramic-coated mineral particles are more than just a decorative topping for your asphalt shingles. They are the frontline soldiers protecting your roof from the elements. Understanding why they come loose and what it means is crucial for any homeowner. This guide will explain the role of shingle granules, the reasons you’re finding them in your gutters, how to tell the difference between normal wear and a serious problem, and what steps you should take to protect your home.
What Are Shingle Granules and Why Are They Important?
Before we dive into why they fall off, it’s essential to understand what shingle granules do. An asphalt shingle is made of a fiberglass or organic mat, saturated with asphalt to make it waterproof. The top surface is then coated with a layer of these crushed mineral granules. This coating serves several critical functions:
- UV Protection: The granules act as a sunblock for your roof. They shield the underlying asphalt from the sun’s harsh ultraviolet rays, which would otherwise cause the shingle to dry out, become brittle, and crack. Without this protection, your shingles would fail in just a few years.
- Fire Resistance: The mineral composition of the granules provides a degree of fire resistance, helping to achieve a Class A fire rating for most modern shingles. This means they are effective against severe exposure to fire originating from outside the home.
- Durability and Impact Resistance: The granules provide a hard, protective shell that helps the shingle withstand impacts from hail, falling branches, and foot traffic during inspections or repairs.
- Aesthetics: Granules come in a wide variety of colors, creating the specific look and curb appeal of your roof. Some modern “cool roof” shingles even have special reflective granules to help reduce heat absorption and lower cooling costs.
In short, the granule layer is what gives a shingle its longevity and protective power. When this layer is compromised, the shingle’s lifespan is significantly reduced.
Why Am I Finding Granules in My Gutters? Common Causes
Finding a collection of granules in your gutters can be alarming, but it isn’t always a cause for immediate panic. The reason for the granule loss is key to determining its severity.
1. Normal Granule Loss from a New Roof
If your roof was installed within the last year, finding granules in your gutters is completely normal and expected. During the manufacturing and packaging process, an excess of granules is applied to the shingles to ensure full coverage. When the shingles are unpacked, handled, and installed, many of these loose, excess granules are dislodged. The first few rainstorms will wash them down into your gutters.
What to look for: You’ll see a one-time “shedding” event of loose granules shortly after installation. After this initial wash-off, the amount of granules you find should decrease dramatically. This is not a sign of a defective roof but simply part of the settling-in process.
2. Roof Age and Natural Wear and Tear
This is the most common reason for significant granule loss on an older roof. Asphalt shingle roofs are designed to last anywhere from 15 to 30 years, depending on the quality of the shingle. Over decades of exposure to sun, rain, wind, and temperature fluctuations, the bond between the granules and the asphalt weakens.
As the shingles age, the asphalt becomes more brittle and less flexible. Thermal shock (the expansion and contraction from daily heating and cooling) causes the shingles to flex, which can slowly pop the embedded granules loose. Rain then easily washes them away.
What to look for: A steady, increasing amount of granules in your gutters year after year. If your roof is approaching the 15-20 year mark and you’re seeing significant shedding, it’s a strong indicator that the shingles are reaching the end of their effective lifespan. You may also see bald patches on the shingles themselves where the black asphalt underlayer is exposed.
3. Severe Weather Damage
A single severe weather event can strip years off your roof’s life by violently dislodging granules.
- Hailstorms: Hailstones act like tiny hammers, pounding the shingles and knocking granules loose at the points of impact. After a hailstorm, you will often find a large, sudden deposit of granules in your gutters. You can also spot hail damage by looking for circular bruises or pockmarks on the shingles themselves.
- Heavy Rain and Wind: Wind-driven rain can have a “sandblasting” effect on your shingles, scouring away granules. Strong winds can also cause shingles to lift and bend, flexing them to the point where granules break free.
- Falling Debris: Tree branches falling during a storm can scrape across the roof surface, gouging out granules and damaging the shingles.
What to look for: A sudden, large accumulation of granules in your gutters immediately following a storm. If you experience a major weather event, it’s wise to inspect your gutters and the roof surface for signs of damage. Prompt action is often needed for these types of roof repairs.
4. Poor Installation Quality
Improper installation techniques can cause premature granule loss and shingle failure.
- Improper Nailing: If shingles are fastened incorrectly (over-driven, under-driven, or angled nails), they can be subject to excess stress and movement, which can dislodge granules. Walking on a newly installed roof on a very hot day can also scuff granules and embed them into the soft asphalt.
- Walking on the Roof: Excessive or careless foot traffic can scuff granules off the shingles. This is why it’s important to hire professionals who know how to navigate a roof without causing unnecessary damage. Our teams are trained to work efficiently while preserving the integrity of your roofing materials, as seen in our project gallery.
5. Blistering and Manufacturing Defects
Although less common with modern shingles, manufacturing defects can sometimes cause granule loss. Shingle blistering happens when moisture is trapped within the shingle during production. On a hot day, this moisture heats up and expands, creating a “blister” or bubble on the shingle’s surface. These blisters can pop, releasing the granules that were covering them. Blisters look like pimples on the shingle, whereas hail hits look like bruises or dents.
When Should You Be Concerned?
So, how do you distinguish between normal shedding and a problem that requires professional attention? Here’s a simple guide:
Normal (Little to No Concern):
- A noticeable amount of granules after a brand-new roof installation.
- A very small, “dusting” of granules found during regular gutter cleaning on a roof that’s less than 10 years old.
Moderate Concern (Time to Pay Attention):
- You’re noticing a consistent and increasing amount of granules with each cleaning.
- Your roof is over 15 years old and shedding granules. This is a sign of aging, and you should start planning for a future replacement.
- You find granules along with other debris, like small pieces of cracked or broken shingles.
High Concern (Act Immediately):
- You find a large, sudden accumulation of granules after a storm.
- You can see visible “bald spots” on your shingles from the ground, where the dark asphalt is exposed.
- Your gutters are sagging or clogging frequently due to the sheer volume of granule sediment.
- You find granules inside your home, which indicates a much more severe problem where the shingle and decking have been completely compromised.
If you fall into the “High Concern” category, it’s time to contact us for a professional inspection. Ignoring these signs can leave your roof vulnerable to leaks and rapid deterioration.
The Consequences of Extensive Granule Loss
A shingle without its protective granules is a shingle that is failing. The consequences of ignoring this issue can be severe and costly.
Accelerated Aging and UV Damage
Once the granules are gone, the asphalt layer is exposed directly to the sun. UV radiation breaks down the oils in the asphalt, causing it to dry out, shrink, and crack. A shingle that loses its granules will fail exponentially faster than a protected one.
Water Intrusion and Leaks
Cracked and brittle shingles can no longer keep water out effectively. Water can seep through the cracks, saturate the roof decking, and eventually find its way into your attic and home. This can lead to rotted wood, damaged insulation, and mold growth.
Clogged and Damaged Gutters
The granules themselves can cause problems. This heavy, abrasive sediment can build up in your gutters, creating clogs that cause water to back up and overflow. This overflow can damage your fascia boards, siding, and even your home’s foundation. The weight of the wet sediment can also cause gutters to sag and pull away from the house.
What to Do About Granule Loss: A Homeowner’s Action Plan
If you’ve determined that your granule loss is more than just normal wear, it’s time to take action.
1. Document and Inspect
Start by safely inspecting your roof from the ground with binoculars. Look for the source of the granule loss. Do you see specific areas that look bare or discolored? Take photos of the granules in your gutters and any visible damage on the roof. This documentation is valuable for both insurance claims and for your roofing contractor.
2. Schedule a Professional Roof Inspection
This is the most critical step. A professional roofing contractor can safely get on your roof and perform a hands-on inspection. They can identify the extent of the granule loss, assess the overall health of your shingles, and check for underlying issues like soft decking or hail damage that you can’t see from the ground. An expert diagnosis is essential for determining the right course of action.
3. Consider Repair vs. Replacement
Based on the professional inspection, you will be presented with your options.
- Minor Repairs: If the granule loss is isolated to a few shingles damaged by hail or a falling limb, a simple roof repair may be all that’s needed. A contractor can replace the individual damaged shingles to restore the roof’s integrity.
- Roof Replacement: If the granule loss is widespread and a result of old age or extensive storm damage, a full roof replacement will likely be the recommendation. While it’s a larger investment, trying to “patch” a roof that is systemically failing is often a waste of money. A new roof, which you can learn more about on our homepage, restores complete protection and comes with a new warranty, providing peace of mind for decades.
4. Ongoing Maintenance
Once your roof is repaired or replaced, proactive maintenance can help maximize its lifespan.
- Clean Your Gutters Regularly: Clean your gutters at least twice a year (spring and fall). This not only prevents clogs but also allows you to monitor the amount of granule loss over time.
- Trim Overhanging Trees: Keep tree branches trimmed back from your roof to prevent them from scraping shingles and to reduce the risk of damage during a storm.
- Get Regular Inspections: Have your roof professionally inspected every few years, especially after it passes the 10-year mark or after a major storm. Catching problems early is always more affordable.
Can You “Recoat” Shingles with New Granules?
A question that sometimes comes up is whether you can apply a new coating or sealant to an old roof to replace the lost granules. In general, this is not a recommended or effective solution. The field-applied coatings and sealants available on the market do not bond to the old shingle surface in the same way as the factory-embedded granules. They can often crack, peel, and sometimes trap moisture, potentially making the problem worse. The most reliable and long-lasting solution for a roof with widespread granule loss is replacement.
Conclusion
The gritty sediment in your gutters is telling you a story about your roof. While a few granules from a new roof are nothing to worry about, a steady or sudden loss on an aging roof is a clear warning sign. It means your home’s primary shield against the elements is weakening. By paying attention to these signals, you can move from a reactive to a proactive homeowner, addressing issues before they turn into catastrophic leaks and costly structural damage.
Don’t ignore the message from your gutters. Take a look, assess the situation, and if you have any concerns, call a professional. A thorough inspection can provide a clear picture of your roof’s health and help you make an informed decision to repair or replace it, ensuring your home stays safe and dry for years to come.
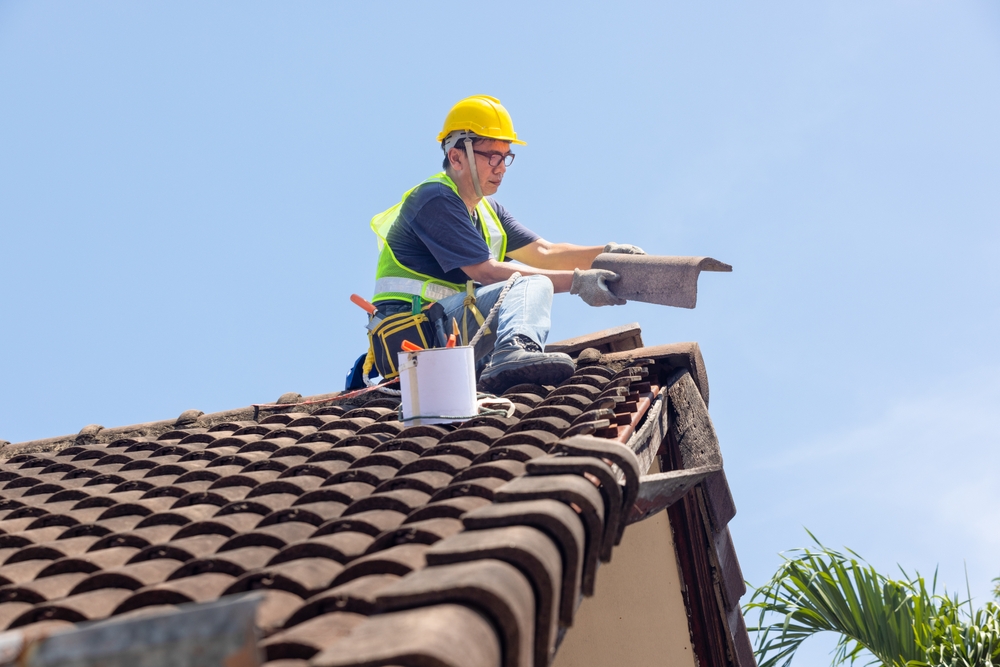
Few home maintenance issues are as alarming as looking up at your roofline and seeing a distinct dip or curve where a straight line should be. A sagging roof isn’t just a cosmetic problem; it’s a critical warning sign that the structural integrity of your home’s most important protector is compromised. Ignoring it is not an option, as a sagging roof is a clear indication of underlying failure that will only worsen over time, potentially leading to catastrophic collapse.
This problem doesn’t happen overnight. It develops gradually due to persistent stress, moisture, or design flaws. Understanding the reasons behind a sagging roof is the first step toward a solution. This comprehensive guide will walk you through the common causes of roof sagging, explain the extreme urgency of addressing the issue, and outline the available repair options, from reinforcement to full replacement.
What Causes a Roof to Sag?
A roof is a complex system of beams, rafters, decking, and coverings designed to bear significant weight and withstand the elements. When any part of this system fails, the load is no longer distributed correctly, leading to the visible sag. Pinpointing the cause is crucial, as the repair strategy will depend entirely on the root problem.
1. Water Damage and Chronic Moisture
Water is the number one enemy of any roof structure. Persistent leaks, whether from damaged shingles, failed flashing, or ice dams, can have a devastating effect on the wooden components of your roof.
- Rotting Decking: The roof deck, typically made of plywood or OSB (Oriented Strand Board), is the surface to which your shingles are attached. When water seeps underneath the shingles, it saturates the decking. Over time, this constant moisture leads to rot, causing the wood to soften, weaken, and lose its ability to support the weight of the roofing materials. The deck will start to bend between the rafters, creating a noticeable sag.
- Weakened Rafters and Trusses: If a leak is severe or goes unchecked for a long time, water can travel beyond the decking and begin to rot the rafters or trusses—the primary support beams of your roof. Rotted rafters can crack, warp, or bow under the load they are meant to carry, causing a significant dip in the roofline.
2. Undersized or Damaged Structural Supports
Your roof’s framing must be designed to handle the “dead load” (the weight of the roofing materials themselves) and the “live load” (temporary weight like snow, ice, or wind pressure). If the original construction was faulty, the roof might be destined to sag from day one.
- Inadequate Rafters or Trusses: If the wooden supports (rafters or trusses) are too small, spaced too far apart, or lack proper bracing, they simply may not be strong enough to hold up the roof over the long term. This is a common issue in older homes built before modern building codes or in DIY additions where professional engineering was overlooked.
- Modifications and Damage: Cutting into a rafter or truss to install a skylight or a vent without properly reinforcing the surrounding structure can critically weaken the frame, leading to sagging.
3. Excessive Weight on the Roof
A roof is only engineered to carry a certain amount of weight. Exceeding this limit will inevitably cause the structure to strain and sag.
- Too Many Layers of Shingles: A common cost-saving measure in the past was to install a new layer of asphalt shingles directly over the old one. While some building codes allow for two layers, adding a third or even fourth layer dramatically increases the dead load on the roof structure. This excess weight can overwhelm the rafters and decking, causing them to bow.
- Heavy Snow and Ice Accumulation: In regions with harsh winters, a heavy, wet snowfall can add thousands of pounds of live load to a roof. If the roof wasn’t designed for such conditions or is already weakened, this weight can cause immediate sagging or structural damage.
4. Age and Material Degradation
Like any part of your home, roofing materials have a finite lifespan. As a roof system ages, all its components begin to break down. Shingles lose their granules, sealants fail, and the wooden structure loses some of its strength and resilience. An old roof is far more susceptible to sagging because its materials are already in a weakened state. If your roof is over 20 years old and showing signs of sagging, it’s a strong indicator that it has reached the end of its useful life.
The Urgency: Why You Cannot Ignore a Sagging Roof
Seeing a sag in your roof should trigger immediate action. This is not a “wait and see” problem. The risks associated with a sagging roof are severe and escalate the longer you wait to address them.
The Risk of Collapse
This is the most terrifying and most real danger. A sagging roof is a structure that is actively failing. The sag indicates that the supports are no longer able to bear the load. A heavy rainstorm, a significant snowfall, or even strong winds could be the final straw that leads to a partial or total roof collapse. A collapse endangers anyone inside the home and will cause catastrophic damage to your property.
Progressive Structural Damage
The sag itself is a symptom of a deeper issue that will continue to worsen. As the roof sags, it creates low spots where water can pool instead of draining away. This standing water accelerates the rot in the decking and framing. Furthermore, the sagging puts additional stress on other parts of your home’s structure, potentially leading to cracked walls, sticking doors, and damaged foundations. What might start as a localized roof repair can quickly spiral into a whole-house structural crisis.
Escalating Repair Costs
The longer you wait, the more expensive the fix will be. A small section of rotted decking is relatively simple to replace. However, if that rot is allowed to spread to the rafters and trusses, the repair becomes exponentially more complex and costly. It can be the difference between a targeted repair and a full roof and framing rebuild. Acting quickly contains the problem and saves you a significant amount of money in the long run.
Reduced Property Value and Insurability
A visibly sagging roof will send potential homebuyers running and can make your property difficult to sell. It can also cause problems with your homeowner’s insurance. An insurer may refuse to renew your policy or deny a claim for damage if they determine the issue was caused by negligence or failure to maintain the property.
Assessing the Severity: How Bad Is It?
You can perform a preliminary visual inspection to gauge the severity of the sag.
- From the Ground: Stand back from your home and look at the roof ridges and lines from multiple angles. Are they straight or do they dip? Use binoculars for a closer look. A slight waviness might just be settled decking, but a pronounced “U” shape is a major red flag.
- From the Attic: If you can do so safely, go into your attic with a powerful flashlight on a sunny day. Look for signs of water intrusion like dark stains, mold, or wet insulation. Examine the rafters or trusses. Do you see any that are cracked, bent, or pulling away at the joints? Look for daylight coming through the roof deck, which indicates holes from rot.
While a visual check is a good start, a sagging roof demands a professional evaluation. A qualified roofing contractor has the training and experience to safely inspect the roof structure, identify the exact cause of the sag, and determine the extent of the damage. For a comprehensive assessment, contact us to schedule a professional inspection.
Repair Options for a Sagging Roof
The appropriate repair depends entirely on the cause and severity of the sag. Solutions range from minor reinforcements to a complete rebuild of the roof system.
1. Reinforcing the Existing Structure
If the sagging is minor and the primary structural members (rafters or trusses) are still sound, reinforcement might be an option. This is often the case when the issue is caused by undersized framing or minor damage.
- Sistering Rafters: This technique involves attaching a new rafter of the same or greater size directly alongside the weakened or broken one. The two are securely fastened together, effectively creating a stronger, doubled-up support that can bear the load and correct the sag.
- Adding Bracing and Supports: A structural engineer or experienced contractor may recommend adding collar ties, purlin bracing, or support posts in the attic. These additions help to redistribute the roof’s load down to load-bearing walls, taking the strain off the sagging rafters. This is a common solution for roofs that were inadequately braced during original construction.
It is critical to note that reinforcement only works if the underlying wood is not rotted. Adding a new board to a rotting one will not solve the problem.
2. Replacing Damaged Components
When water damage and rot are the culprits, the compromised materials must be completely removed and replaced.
- Decking Replacement: If the sag is confined to the roof deck between the rafters, the solution involves stripping the shingles off the affected area, cutting out the rotted plywood or OSB, and installing new decking. While this is underway, it’s the perfect time to inspect the rafters below to ensure they are still sound.
- Rafter or Truss Replacement: If the main support beams are rotted, they must be replaced. This is a major structural job that involves temporarily supporting the roof, carefully removing the damaged timber, and installing a new, properly sized rafter or truss. This is a complex and dangerous task that should only be performed by highly skilled professionals.
Our team has extensive experience with these types of intensive roof repairs. You can see examples of our structural work in our project gallery.
3. Full Roof Replacement
In many cases, especially with older roofs or widespread damage, a full roof replacement is the only viable and responsible solution. A sagging roof is often a symptom of a system that has failed in multiple ways. A full replacement addresses all the issues at once.
The process typically involves:
- Tear-Off: Removing all layers of old shingles down to the roof deck. This is essential for properly inspecting the structure.
- Structural Inspection and Repair: With the decking exposed, the contractor can fully assess the rafters and trusses. At this stage, any necessary sistering, bracing, or replacement of structural members is performed. All rotted decking is also replaced.
- Installation of a New System: A complete new roofing system is installed, including new underlayment (ice and water shield), flashing, shingles, and proper ventilation. This ensures that the original cause of the failure (like water intrusion or poor ventilation) is also corrected.
While a full replacement is a significant investment, it provides a long-term solution and peace of mind. It restores the structural integrity of your home, improves its value, and comes with a new warranty. Our experts at HW Roofing can guide you through the entire process, from initial inspection to final installation. Visit our homepage to learn more about our comprehensive roofing services.
Conclusion: Act Decisively to Protect Your Home
A sagging roof is one of the most serious structural problems a homeowner can face. It is a visible cry for help from your home, signaling deep-seated issues that threaten its safety and stability. Whether caused by water damage, improper construction, excess weight, or simply old age, the urgency remains the same. The risk of collapse, progressive damage, and skyrocketing costs makes immediate action non-negotiable.
Take a moment to inspect your roofline today. If you see any sign of a dip, curve, or sag, do not delay. Your next step should be to call a trusted, professional roofing contractor for a thorough structural assessment. They can diagnose the root cause of the problem and recommend the right solution, be it targeted reinforcement or a full replacement. By acting decisively, you are not just fixing a roof; you are protecting your family, your property, and your single largest investment.

It’s a baffling and unsettling discovery. You walk into a room and see a fresh water stain on the ceiling, or worse, an active drip. You check the weather—it’s been sunny for days. How can your roof be leaking with no rain? This confusing scenario is more common than you might think, and it points to hidden moisture sources that can be just as destructive as a storm-related leak.
While rain is the usual suspect, water can find its way into your home from several other places. These “phantom leaks” are often related to issues inside your attic, with your home’s systems, or from leftover winter problems. Ignoring them can lead to serious structural rot, mold growth, and expensive repairs. This guide will uncover the mysterious reasons your roof might leak on a perfectly sunny day and explain what you can do about it.
The Mystery of the Dry-Weather Leak
When water appears without rain, it’s a sign that the problem isn’t a simple hole in your shingles. The source is likely something internal or a delayed reaction to a past weather event. Pinpointing the exact cause is critical for an effective and lasting solution. Let’s investigate the most common culprits behind these perplexing leaks.
1. Attic Condensation: Your Home’s Indoor Rainstorm
One of the most frequent causes of a roof leak with no rain is attic condensation. This occurs when warm, moist air from your living spaces rises and gets trapped in a cold attic. When this humid air hits the cold underside of your roof sheathing, the moisture condenses—turning from vapor back into liquid water. This “attic rain” can be significant enough to drip onto your insulation, soak your ceiling drywall, and mimic a classic roof leak.
What Causes Severe Attic Condensation?
- Poor Ventilation: An attic needs a balanced system of intake vents (at the soffits or lower roof edge) and exhaust vents (at the ridge or peak). Without proper airflow, moist air has no way to escape and builds up.
- Air Leaks from Living Spaces: Gaps around light fixtures, attic hatches, bathroom exhaust fans, and plumbing vents allow warm, humid air from your kitchen, laundry room, and bathrooms to pour into the attic. A single bathroom fan venting directly into the attic instead of outside is a major source of moisture.
- Blocked Vents: Insulation, debris, or even animal nests can block soffit vents, choking off the fresh air supply your attic needs to stay dry.
How to Identify and Fix Attic Condensation
Look for signs like damp or frosted roof sheathing in the winter, wet and compressed insulation, or blackened wood that suggests mold growth. The solution involves a two-pronged approach: sealing air leaks and improving ventilation.
- Air Sealing: Use foam sealant or caulk to seal any gaps between your home’s conditioned space and the attic. Pay close attention to plumbing stacks, electrical wiring holes, and the frame of the attic access door.
- Improving Ventilation: A professional roofer can assess your attic’s ventilation system. This might involve clearing blocked soffit vents, adding more vents, or installing a ridge vent for more effective air exhaust. Proper ventilation is a cornerstone of a healthy roof system, a principle we stand by on every project. You can explore our approach on our homepage.
2. Plumbing Leaks: The Hidden Water Source
Another common non-rain leak source is your home’s plumbing system. Pipes often run through attics and walls, and even a slow, pinhole leak can release a surprising amount of water over time. This water can travel along joists and studs before showing up on a ceiling far from the actual leak.
Common Plumbing Leak Scenarios
- Supply Line Leaks: Pressurized water supply lines (both hot and cold) running through the attic or ceiling joists can develop slow leaks at joints or due to corrosion.
- Drain Pipe Leaks: A cracked or disconnected drain pipe from an upstairs bathroom can leak every time a sink, shower, or toilet is used. Because it only leaks with use, it can be harder to diagnose.
- Condensate Line Clogs: Your air conditioning system produces condensation, which is drained away through a pipe. If this line becomes clogged with algae or debris, the water will back up and overflow the drain pan, often located in the attic.
Finding and Fixing a Plumbing Leak
If the water stain seems to grow or shrink depending on water usage, a plumbing issue is a strong possibility. Check the area directly above the stain for any plumbing fixtures. If you have an AC unit in your attic, inspect the drain pan for standing water. While a handy homeowner might be able to clear a condensate line, leaking supply or drain lines almost always require a professional plumber. Ignoring them is not an option, as they can cause extensive damage that may eventually require serious roof repairs to the underlying structure.
3. Ice Dams: A Delayed Winter Problem
Even in the middle of spring, you could be dealing with the after-effects of winter ice dams. An ice dam is a ridge of ice that forms at the edge of a roof, preventing melting snow from draining off. The water backs up behind the dam, gets under the shingles, and soaks the roof deck, insulation, and ceiling.
The confusing part is that this water might not show up inside for weeks or even months. The trapped moisture can be absorbed by wood and insulation, slowly migrating downward. On a warm, sunny day, the temperature change can cause the materials to release the trapped water, resulting in a sudden drip long after the snow and ice have melted.
Signs of a Past Ice Dam
- Water stains located on an exterior wall.
- Peeling paint or blistering near the top of the wall.
- Damaged gutters or shingles along the eaves of your roof.
Preventing Future Ice Dams
Like condensation, the root cause of ice dams is often a combination of poor insulation and inadequate ventilation. A warm attic melts snow from the bottom up. The meltwater runs down the roof until it hits the cold eaves, where it refreezes, starting the dam. Improving attic insulation and ensuring proper soffit-to-ridge ventilation is the long-term cure.
4. Leaks from HVAC Units
For homes with HVAC systems located in the attic, the unit itself can be a major source of water. As mentioned earlier, the air conditioner’s condensate drain line is a common offender. However, other issues can arise.
HVAC-Related Leak Causes
- Cracked Drain Pan: The secondary drain pan underneath the unit can crack with age, allowing overflow water to leak out.
- Frozen Evaporator Coils: If the coils freeze up due to low refrigerant or dirty filters, they will thaw and release a large amount of water when the unit cycles off, overwhelming the drain system.
- Furnace Condensation (High-Efficiency Units): High-efficiency furnaces also produce condensation during their heating cycle. A problem with this drainage system can cause leaks in the winter.
What to Do About an HVAC Leak
First, turn off your HVAC system to prevent more water from being produced. Carefully inspect the unit in your attic for standing water or active dripping. You can often clear a clogged condensate line with a wet/dry vac at the exterior drain point. However, for issues like frozen coils or a cracked pan, you’ll need to call an HVAC professional. Don’t delay—the resulting water damage can be extensive.
5. Stored Water in Roofing Materials
Some roofing materials, particularly old and absorbent ones, can hold onto water for a surprisingly long time. This is especially true for roofs with low slopes or flat sections where water doesn’t drain quickly.
Imagine your roofing felt or an old layer of shingles acting like a sponge. It gets saturated during a rainstorm, but the water doesn’t leak through immediately. Days later, changes in temperature or humidity can cause the material to release its stored water, leading to a drip. This is more common in older roofs nearing the end of their lifespan. If you see this, it’s a strong signal that it’s time for a professional inspection. A look at our gallery can show you what a fresh, properly installed roof system looks like.
Steps to Take When You Find a Leak on a Sunny Day
Discovering a leak is stressful, but a methodical approach can help you manage the situation and prevent further damage.
- Contain the Water: Place a bucket under the drip immediately. If the ceiling is bulging, the drywall is saturated. You may need to carefully puncture the center of the bulge with a screwdriver to release the water in a controlled way and prevent a larger section of the ceiling from collapsing.
- Try to Trace the Source: Go into your attic with a flashlight. Look directly above the leak area. Do you see wet wood, damp insulation, a dripping pipe, or a full AC drain pan? Be extremely careful where you step—only put your weight on the wooden joists, not the drywall ceiling below.
- Check Your Home’s Systems: If you suspect plumbing or HVAC, check if the leak gets worse when you run a shower or the air conditioning. This can help confirm the source.
- Document the Damage: Take photos of the leak, the stained ceiling, and any visible sources of water you find in the attic. This documentation will be helpful for insurance claims and for your repair contractor.
- Call the Right Professional:
- If you see a dripping pipe, call a plumber.
- If the AC drain pan is overflowing, call an HVAC technician.
- If you see damp roof decking, wet insulation with no obvious pipe nearby, or signs of ice dam damage, it’s time to call a roofing contractor.
A professional roofer can perform a comprehensive inspection to determine if the issue is related to ventilation, past ice dams, or another hidden roof vulnerability. For expert help, don’t hesitate to reach out to our team via our contact-us page.
The Dangers of Ignoring Hidden Leaks
A leak that appears without rain can seem less urgent, but the damage it causes is just as severe. Because these leaks are often slow and persistent, they can go unnoticed for a long time, leading to major problems.
Mold and Mildew
Chronic dampness in your attic or wall cavities creates the perfect breeding ground for toxic black mold. Mold not only rots the wood but also releases spores into the air, which can cause serious respiratory problems and allergies for your family.
Structural Rot
Prolonged moisture exposure will rot roof decking, rafters, and ceiling joists. What starts as a small, damp spot can eventually compromise the structural integrity of your roof. Repairing rotted wood is far more complex and expensive than fixing the initial leak.
Insulation Damage
Wet insulation loses its R-value, meaning it can no longer effectively insulate your home. It also becomes compressed and heavy, putting a strain on your ceiling. Once insulation is saturated, it rarely dries out completely and usually needs to be replaced.
Prevention: The Best Long-Term Solution
The best way to deal with a “no rain” roof leak is to prevent it from ever happening. Regular home maintenance is key.
- Schedule Annual Roof Inspections: A professional can spot inadequate ventilation, air leaks, or early signs of shingle failure before they cause major issues.
- Maintain Your HVAC System: Have your HVAC unit serviced annually, including a check of the condensate drain lines and pan. Change your air filters regularly to prevent frozen coils.
- Check Your Attic in Winter: On a cold day, pop your head into the attic. If you see frost on the underside of the roof deck, it’s a red flag for a major condensation problem that needs to be addressed.
- Seal Air Leaks: Take a weekend to air-seal your attic floor. Use weatherstripping on the attic hatch and caulk or foam to seal around pipes and wiring. This not only prevents moisture issues but also saves you money on energy bills.
Conclusion: Don’t Let a Mystery Leak Go Unsolved
A roof that leaks on a sunny day is a clear sign that a hidden problem needs your attention. Whether the culprit is attic condensation, a faulty pipe, a clogged AC drain, or the lingering effects of an ice dam, prompt action is essential. By understanding the potential causes, you can take the right steps to diagnose the issue and call the appropriate professional.
Don’t dismiss a small water spot. It is your home’s early warning system, signaling a problem that will only get worse with time. A thorough inspection can uncover the root cause and allow for targeted, effective repairs that protect your property from mold, rot, and structural damage.
If you’re facing a perplexing leak and aren’t sure where to turn, our team at HW Roofing is here to help. We specialize in comprehensive roof repairs and can diagnose even the most mysterious water intrusion issues. Contact us today to ensure your home remains safe, dry, and secure, no matter the weather.
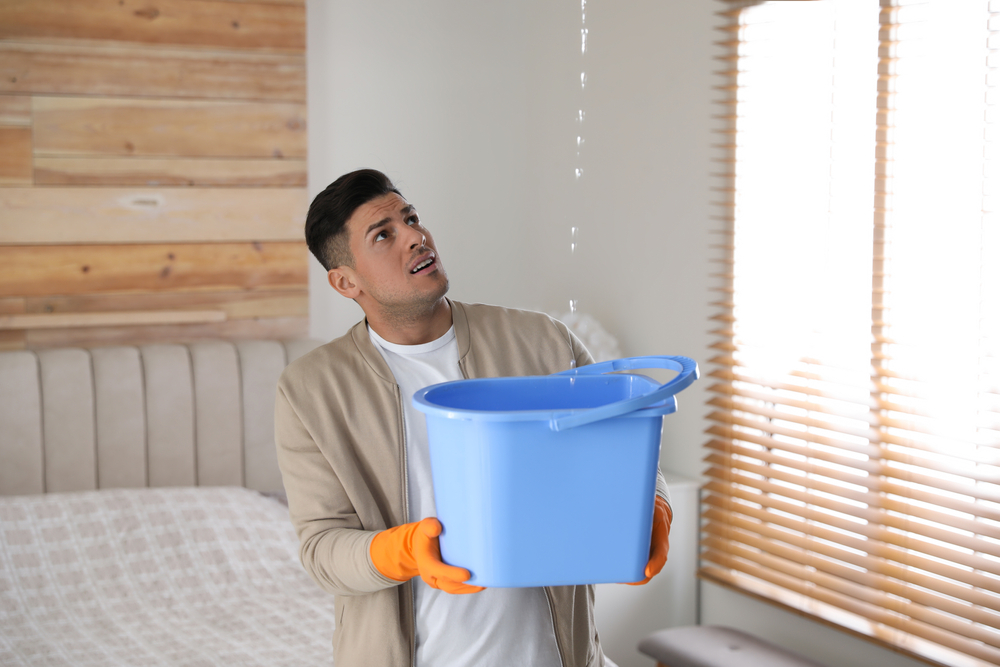
You spot a dark stain spreading across your ceiling right above the fireplace. Or perhaps you hear the maddening “drip, drip, drip” during a heavy storm. A roof leak around the chimney is one of the most common yet frustrating issues homeowners face. It sits at a critical junction where different materials—brick, mortar, shingles, and metal—meet, creating the perfect opportunity for water to sneak in if everything isn’t perfectly sealed.
Ignoring this issue isn’t an option. Water intrusion can rot your roof deck, damage insulation, and compromise the structural integrity of your chimney itself. This guide explores exactly why these leaks happen, how to spot them, and the repair options available to keep your home dry and secure.
Why Is My Chimney Leaking?
The chimney is essentially a large hole in your roof. While builders do their best to seal this hole, the chimney structure itself moves independently from the house. As your home settles and shifts with temperature changes, gaps can form. Understanding the specific mechanics of these leaks is the first step toward a lasting fix.
1. Failed Flashing
Flashing is the MVP of your roof’s defense system. It is the sheet metal installed at the intersection between the roof and the chimney to create a waterproof barrier. When flashing is installed correctly, it directs water away from this vulnerable joint. However, flashing is often the primary culprit when you have a leak around the chimney.
There are two main layers to chimney flashing: step flashing and counter flashing. Step flashing is woven between the shingles and runs up the side of the chimney. Counter flashing is embedded into the chimney mortar and hangs down over the step flashing. If the sealant holding the counter flashing fails, or if the metal rusts and corrodes, water can slip right behind it and enter your attic.
2. Cracked Chimney Crown
At the very top of your chimney sits the chimney crown. This is usually a slab of concrete or mortar designed to shed water away from the flue. Over time, exposure to sun, rain, and freezing temperatures can cause the crown to crack. Once cracks appear, water seeps in. During freeze-thaw cycles, this water expands, widening the cracks significantly. Eventually, water travels down through the chimney structure and manifests as a leak inside your home.
3. Deteriorating Brick and Mortar
Bricks are porous. While they are durable, they act like a sponge. Over decades, the mortar joints between bricks can crumble and decay. When this happens, wind-driven rain can penetrate the masonry itself. If the water saturation is heavy enough, moisture will soak through to the interior of the chimney and drip down into your living space.
4. Rusted Chase Covers
If you have a prefabricated fireplace rather than a masonry one, you likely have a metal chimney chase cover. These covers are often made of galvanized steel, which can rust over time. Once rust sets in, pinholes develop, allowing water to drip directly onto the top of your fireplace unit. If you see rust streaks running down the side of your chimney siding, a rusted chase cover is almost certainly the issue.
5. Shingle Damage Near the Chimney
Sometimes the issue isn’t the chimney itself, but the roof immediately surrounding it. Broken, missing, or curling shingles near the chimney base compromise the roof’s ability to shed water. If debris like leaves and branches accumulate behind the chimney (in the area known as the “cricket” or “saddle”), it can trap moisture against the shingles, accelerating their deterioration.
Identifying the Signs of a Chimney Leak
Before you can fix a leak around the chimney, you have to confirm that the chimney is actually the source. Water is tricky; it can enter at one point and travel along rafters before dripping onto your ceiling ten feet away. However, there are specific tell-tale signs that point directly to the chimney.
Interior Signs
- Water Stains on the Ceiling or Walls: Look for discolored patches on the ceiling near the fireplace or running down the walls adjacent to the chimney.
- Dripping Noises: Hearing water dripping inside the chimney flue or stove pipe during rain.
- Musty Odors: A persistent damp smell near the fireplace, even when it hasn’t rained for a few days.
- Water in the Firebox: Seeing puddles or dampness inside the fireplace itself.
Exterior Signs
- Rust Streaks: Reddish-brown stains running down the chimney cap or chase cover.
- Efflorescence: White, chalky powder on the brickwork. This indicates that water is moving through the bricks and leaving salt deposits behind.
- Missing Mortar: Visible gaps in the joints between bricks.
- Loose Flashing: Metal flashing that is pulling away from the brick or has visible gaps.
If you notice any of these signs, it is crucial to act quickly. For professional assessment and help, you can always visit our contact page to schedule an inspection.
Repair Options: DIY vs. Professional
Once you’ve identified a leak around the chimney, you have two paths: attempting a repair yourself or calling in the pros. The right choice depends on the severity of the leak, your comfort level with heights, and the complexity of the repair.
DIY Fixes for Minor Issues
If the issue is minor—like a small crack in the crown or a sealant failure—a handy homeowner might be able to tackle it.
1. Re-Caulking Flashing
If the metal flashing looks sound (no rust or holes) but the sealant has dried out and cracked, you can apply a fresh bead of high-quality roofing sealant. Look for a polyurethane or silicone-based sealant designed specifically for roofing. Clean the area thoroughly, remove old caulk, and apply a generous bead to seal the gap between the flashing and the chimney.
2. Applying Water Repellent
If porous bricks are the issue, applying a masonry water repellent can help. This product creates a hydrophobic barrier that stops water from soaking into the brick while still allowing the masonry to breathe. It’s applied with a garden sprayer. Be sure to protect your shingles and windows from overspray.
3. Patching the Chimney Crown
Small hairline cracks in the chimney crown can be sealed using a brushable crown repair sealer. This is a flexible, waterproof coating that bridges small gaps. Clean the crown of moss and debris before applying the product.
When to Call a Professional
While DIY fixes can work for maintenance, significant leaks usually require professional intervention. Roofing is dangerous work, and improper repairs can trap moisture, leading to rot.
Complete Flashing Replacement
If the flashing is rusted, bent, or was never installed correctly (a common issue), it needs to be ripped out and replaced. This involves removing shingles around the chimney, installing new step flashing and counter flashing, and re-shingling the area. This is a complex job that requires specialized tools and knowledge of water flow management. It is one of the core services covered under professional roof repairs.
Chimney Cricket Installation
If your chimney is wide (usually more than 30 inches) and located on the downward slope of a roof, water can pool behind it. Building codes often require a “cricket”—a small, peaked roof structure built behind the chimney to divert water around it. Installing a cricket involves carpentry and roofing skills that are best left to experts.
Masonry Re-pointing
If the mortar joints are deeply eroded, simply smearing silicone over them won’t work. The old mortar needs to be ground out and replaced with fresh mortar in a process called re-pointing or tuck-pointing. This restores the structural integrity of the chimney.
The Long-Term Cost of Ignoring Leaks
It is tempting to put a bucket under the drip and wait for better weather or better finances. However, water damage is progressive. What starts as a small drip can lead to massive repair bills.
Structural Rot
Water that bypasses the flashing often lands on the roof deck (the plywood beneath your shingles) and the framing members. Over time, this wood softens and rots. If the rot spreads to the main support beams, your roof could sag or even collapse.
Mold and Mildew
Damp insulation and drywall are breeding grounds for mold. Mold spores can spread through your home’s HVAC system, causing respiratory issues for your family. Remediation for mold is often far more expensive than the initial roof repair.
Interior Damage
Beyond the roof structure, water ruins drywall, peels paint, and warps hardwood floors. A leak around the chimney can destroy the aesthetic of your living room, requiring extensive cosmetic repairs.
Preventative Maintenance Tips
The best way to deal with a roof leak around the chimney is to prevent it from happening in the first place. Regular maintenance can extend the life of your roof and chimney significantly.
- Annual Inspections: Have your roof inspected at least once a year. A professional roofer can spot potential failure points in flashing or sealants before they leak.
- Keep Gutters Clean: Clogged gutters can cause water to back up under the shingles near the eaves, but they can also contribute to water issues around chimneys if downspouts from upper roofs drain near them.
- Trim Overhanging Branches: Tree limbs can scrape against the chimney and roof, damaging shingles and the chimney cap. They also drop leaves that trap moisture.
- Check the Cap: Ensure your chimney cap is secure and screening is intact to keep birds and rodents out. Nests can block airflow and trap moisture.
Choosing the Right Contractor
If you decide to hire a professional, ensure they have experience specifically with chimney leaks. It is a specialized area where roofing and masonry intersect. Look for a contractor who:
- Is fully licensed and insured.
- Provides detailed written estimates.
- Has a portfolio of completed work. You can check out our gallery to see examples of quality craftsmanship.
- Has positive local reviews and a physical business address.
At HW Roofing, we specialize in diagnosing and repairing complex roof leaks. We understand that a leak around the chimney is stressful, and we work efficiently to restore your home’s defense against the elements.
FAQs About Chimney Leaks
How much does it cost to fix a leak around a chimney?
Costs vary widely depending on the cause. Simple resealing might cost a few hundred dollars, while replacing flashing or rebuilding a crown can cost significantly more. It is best to get a personalized quote.
Can I fix a chimney leak in the rain?
It is not recommended. Sealants need dry surfaces to adhere properly, and working on a wet roof is extremely dangerous. Emergency tarping can be done during a storm to stop immediate water entry, but permanent repairs should wait for dry weather.
Does homeowner’s insurance cover chimney leaks?
It depends on the cause. If the leak is due to sudden storm damage (like a fallen tree limb), it might be covered. If it is due to lack of maintenance or wear and tear, it is likely not covered. Check your specific policy.
How long does a chimney flashing repair take?
Most flashing repairs can be completed in one day. However, if there is extensive rot in the underlying wood, the project may take longer.
Conclusion
A roof leak around the chimney is a nuisance that can quickly turn into a nightmare. Whether it’s caused by failed flashing, a cracked crown, or porous bricks, identifying the source is crucial. While some minor maintenance can be DIY, the complexity of flashing and masonry work often warrants professional help. By addressing the leak promptly, you protect your home from structural damage, mold, and costly interior repairs.
Don’t let a small drip become a major disaster. If you suspect your chimney is leaking, assess the situation, cover the basics, and don’t hesitate to call in the experts. Your home—and your peace of mind—are worth it.
For reliable service and expert advice, visit our homepage or contact us directly to schedule your inspection.
Detailed Breakdown of Common Leak Sources
To further understand what you are dealing with, let’s dive deeper into the mechanics of the most common failure points. This knowledge will help you have a more informed conversation with your roofing contractor.
The Anatomy of Step Flashing
Step flashing is arguably the most critical component of the chimney-roof junction. It consists of L-shaped pieces of metal.
- Placement: One leg of the “L” goes under a shingle, and the other leg goes up the side of the chimney.
- The “Step”: This is repeated for every course of shingles, creating a overlapping “step” pattern.
- Function: This ensures that water running down the roof is directed on top of the shingle below, shedding it away from the chimney.
- Failure Mode: If a single piece of step flashing is rusted through or installed backward (where the water runs under the shingle), a leak occurs. Because step flashing is partially hidden, these issues are hard to spot without lifting shingles.
The Counter Flashing Seal
Counter flashing covers the top edge of the step flashing to prevent water from running behind it. The top edge of the counter flashing is usually tucked into a groove cut into the chimney mortar (reglet) and sealed.
- The Problem: Sealants have a lifespan. Over 10-15 years, exposure to UV rays makes sealants brittle. They shrink and pull away from the brick.
- The Result: Rain running down the side of the chimney hits this gap and funnels directly behind the flashing system.
- The Fix: This requires cleaning out the old sealant and reglet joint and applying fresh, high-grade masonry sealant or lead wedges to hold the flashing tight.
The Chimney Crown vs. The Chimney Cap
Homeowners often confuse these two.
- Chimney Crown: The masonry “roof” of the chimney structure itself. It covers the top of the brick/stone column.
- Chimney Cap: The metal hat that sits on top of the flue pipe.
- Leak Scenarios: A missing cap allows rain to fall straight down the flue into your fireplace. A cracked crown allows water to destroy the chimney from the inside out. Both need to be in good condition. If your crown lacks a “drip edge” (an overhang that directs water off the chimney face), water will run down the bricks, increasing erosion.
Advanced Repair Techniques
When standard repairs aren’t enough, professionals might employ more robust solutions.
Installing a Cricket (Saddle)
As mentioned briefly above, a cricket is vital for wide chimneys. Think of a chimney as a large rock in a stream. If the rock is wide, water piles up behind it. On a roof, this “piling up” leads to standing water, which eventually finds a way in.
- Construction: A cricket is a small, triangular structure built from wood and covered with roofing material.
- Placement: It is installed on the ridge side (high side) of the chimney.
- Function: It splits the water stream, diverting it to the left and right sides of the chimney where the flashing can handle it.
- Regulation: The International Residential Code (IRC) generally requires a cricket for chimneys wider than 30 inches parallel to the ridge line. If your home lacks one and you have persistent leaks, retrofitting a cricket is often the only permanent solution.
Masonry Waterproofing
If your bricks are old, they might be spalling (flaking off). This means they are absorbing significant water.
- The Test: Spray water on your chimney bricks. If it darkens immediately, it’s absorbing water. If it beads up, it’s sealed.
- The Solution: A breathable siloxane or silane-based water repellent is applied. Unlike paint, which traps moisture inside the brick (causing more damage), these repellents penetrate the surface and stop liquid water from entering while allowing water vapor to escape.
Why Seasonal Changes Matter
Your roof and chimney go through a lot of stress throughout the year.
- Summer: High heat causes thermal expansion. Metal flashing expands at a different rate than brick masonry. This pushing and pulling stresses the sealants.
- Winter: Freeze-thaw cycles are brutal. Water that seeps into a small crack during the day freezes at night. Water expands by about 9% when it freezes, acting like a hydraulic wedge that forces the crack open further.
- Spring/Fall: Heavy rains test the drainage capacity of your roof. Leaves falling in autumn can dam up the area behind the chimney, creating moisture traps.
Understanding these seasonal stresses underscores the importance of regular inspections. It is far cheaper to reseal a small gap in the summer than to rebuild a frozen, crumbled chimney corner in the winter.
Final Thoughts on Roof Leak Repair
Dealing with a roof leak around the chimney is never convenient, but it is manageable with the right knowledge. You now understand that it isn’t just “a hole in the roof”—it’s a system of flashing, masonry, and shingles that must work in harmony.
If you are unsure about the source of your leak, or if the thought of climbing a ladder makes you dizzy, let the professionals handle it. At HW Roofing, we have the expertise to diagnose the tricky leaks that others miss. We use high-quality materials and proven techniques to ensure your chimney stays watertight for years to come.
Remember, your roof protects your biggest investment. Keep it in top shape. Check out our gallery to see our team in action, or visit our contact page to start the conversation about your roof repair needs. Don’t wait for the next storm—secure your home today.
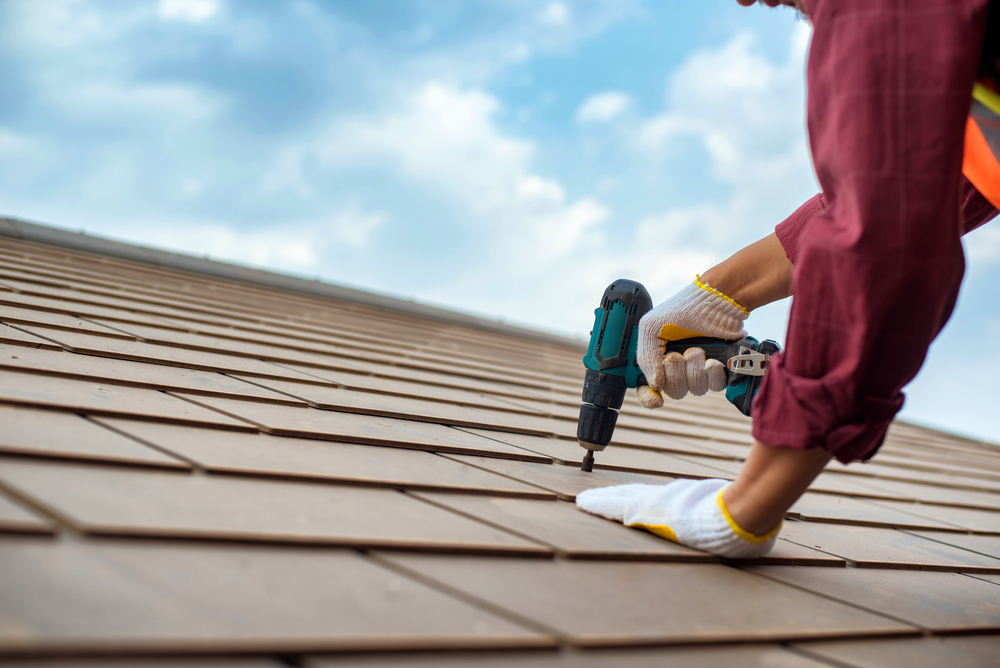
Owning a home comes with a never-ending checklist of maintenance tasks, but few items on that list carry the financial weight and stress of the roof. It is the primary shield between your family and the elements, protecting everything you own from rain, wind, and sun. So, when you spot a water stain on your ceiling or find a shingle lying on your lawn after a storm, the immediate question is often one filled with anxiety: Can I just patch this, or do I need a whole new roof?
This dilemma—repair vs. replace—is one of the most significant financial decisions a homeowner will make. Choose correctly, and you save thousands of dollars while extending the life of your home. Choose poorly, and you could be throwing good money after bad on temporary fixes, or conversely, replacing a perfectly good roof years before it’s necessary.
The answer is rarely black and white. It depends on a complex interplay of factors including the age of the roof, the extent of the damage, the materials used, your future plans for the home, and the specific climate challenges of your region. For homeowners, understanding these variables is crucial to making an educated decision that balances budget with safety.
In this comprehensive guide, we will walk you through the critical factors you need to weigh. We will explore the hidden costs of deferring replacement, the scenarios where a simple repair is the smartest move, and how to evaluate the condition of different roofing materials. Our goal is to empower you with the knowledge to make the right call for your home and your wallet.
The Core Dilemma: Band-Aid or Surgery?
Think of your roof like a car. If you get a flat tire, you don’t buy a new car; you patch the tire or buy a new one. However, if the transmission fails, the engine is smoking, and the body is rusted through, putting new tires on that car is a waste of money. You need a new vehicle.
Roofing works on a similar logic. A repair is a targeted intervention designed to fix a specific failure point—a missing shingle, a cracked boot, a loose piece of flashing. It is a localized solution. A replacement, on the other hand, is a systemic reset. It involves stripping the roof down to the deck and rebuilding the entire waterproofing system.
The challenge lies in the gray area. What if the car runs okay but needs frequent repairs? What if the roof isn’t leaking yet, but looks worn out? Determining whether you need a “Band-Aid” (repair) or “surgery” (replacement) requires a thorough diagnosis of the roof’s overall health.
Critical Factor #1: The Age of Your Roof
The single most objective factor in your decision is the age of the existing roof. Every roofing material has a theoretical lifespan—a period during which it is designed to perform effectively. As a roof approaches the end of this lifespan, the materials degrade chemically and physically, making repairs less effective and more frequent.
If your roof is well within its lifespan, a repair is usually the default choice. If it is nearing or past its expiration date, replacement is often the wiser investment. Here is a general guide to material lifespans:
- 3-Tab Asphalt Shingles: 15–20 years.
- Architectural Asphalt Shingles: 20–25 years.
- Metal Roofing (Standing Seam): 50+ years.
- Concrete/Clay Tile: 50+ years (though the underlayment often fails at 20–30 years).
- Flat Roofs (Modified Bitumen/TPO): 12–20 years.
The “Repairability” Factor
Age doesn’t just affect performance; it affects repairability. As asphalt shingles age, they become brittle due to the loss of volatile oils. To repair a shingle roof, a roofer must gently lift the shingles surrounding the damaged area to slide in a new one and nail it down. If the roof is too old and brittle, lifting the surrounding shingles will cause them to crack. In this scenario, a repair is impossible because trying to fix one leak will create two new ones. If a professional roofer tells you the roof is “too brittle to repair,” this is what they mean.
Critical Factor #2: The Scope of the Damage
How much of the roof is actually compromised? This is often determined by the “30% Rule.” Generally, if damage covers more than 30% of the roof’s surface area, a full replacement is more cost-effective and structurally sound than a repair.
When Repair Makes Sense (Localized Damage)
If a tree branch fell and punctured a 5-foot section of the roof, but the rest of the roof is pristine, a repair is the obvious choice. Similarly, if a storm blew off three or four shingles, or if a specific pipe boot has cracked due to sun exposure, these are isolated incidents. The integrity of the overall system remains high. Addressing these specific issues through professional roof repairs can restore the roof to 100% functionality for a fraction of the cost of replacement.
When Replacement is Necessary (Widespread Damage)
Conversely, if you have looked at your roof and see issues everywhere—curling shingles on every slope, bald spots in the valleys, and rust on multiple flashing points—the system is failing globally. Patching a roof in this condition is like playing “Whack-a-Mole.” You might stop a leak in the kitchen today, but next week a leak will appear in the bedroom. When the damage is systemic, replacement is the only way to stop the cycle of constant repairs.
Critical Factor #3: Geographical and Climate Considerations
Where you live plays a massive role in this decision. For homeowners in areas prone to severe weather—like hurricane zones in Florida or tornado alleys in the Midwest—the threshold for replacement might be lower.
In high-wind regions, the adhesive seal that holds shingles down is critical. Once a roof has been subjected to years of thermal cycling and wind uplift, that seal weakens. An older roof might look okay from the street, but it may not have the “uplift resistance” to survive the next Category 1 hurricane.
If you are in a storm-prone area and your roof is borderline, leaning toward replacement offers peace of mind. It ensures you have the latest wind-rated materials and that the roof deck is re-nailed to current building codes, providing superior protection for your family.
Critical Factor #4: Your Future Plans for the Home
Are you staying, or are you selling? Your long-term plans should heavily influence your investment strategy.
Scenario A: You Are Selling Soon
If you plan to sell your home in the next 1–3 years, the condition of the roof is a major negotiating point.
- Repair: If the roof has plenty of life left and just needs a minor fix to pass inspection, do the repair. It keeps your costs low.
- Replace: If the roof is old and unsightly, it will likely deter buyers or force you to lower your asking price significantly. Installing a new roof can increase your home’s resale value and curb appeal. Many buyers are willing to pay a premium for a home with a brand-new roof because they know they won’t have to worry about it for decades.
Scenario B: This is Your Forever Home
If you plan to stay in the home for 10, 15, or 20 years, a replacement is an investment in your own future. By replacing an aging roof now, you lock in current material prices (which historically rise over time) and save yourself the stress of dealing with leaks later. You also gain the benefits of improved energy efficiency and warranty protection.
Signs That Indicate You Can Likely Repair
Not every leak is a death sentence for your roof. Here are several scenarios where a repair is typically the right course of action.
1. The Roof is Relatively New
If your roof was installed five or ten years ago, it should have plenty of life left. Leaks in young roofs are usually due to installation errors (like improperly driven nails) or failure of a specific component (like a flashing boot) rather than material failure. These are easily fixable.
2. The Damage is External or Mechanical
If a satellite dish was removed and left holes, or if a raccoon chewed a hole in a soffit, the damage is mechanical. It wasn’t caused by the roof “wearing out.” Fixing the specific hole usually resolves the problem completely.
3. Flashing Failures
Statistically, most leaks occur at penetrations—chimneys, vents, skylights, and valleys—where the roof plane is interrupted. Often, the shingles or tiles are fine, but the metal flashing or sealant at these junction points has failed. A roofer can remove the materials around the penetration, install new flashing, and put the roof back together without needing to tear off the whole system.
Signs That Indicate Replacement is Inevitable
While we always hope for a simple fix, certain signs indicate that the roof has reached the point of no return. Ignoring these signs and attempting to patch them can lead to structural damage to your home.
1. Widespread Granule Loss (The “Bald” Look)
On asphalt shingles, the ceramic granules protect the asphalt from the sun. When you see large amounts of granules in your gutters or “bald spots” on the shingles where the black asphalt is showing, the roof is cooking in the sun. It will rapidly become brittle and crack. This is a sign of end-of-life material failure.
2. Curling, Buckling, and Clawing
When shingles curl upward (cupping) or the edges stay flat but the middle lifts (clawing), it means the binder in the asphalt has dried out. The shingle is physically deforming. This creates gaps for wind-driven rain to enter. Once shingles deform, they cannot be flattened back out; they must be replaced.
3. Sagging Roof Deck
If you look at your roof line and see a dip or a sag, you have a serious problem. This indicates that the wooden decking underneath is rotting or that the structural trusses are compromised. This is almost always caused by long-term water intrusion. You cannot repair this from the top down; the roofing material must be stripped off to repair the structure underneath.
4. Daylight in the Attic
Go into your attic on a sunny day and turn off the lights. If you see pinpricks of light coming through the roof boards (other than at intended vents), you have a porous roof. If light can get in, water definitely can. Multiple entry points for light usually mean the shingles have degraded to the point of being useless.
5. Moisture in the Insulation
If your attic insulation is damp, matted, or moldy, you likely have a widespread leak or a ventilation issue that is causing condensation. Wet insulation loses its R-value (thermal resistance) and promotes mold growth that can affect your family’s health.
Material-Specific Decision Making
The type of material on your roof also dictates the repair-vs-replace logic.
Asphalt Shingles
- Repair Challenge: Color matching. Sun fades shingles over time. A patch with brand-new shingles will stand out like a sore thumb. If aesthetics are important to you, this might push you toward replacement or repairing a larger section (a whole slope) to mask the difference.
- Decision: Easy to repair if young; impossible to repair if old and brittle.
Metal Roofs
- Repair Challenge: Thermal movement. Leaks in metal roofs are often caused by screws backing out or washers degrading.
- Decision: Re-screwing a metal roof (replacing all old screws with new, larger ones) is a fantastic “repair” option that can add 10+ years to the roof’s life without a full replacement. However, if the metal panels themselves are rusted through, replacement is required.
Tile Roofs
- Repair Challenge: Underlayment failure. The tiles often look perfect, but the paper underneath is rotten.
- Decision: Tile roofs offer a unique middle ground called a “Lift and Relay.” You can remove the tiles (saving the expensive material), replace the underlayment, and re-install the original tiles. This is a major repair project but cheaper than a full replacement with new tiles.
Flat Roofs
- Repair Challenge: Water entrapment. If water gets under a flat roof membrane, it saturates the insulation board.
- Decision: You cannot roof over wet insulation. If moisture scans show wet insulation, those areas must be cut out and replaced. If the membrane is old but the insulation is dry, a “silicone restoration coating” is a great alternative to replacement. It seals the roof seamlessly and costs about half as much as a new roof.
The Financial Breakdown
Cost is often the deciding factor. Let’s look at the economics.
Immediate Cash Flow
A repair is obviously cheaper in the short term. A typical repair might cost between $300 and $1,500, whereas a replacement can range from $10,000 to $30,000+ depending on size and material. If cash flow is tight and the roof is not in critical condition, a repair buys you time.
Cost Per Year (The Long View)
However, you must consider the cost of repeated repairs. If you spend $1,000 a year patching an old roof for five years, you’ve spent $5,000 on a roof that still needs to be replaced.
Furthermore, roofing prices rise annually due to inflation and material costs. A roof that costs $15,000 today might cost $18,000 in three years. By replacing it now, you lock in the price and stop the bleeding of repair costs.
Energy Savings
Don’t forget the hidden savings of a new roof. Modern roofing materials are much more energy-efficient.
- Cool Roofs: New shingles and metal roofs have reflective granules or coatings that reflect solar heat, lowering your attic temperature.
- Ventilation: A replacement allows you to upgrade your ventilation system (ridge vents, soffit vents).
- Savings: These upgrades can lower your cooling bills by 10–20%. Over the 20-year life of the roof, this can add up to thousands of dollars in savings that you wouldn’t get with a simple repair.
The Role of Insurance
Homeowner’s insurance adds another layer to the decision.
- Wear and Tear: Insurance does not cover roofs that wear out due to age. That is a maintenance responsibility.
- Acts of God: Insurance does typically cover damage from hail, wind, and fallen trees.
If your roof has sustained storm damage, you might be eligible for a full replacement covered by your policy (minus your deductible). This changes the math entirely. If you can get a brand-new roof for the cost of your deductible, replacement is almost always the best choice.
However, filing a claim for a small repair might not be worth it if the repair cost is close to your deductible amount, as it could raise your premiums. Always consult with a reputable roofer who understands the claims process before filing.
The “Hidden” Option: Roof Restoration
Sometimes, you don’t need a repair or a full replacement. You might be a candidate for restoration.
This is particularly relevant for flat roofs and metal roofs. Restoration involves cleaning the roof, repairing seams and penetrations, and then applying a high-performance liquid coating (like silicone or acrylic).
- Pros: It costs about 50% less than replacement, extends the warranty by 10–20 years, and is considered a maintenance expense for tax purposes (for commercial owners).
- Cons: It can only be done if the underlying insulation is dry and the structure is sound.
You can view examples of restored roofs in our gallery to see if this might be a viable option for your home.
How to Hire the Right Professional for the Diagnosis
Ultimately, the decision often requires a professional eye. You need a roofer who will act as a partner, not just a salesperson.
- Beware the “One-Size-Fits-All” Pitch: Some roofers only want to sell replacements because they are more profitable. If a roofer glances at your roof from the driveway and says you need a new one, get a second opinion.
- Look for Evidence: A trustworthy roofer will provide photos of the damage. They should show you the rusted flashing, the brittle shingles, or the soft decking. They should explain why a repair will or won’t work.
- Ask for Options: A good contractor will often give you a “Good, Better, Best” scenario. “We can repair it for $800 to get you through the year, or replace it for $12,000 with a 25-year warranty.”
At HW Roofing, we pride ourselves on honest assessments. We would rather perform a quality repair and earn your trust for the future replacement than push you into a purchase you don’t need today.
Conclusion: Making the Informed Choice
Deciding between repairing and replacing your roof is a balancing act between your current budget and your future security.
- Choose Repair If: The roof is young, the damage is localized, you are tight on budget, or you plan to move very soon.
- Choose Replacement If: The roof is old (20+ years), the damage is widespread, you plan to stay in the home long-term, or storm damage has made insurance coverage an option.
Your home is your sanctuary, and a solid roof is non-negotiable. Don’t let the decision overwhelm you. Gather the data, check the age, inspect the damage, and consult with a professional you trust.
If you are unsure about the condition of your roof or need an honest opinion on whether to repair or replace, we are here to help. Contact us today to schedule a comprehensive inspection. Let us help you ensure that, whatever you choose, your home remains safe and dry for years to come. Visit HW Roofing for more information on our services and commitment to quality.
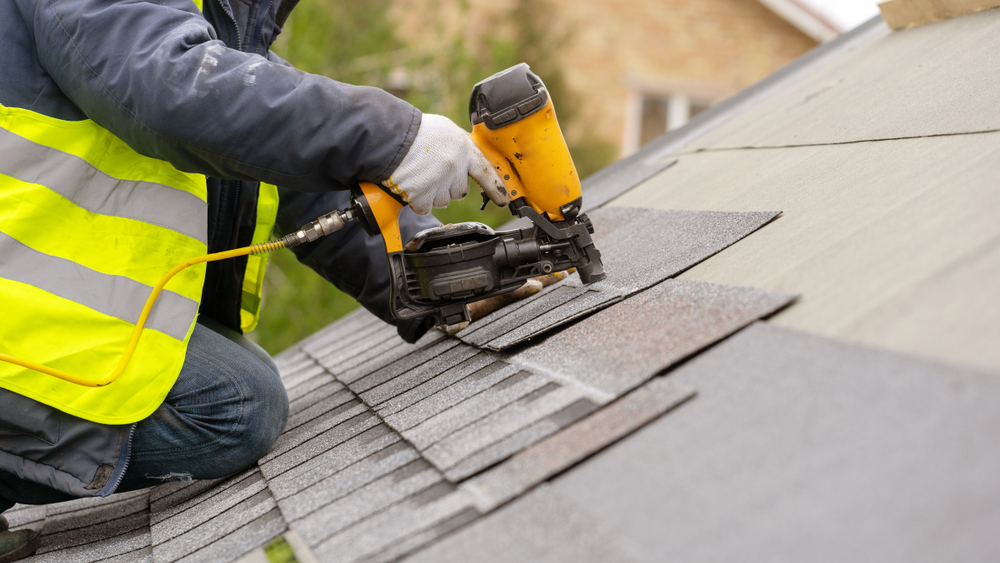
When you live in Central Florida, your home is up against a formidable opponent: the weather. From the relentless, baking sun of July to the torrential downpours of the rainy season and the looming threat of hurricane-force winds, the elements are constantly testing the limits of your home’s exterior. No part of your house takes a bigger beating than the roof.
For homeowners in Orlando, Apopka, and the surrounding areas, choosing a roofing material isn’t just about curb appeal—it’s a strategic decision about protection and investment. One of the most common questions we receive is, “Which roof material lasts the longest?” The answer is complex, as longevity depends not just on the material itself, but on how well it stands up to the specific, harsh conditions of the Sunshine State.
In this comprehensive guide, we will break down the lifespans of the most popular roofing materials used in Central Florida. We will explore the strengths and weaknesses of asphalt shingles, metal, tile, and flat roofing systems, helping you determine which option offers the best long-term value for your home. Whether you are building new or facing a replacement, understanding these factors is key to making a choice that will keep your family dry and secure for decades to come.
The Central Florida Factor: Why Roofs Fail Here
Before ranking materials, it is crucial to understand the battlefield. A roof that lasts 30 years in Ohio might only last 15 in Florida. Our unique climate creates a “perfect storm” of stressors that accelerate aging.
1. Intense Ultraviolet (UV) Radiation
Florida isn’t called the Sunshine State for nothing. Our proximity to the equator means UV radiation is stronger here than in most of the country. UV rays act like a slow-motion laser beam on roofing materials. They dry out the oils in asphalt shingles, making them brittle. They break down the chemical bonds in sealants and synthetic underlayments. Over time, this leads to cracking, fading, and a loss of waterproofing ability.
2. Thermal Shock
It’s not just the heat; it’s the fluctuation. On a summer afternoon, roof surface temperatures can soar above 150°F. When a sudden afternoon thunderstorm rolls in, that temperature can drop 50 to 80 degrees in a matter of minutes. This rapid expansion (from heat) and contraction (from cooling) causes materials to warp, split, and pull away from fasteners. This phenomenon, known as thermal shock, is a leading cause of structural fatigue in roofs.
3. Wind and Uplift
During hurricane season, sustained winds and gusts put immense pressure on roofs. It’s not just about shingles blowing off; wind creates “uplift,” trying to suck the roof deck off the house. Materials must be rated for high-velocity hurricane zones (HVHZ) to survive.
4. Humidity and Algae
High humidity creates an ideal breeding ground for Gloeocapsa magma (blue-green algae) and mold. While often cosmetic, these organisms can hold moisture against the roof surface, accelerating rot in wood components and degradation in asphalt.
Contender #1: Asphalt Shingles
Estimated Lifespan in Florida: 15–20 Years
Asphalt shingles are the most common roofing material in North America, and HW Roofing installs them frequently due to their affordability and versatility. However, in terms of pure longevity, they are on the lower end of the spectrum.
The Composition
Shingles are made of a fiberglass mat coated in asphalt and topped with ceramic granules. The asphalt provides waterproofing, while the granules reflect UV rays.
Why They Fail
In Central Florida, the sun eventually wins the battle against asphalt. Over time, the heat causes the volatiles in the asphalt to evaporate. As the shingle dries out, it loses its flexibility. Simultaneously, the adhesive strips that seal the shingles together can become brittle. Once a shingle loses its flexibility, thermal cycling causes it to crack. Additionally, wind and rain slowly strip away the protective granules. Once the black asphalt is exposed to direct sun, deterioration accelerates rapidly.
3-Tab vs. Architectural
It is important to distinguish between the two main types of shingles:
- 3-Tab Shingles: These are flat, single-layer shingles. In Florida, they typically last 12–15 years. They are thinner and have lower wind ratings (usually up to 60-70 mph).
- Architectural Shingles: These are thicker, multi-layered shingles that add dimension to the roof. Because they are heavier and have better adhesive seals, they generally last 18–25 years in Florida and often carry wind ratings up to 130 mph.
Verdict: Shingles are the budget-friendly champion, but they require earlier replacement than other materials.
Contender #2: Metal Roofing
Estimated Lifespan in Florida: 40–70 Years
Metal roofing has seen a surge in popularity in Central Florida, and for good reason. When it comes to durability, metal is a heavyweight contender that punches well above its weight class.
The Composition
Residential metal roofs are typically made of steel (galvalume) or aluminum. They come in standing seam designs (where fasteners are hidden) or screw-down panels (exposed fasteners).
Why They Last
Metal is inorganic; it doesn’t dry out, crack, or rot like asphalt or wood.
- Sun Resistance: Metal reflects a significant portion of solar heat, especially lighter colors. It is virtually immune to UV degradation.
- Wind Resistance: Metal roofs have the highest wind ratings in the industry, often withstanding gusts over 140 mph. The interlocking panels create a continuous shell that is very difficult for wind to lift.
- Moisture Resistance: Metal sheds water instantly and is impervious to mold and algae rot.
The Weak Points
While the metal panels themselves can last 70 years, the components holding them together might not.
- Screws and Washers: On exposed fastener roofs, the rubber washers around the screws can dry rot in the Florida sun after 15-20 years, leading to leaks. These require maintenance (re-screwing) to ensure the roof reaches its full potential.
- Corrosion: In coastal areas (less of a concern in Apopka but relevant for wider Central Florida), salt air can corrode steel roofs. Aluminum is the preferred choice near the coast as it does not rust.
Verdict: Metal is one of the longest-lasting materials available. A standing seam metal roof is a “lifetime” roof for many homeowners, offering incredible protection against hurricanes.
Contender #3: Concrete and Clay Tile
Estimated Lifespan in Florida: 50–100 Years (for the tiles)
Drive through any upscale Florida neighborhood, and you will see tile roofs. They are the aesthetic standard for Mediterranean and Spanish-style architecture. But are they just a pretty face? Absolutely not.
The Composition
Tiles are made from either kiln-fired clay or molded concrete. They are heavy, dense, and incredibly tough.
Why They Last
- Thermal Mass: Tiles are thick. They absorb heat during the day and release it slowly at night, insulating the underlayment from peak temperatures.
- Imperviousness: Concrete and clay do not rot, burn, or degrade in the sun. They are immune to insect damage.
- Wind Resistance: Their sheer weight keeps them on the roof during storms.
The “Underlayment” Caveat
Here is the critical nuance that every Florida homeowner must understand: The tiles last forever, but the waterproof paper underneath them does not.
A tile roof is a “water-shedding” system, not a waterproof one. Water can get under the tiles during wind-driven rain. The real protection comes from the underlayment (felt or synthetic membrane) on the wood deck.
In the past, hot-mop or organic felt underlayments were used, which typically lasted 20-30 years before drying out and cracking. Modern synthetic underlayments are better, but they still usually have a shorter lifespan than the tiles themselves.
The Repair Reality: Homeowners with tile roofs often face a “lift and relay” procedure after 30 years. This involves removing the perfectly good tiles, replacing the underlayment, and putting the old tiles back on. While expensive, this restores the roof for another 30+ years.
Verdict: Tile is arguably the longest-lasting material, but the system requires major maintenance (underlayment replacement) mid-way through its life.
Contender #4: Flat Roofing (Low-Slope)
Estimated Lifespan in Florida: 10–20 Years
Flat roofs are common on modern homes, lanais, and garages. Because water doesn’t shed as quickly off a flat surface, these roofs face a harder challenge than sloped roofs.
The Options
- Modified Bitumen (Mod Bit): Asphalt-based rolls. Lasts 10-15 years. Susceptible to UV damage and “alligatoring” (cracking) over time.
- TPO (Thermoplastic Polyolefin): A white, single-ply membrane. Reflects heat very well. Lasts 15-20 years.
- PVC: Similar to TPO but more chemical resistant. Lasts 20+ years.
Why They Have Shorter Lifespans
Ponding water (water that stays on the roof for 48+ hours) is the enemy. Standing water breaks down adhesives and materials rapidly. The intense Florida sun also attacks the seams of these membranes. While durable, they simply do not have the longevity of metal or tile due to the physics of water drainage.
Verdict: Flat roofs are practical solutions for specific architectural needs but generally have the shortest lifespan of the major categories in Florida.
The Ranking: Which Material Wins?
If we rank purely by how long the material can remain on your house before needing total replacement, here is the hierarchy for Central Florida:
- Standing Seam Metal (Aluminum/Steel): 50+ Years.
- Why it wins: The panels are indestructible, and the concealed fasteners mean there are no washers to wear out. It requires the least maintenance.
- Clay/Concrete Tile: 50+ Years (with caveats).
- Why it’s second: The tiles themselves can outlast metal, but the inevitable failure of the underlayment requires a massive, expensive “reset” halfway through the roof’s life.
- Architectural Shingles: 18–25 Years.
- Why it’s third: Asphalt degrades in the sun. It’s a great value, but biology and chemistry are against it in the long run.
- Flat Roofs (TPO/Mod Bit): 12–20 Years.
- Why it’s fourth: The lack of slope and constant UV exposure limits the lifespan of the chemical bonds in the membranes.
Factors That Shorten Roof Life (Beyond Material)
You could buy the most expensive copper roof in the world, but it could fail in five years if other factors aren’t considered. Longevity isn’t just about what you buy; it’s about how it’s installed and treated.
1. Installation Quality
This is the single biggest variable. A roof is a system involving decking, underlayment, flashing, ventilation, and the surface material.
- Ventilation: If your attic isn’t properly ventilated (intake at the soffits, exhaust at the ridge), heat builds up in the attic. This cooks the shingles from the bottom up, essentially frying your roof. Proper ventilation can add years to a roof’s life.
- Nailing: If a roofer places nails too high on a shingle (high-nailing), the wind will rip them off. If they overdrive the screws on a metal roof, the washers crack.
- Flashing: Most leaks happen at penetrations (chimneys, valleys, walls). If the flashing isn’t installed correctly, the roof will leak long before the material wears out.
Choosing a reputable contractor like HW Roofing ensures that the installation meets or exceeds manufacturer specifications, preserving your warranty and your roof’s lifespan.
2. Tree Coverage
Large oak trees are beautiful, but they are tough on roofs.
- Debris: Leaves and needles trap moisture on the roof, accelerating rot and algae growth.
- Impact: Falling branches can puncture shingles or crack tiles.
- Abrasion: Branches rubbing against the roof during windstorms act like sandpaper, stripping granules off shingles or scratching the coating off metal.
3. Maintenance Neglect
Small problems become big failures. A cracked bit of caulking around a pipe boot costs $5 to fix. If ignored, it lets water into the decking, rotting the wood and requiring thousands of dollars in repairs. The philosophy of “out of sight, out of mind” is the fastest way to shorten a roof’s life.
Maximizing Your Roof’s Lifespan in Central Florida
Regardless of the material you choose, you can take active steps to squeeze every year of value out of your investment.
Schedule Annual Inspections
You get your car oil changed and your teeth cleaned; your roof deserves the same attention. An annual inspection by a professional can catch loose shingles, backed-out screws, or failing sealant before leaks occur. This is especially important after hurricane season. If you suspect damage, check our roof repairs page to see how we handle these issues.
Keep Gutters Clean
Clogged gutters cause water to back up. Instead of flowing off the roof, water pools at the eaves (the roof edge). This can rot the fascia board and the edge of the roof deck (plywood). It also invites insects and pests.
Cut Back Trees
Maintain a clearance of at least 6 to 10 feet between tree branches and your roof. This reduces debris accumulation and prevents squirrels and rats from having an easy bridge to your home.
Soft Wash, Don’t Pressure Wash
If your roof has black streaks (algae), it’s tempting to blast it with a pressure washer. Do not do this. High pressure strips granules from shingles and can force water under tiles. Instead, hire a professional for a “soft wash” using specialized cleaning solutions that kill the algae without damaging the roof surface.
Visual Checks
You don’t need to climb a ladder to check your roof. Grab a pair of binoculars and scan your roof from the ground. Look for:
- Missing or bent shingles.
- Rust streaks.
- Cracked tiles.
- Debris piles in the valleys.
If you spot anything concerning, don’t wait. Visit our contact us page to schedule a professional assessment.
Repair vs. Replace: What Makes Financial Sense?
When discussing longevity, we must also discuss the economics. Just because a metal roof lasts twice as long as a shingle roof doesn’t always mean it’s the right choice for everyone. It depends on your plans.
The “Cost Per Year” Calculation
When comparing quotes, divide the total cost by the expected lifespan.
- Shingle Roof: $15,000 / 20 years = $750 per year.
- Metal Roof: $30,000 / 50 years = $600 per year.
In the long run, metal often costs less per year. However, the upfront cost is significantly higher.
Your Timeline
- Staying forever? If this is your “forever home,” investing in Metal or Tile makes sense. You pay more now to avoid paying for a second roof replacement in 20 years.
- Selling soon? If you plan to move in 5-7 years, an Architectural Shingle roof will boost your curb appeal and pass inspection without the high premium of metal. You likely won’t recoup the full cost of a metal roof in resale value in such a short window.
You can browse our gallery to see examples of how different materials look on homes similar to yours, which might help you decide which aesthetic justifies the investment.
The Verdict
So, which roof material lasts the longest in Central Florida?
The crown goes to Standing Seam Metal Roofing. Its ability to withstand UV rays, high winds, and rain without degrading makes it the durability king of the humid subtropics. It offers a “set it and forget it” peace of mind that few other materials can match.
However, Concrete and Clay Tile are a very close second, offering timeless beauty and incredible structural resilience, provided you are prepared for the eventual underlayment maintenance.
Architectural Shingles remain the pragmatic choice—offering excellent protection and decent longevity at a price point that is accessible for most homeowners.
No matter which material you choose, the key to longevity lies in the quality of the installation. A metal roof installed poorly will fail faster than a shingle roof installed perfectly.
At HW Roofing, we specialize in Florida-proof installations. We understand the science of airflow, waterproofing, and wind uplift. We don’t just nail down shingles; we engineer roofing systems designed to go the distance.
Are you ready to invest in a roof that lasts? Whether you need a durable replacement or a maintenance check to extend the life of your current roof, we are here to help. Contact us today for a free consultation and let us help you secure your home against the Florida elements.
Frequently Asked Questions About Roof Longevity
Does roof color affect longevity?
Yes, to an extent. Dark-colored roofs absorb more heat, which can accelerate the drying out of asphalt shingles and increase thermal expansion/contraction in all materials. Lighter colors reflect heat, keeping the roof cooler and potentially extending its life, while also lowering your AC bills.
Will a metal roof rust in Central Florida?
In inland areas like Apopka or Orlando, high-quality Galvalume (steel with a zinc-aluminum coating) is extremely rust-resistant and will last decades. If you live directly on the coast (within a mile of saltwater), aluminum is recommended as it does not rust.
Can I walk on my roof to inspect it?
We generally advise against it. Walking on shingles on a hot day can tear the surface granules (scuffing). Walking on tile roofs can easily crack the tiles if you don’t know where to step. Flat roofs are safer to walk on, but you still risk punctures. It is always safer and better for the roof to have a professional handle roof-top inspections.
How do I know if my roof needs replacing or just a repair?
If the damage is localized (e.g., a tree branch hit one spot), a repair is likely sufficient. If the roof is showing signs of widespread age (curling shingles everywhere, bald spots, granules in gutters, multiple leaks), replacement is usually the more fastidious financial decision. Visit our roof repairs page to learn more about our diagnostic process.
Does insurance cover roof replacement?
Homeowners insurance typically covers replacement if the damage is caused by an “act of God” (sudden event) like a hurricane, hail storm, or fallen tree. It generally does not cover replacement due to normal wear and tear or age. However, maintaining your roof well can prevent insurance companies from denying claims due to “negligence.”
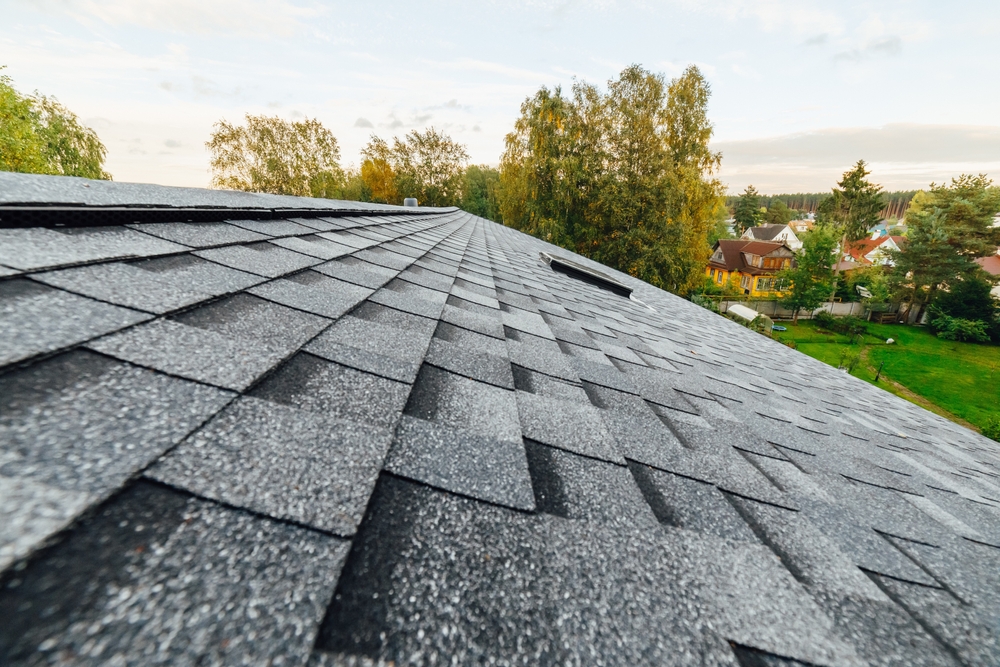
Flat roofs have long been a staple of commercial architecture, but in Florida, they are an increasingly popular feature of residential design as well. Whether adorning a modern minimalist home, a mid-century gem, or a functional addition like a lanai or garage, flat roofs offer clean lines and practical space usage. However, the very feature that defines them—their low slope—presents a unique set of challenges in Florida’s tropical climate.
When heavy afternoon storms roll in, a flat roof doesn’t have the advantage of gravity shedding water as quickly as a steep shingle or tile roof. This makes them more susceptible to specific issues like ponding water, blistering, and membrane failure. For Florida homeowners, understanding the nuances of flat roof maintenance isn’t just about preserving aesthetics; it’s about protecting the structural integrity of the home against water intrusion.
In this comprehensive guide, we will explore the specific vulnerabilities of flat roofs in the Sunshine State. We will break down the most common problems, from ominous water pools to unsightly bubbles, and detail the professional repair techniques used to fix them. If you own a home with a flat roof, this information is your first line of defense.
Why Flat Roofs Are Practical for Florida Homes
Before we dive into the repairs, it’s important to understand why flat roofs are a viable and even advantageous choice for Florida homeowners, despite the challenges.
Modern Aesthetics and Functionality
Flat roofs are synonymous with modern architecture. They allow for unique interior ceiling heights and clean, geometric exterior lines that fit perfectly with the Florida landscape. beyond looks, they offer functional space. In a state with limited land, a flat roof can often be converted into a rooftop deck or garden (with proper structural support), expanding your outdoor living area.
Wind Resistance
In hurricane-prone areas, aerodynamics matter. Steep-slope roofs can act like sails, catching high winds that threaten to lift the structure. Flat roofs, by contrast, offer less resistance to wind, making them inherently more aerodynamic and potentially safer during severe storms, provided the edges and flashing are secure.
Cost-Effectiveness
Generally, flat roofs are easier to access and safer to walk on, which can make installation and maintenance safer and sometimes quicker than steep-slope alternatives. The materials used, such as Modified Bitumen or TPO (Thermoplastic Polyolefin), are also cost-effective per square foot.
However, these benefits rely heavily on the quality of the installation and the vigilance of the homeowner. Neglect can turn a practical roof into a leaky liability.
The “Flat” Misconception: Low Slope vs. No Slope
A critical distinction in roofing is that no roof should be perfectly flat. Even “flat” roofs are technically “low-slope” roofs. They must have a slight pitch (usually at least 1/4 inch per foot) to direct water toward drains, scuppers, or gutters.
If this slope is inadequate—due to poor design, settling of the house, or sagging decking—water has nowhere to go. This leads to the number one enemy of flat roofs: ponding water.
Common Flat Roof Problems in Florida
Florida’s climate is a stress test for roofing materials. The combination of intense UV radiation, high heat, and torrential rainfall creates a perfect storm for flat roof deterioration.
1. Ponding Water (The Silent Destroyer)
Ponding water is defined as water that remains on a roof for more than 48 hours after a rain event. In Florida, where it can rain daily in the summer, this is a critical issue.
- Why it happens: Clogged drains, sagging roof structures, or insufficient pitch are the main culprits.
- The Damage: Water is heavy (about 5 pounds per square foot for every inch of depth). This extra weight stresses the roof structure. Furthermore, standing water acts as a magnifying glass for the sun, intensifying UV damage to the membrane below. It also allows algae and vegetation to grow, whose roots can penetrate the roof surface. Eventually, the water breaks down the adhesives and materials, leading to leaks.
2. Blistering and Bubbling
Walking on your flat roof and seeing what looks like bubbles under the surface is alarming. These are blisters.
- Why it happens: Blisters occur when moisture or air is trapped between the layers of the roof membrane or between the membrane and the deck. When the Florida sun heats the roof, this trapped air or water vapor expands, pushing the membrane up and creating a bubble.
- The Damage: Small blisters might not be an immediate leak risk, but they weaken the surface. Large blisters can crack or pop, creating an open wound in your roof’s defense. If a blister is stepped on, it can easily break.
3. Alligatoring
This phenomenon gets its name because the roof surface begins to look like the hide of an alligator.
- Why it happens: This is primarily a sign of aging and UV damage on asphalt-based flat roofs (like built-up roofs or modified bitumen). As the sun dries out the oils in the asphalt, the surface loses flexibility and cracks.
- The Damage: These cracks start shallow but eventually deepen, penetrating the waterproofing layer and allowing water to seep into the insulation and decking.
4. Flashing Separations
Flashing is the metal strip used to seal edges, corners, and penetrations (like vents or chimneys).
- Why it happens: Flat roofs expand and contract significantly with temperature changes. This thermal movement creates stress at the edges where the roof membrane meets the metal flashing. Over time, the membrane can pull away or the sealant can fail.
- The Damage: This creates a direct pathway for water to enter the building envelope, often resulting in leaks that run down walls.
5. Punctures and Tears
Because flat roofs are often used as platforms for AC units or are easily accessible for walking, they are prone to physical damage.
- Why it happens: Dropped tools from HVAC technicians, falling tree limbs during storms, or even sharp debris can puncture single-ply membranes like TPO or EPDM.
- The Damage: A hole is a leak waiting to happen. In a flat roof system, water doesn’t run off quickly, so it has plenty of time to find even the smallest puncture.
Flat Roof Repair Techniques: How Pros Fix It
Repairing a flat roof requires specific knowledge of the materials involved. You cannot simply slap some shingle tar on a TPO roof and hope for the best. Incompatible materials can chemically react and worsen the damage. Here is how professional roof repairs are handled for different issues.
Fixing Ponding Water
Resolving ponding water often requires addressing the slope rather than just patching a leak.
- Clearing Drains: The first step is always ensuring scuppers, gutters, and internal drains are clear of debris.
- Tapered Insulation: For persistent low spots, roofers may install a “cricket” or tapered insulation system. This involves building up the low area with angled rigid foam insulation and then applying new roofing membrane over it. This physically creates a slope that directs water toward the drains.
- Roof Drains: In severe cases, adding new drains in the lowest points of the roof may be necessary to give the water an escape route.
Repairing Blisters
Do not try to pop a blister yourself! This creates a hole where there wasn’t one before.
- The Process: A professional will carefully cut the blister open (usually in an ‘X’ shape) to release the trapped air or water.
- Drying: It is crucial to ensure the area underneath is completely dry. If the insulation is wet, it must be replaced.
- Sealing: The flaps of the membrane are glued back down. Then, a patch of new membrane is applied over the cut area, extending several inches beyond the damage in all directions. It is heat-welded or adhered with specialized mastic to ensure a watertight seal.
Addressing Punctures and Tears
The repair method depends on the roof material.
- Modified Bitumen (Mod Bit): These repairs often use a torch-down method or cold-applied adhesives. A patch of similar asphalt-based material is fused over the tear.
- TPO/PVC (White Single-Ply): These materials are heat-weldable. A roofer uses a hot-air gun to weld a new piece of TPO/PVC over the puncture. This fuses the new and old material into a single, solid sheet. Chemical solvents can also be used but heat welding is superior.
- EPDM (Rubber): Rubber roofs are repaired using specialized primers and peel-and-stick rubber patches. The surface must be aggressively cleaned and primed for the patch to hold.
Coating Restoration: The Life-Extender
For roofs suffering from alligatoring or widespread minor surface wear (but no wet insulation), a silicone or acrylic roof coating is a fantastic repair option.
- The Solution: The roof is pressure washed and primed. All seams and penetrations are reinforced with heavy mastic and fabric. Then, a liquid coating is rolled or sprayed over the entire surface.
- The Benefit: This creates a seamless, white, reflective barrier that stops leaks, halts UV degradation, and lowers cooling costs. It essentially gives you a new roof surface at a fraction of the cost of replacement.
You can see examples of successful flat roof restorations and repairs in our gallery.
Materials Matter: Knowing Your Flat Roof Type
To understand the repair, you must identify what type of roof you have.
- Built-Up Roof (BUR): The traditional “tar and gravel” roof. It consists of alternating layers of bitumen and reinforcing fabric, topped with gravel. Repairs involve removing gravel and patching layers.
- Modified Bitumen (Mod Bit): Evolution of BUR. It comes in rolls and is applied with a torch (torch-down) or peel-and-stick adhesives. It has a granulated surface similar to shingles. Very common in Florida residential additions.
- TPO (Thermoplastic Polyolefin): A white, single-ply membrane that reflects heat. It is energy efficient and highly resistant to punctures. Seams are heat-welded.
- EPDM (Ethylene Propylene Diene Monomer): A synthetic rubber roof, usually black (though can be coated white). It is extremely durable but the seams (glued) can fail over time.
The Cost of Flat Roof Repairs in Florida
Flat roof repairs can vary in price, but they are generally an investment that saves you from a much larger replacement bill.
Factors Influencing Cost
- Access: Is the roof on the first floor or three stories up? Easy access lowers labor costs.
- Material: TPO repairs usually require expensive hot-air welding equipment and skilled labor. Mod Bit repairs can be less equipment-intensive but require fire safety protocols if torches are used.
- Insulation Damage: If the leak has saturated the insulation board underneath the membrane, the cost rises significantly because the wet insulation must be cut out and replaced. You cannot roof over wet insulation.
- Scope: A simple patch is cheap. Fixing a drainage issue with tapered insulation is a construction project.
Price Ranges
- Minor Patching: For small punctures or sealing a flashing, expect to pay between $300 and $800.
- Blister Repair: Fixing a few localized blisters might run $500 to $1,200.
- Ponding Water Correction: Installing crickets or new drains can range from $1,500 to $4,000+ depending on the size of the area.
- Silicone Restoration Coating: This is priced per square foot, typically ranging from $4 to $8 per sq. ft., offering a mid-range solution between repair and replacement.
Repair vs. Replacement: Making the Call
When is a repair enough, and when do you need to tear it off and start over?
Choose Repair When:
- The roof is less than 10-12 years old.
- The insulation is dry (verified by a moisture scan or core cut).
- The problems are localized (e.g., one leaking vent or a few punctures).
- The membrane is still flexible and not cracking extensively.
Choose Replacement When:
- Wet Insulation: If the roof feels “squishy” when you walk on it, the insulation is saturated. Trapped moisture will rot your deck and cause mold. The entire system must go.
- Age: If the roof is 15-20+ years old and showing signs of widespread failure (alligatoring, brittle membrane, failing seams everywhere).
- Frequent Leaks: If you are chasing a new leak every time it rains, the membrane has likely reached the end of its useful life.
At HW Roofing, we provide honest assessments to help you decide. We won’t sell you a new roof if a repair will give you five more good years.
Choosing a Flat Roof Specialist
Flat roofing is a different trade than shingle roofing. The skills required to heat-weld TPO or torch-down bitumen are specialized. When hiring a contractor in Florida:
- Check for Commercial Experience: Since flat roofs are common on commercial buildings, roofers with commercial experience often have the best skills for residential flat roofs.
- Insurance: Ensure they have liability insurance specifically covering “open flame” work if they are installing Modified Bitumen, as torch-down applications carry fire risks.
- Ask About Slope: A good roofer will talk to you about how to get water off the roof, not just how to stop the leak. If they ignore the ponding water issue, look elsewhere.
Maintenance: The Key to Longevity
Because flat roofs don’t shed debris naturally, maintenance is more critical than with sloped roofs.
- Keep it Clean: Sweep leaves and branches off the roof regularly. Debris holds moisture and can rot the membrane.
- Clear Drains: Check scuppers and gutters before and after storms. A clogged drain turns your roof into a swimming pool.
- Trim Trees: Keep branches away to prevent abrasion and puncture risks.
- Inspect Seals: Check the sealant around AC units and vents annually. Sun destroys caulk; re-sealing these points is easy preventative maintenance.
Conclusion: Don’t Let Flat Roof Fears Keep You Up at Night
A flat roof is a sophisticated, high-performance feature of your Florida home. While it demands respect and attention, it doesn’t have to be a source of anxiety. By understanding the signs of ponding, blistering, and aging, you can catch problems early when they are affordable to fix.
Whether you need a quick patch for a puncture, a solution for standing water, or a full restoration coating, professional intervention is key. DIY fixes on flat roofs often trap moisture or use incompatible materials, leading to worse problems down the road.
If you suspect your flat roof has issues, or if you just want a professional eye to check its condition before hurricane season, don’t hesitate. Contact the experts at HW Roofing. Visit our contact us page today to schedule an inspection and ensure your roof stays watertight and worry-free.
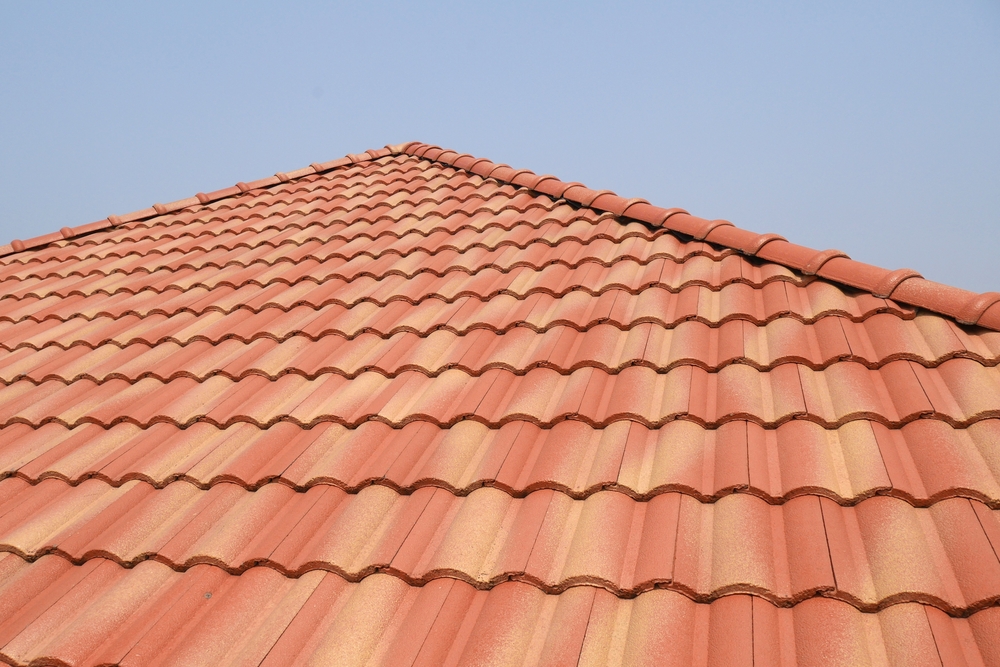
A tile roof is more than just a protective covering for your home; it is a statement of style, longevity, and resilience. Especially prevalent in Florida, tile roofs—whether clay, concrete, or slate—evoke a sense of timeless elegance while offering robust defense against the harsh subtropical climate. However, despite their durability and reputation for lasting 50 years or more, tile roofs are not invincible. They require specialized care, and when issues arise, they demand expert attention.
For many homeowners, the first sign of trouble isn’t a missing tile but a water stain on the ceiling. Unlike shingle roofs where the visible layer is the primary water barrier, a tile roof system relies heavily on what lies beneath the tiles: the underlayment. Understanding the dynamic relationship between your tiles and the underlayment is key to maintaining your home’s integrity.
In this comprehensive guide, we will delve deep into the world of tile roof repair. We will explore why tiles crack, the critical role of underlayment, the specific repair techniques professionals use, and what you can expect to pay for these services. If you own a tile roof in Florida, this knowledge is your best tool for protecting your investment.
Why Tile Roofs Are a Florida Favorite
Before we discuss repairs, it’s worth noting why tile roofs are so dominant in the Florida landscape. Their popularity is driven by both form and function.
Durability Against the Elements
Florida’s weather is a rigorous test for any building material. Tile roofs excel here. Concrete and clay tiles are impervious to rot and insect damage. More importantly, they are highly resistant to the salt air that can corrode metal and degrade asphalt. Their heavy weight also provides excellent resistance to wind uplift during hurricanes, provided they are properly fastened.
Thermal Performance
In a state where air conditioning runs year-round, energy efficiency is paramount. Tile roofs have natural thermal properties. The shape of many tiles (like S-tiles or barrel tiles) allows for air circulation under the tile, which helps dissipate heat before it reaches the attic. The thermal mass of the concrete or clay also helps regulate indoor temperatures.
Aesthetic Appeal
From Mediterranean revivals to modern ranches, tile roofs complement a wide range of architectural styles. They add significant curb appeal and can increase the resale value of a home.
However, these benefits come with a caveat: complexity. A tile roof is a sophisticated system that requires knowledgeable professionals for installation and roof repairs.
Common Issues with Tile Roofs
While the tiles themselves are incredibly durable, the system as a whole has vulnerabilities. Identifying these common issues early can prevent minor damage from escalating into major structural problems.
1. Cracked or Broken Tiles
This is the most visible issue homeowners face. Tiles can crack for several reasons:
- Impact Damage: Falling tree limbs, hail, or even wayward golf balls can shatter a tile.
- Foot Traffic: Tiles are not designed to be walked on by untrained individuals. Walking on the delicate areas of a tile (like the center of a high arc) can easily snap it. This is a common cause of damage when homeowners or unqualified workers (like painters or pressure washers) get on the roof.
- Thermal Shock: While rare in high-quality tiles, rapid temperature changes can sometimes cause older or lower-quality tiles to crack.
- Improper Fastening: If tiles are nailed down too tightly, they don’t have room to expand and contract with heat, leading to stress cracks.
Why it matters: A cracked tile allows UV rays and water to reach the underlayment directly. While the underlayment is water-resistant, it is not designed to be the primary shield against the sun for long periods. UV exposure will degrade it rapidly.
2. Sliding or Slipped Tiles
Tiles are held in place by nails, screws, or sometimes foam adhesive. Over time, these fasteners can fail due to corrosion or adhesive breakdown. When a tile slips out of place, it exposes the underlayment and leaves a gap in the roof’s armor. This is often seen after high-wind events or on steeper roof pitches where gravity exerts constant pull.
3. Valley Deterioration
Valleys are the V-shaped channels where two roof slopes meet. They handle a high volume of water runoff. In tile roofs, valleys are typically lined with metal flashing. Over time, this metal can rust, or debris (leaves, pine needles) can accumulate under the tiles in the valley, creating dams that force water sideways and under the roofing system.
4. Flashing Failures
Just like with other roofing types, the metal flashing around chimneys, vents, skylights, and walls is a weak point. If the sealant fails or the metal corrodes, water can seep into the home. On tile roofs, flashing repair is more labor-intensive because the surrounding tiles must be carefully removed to access the metal.
The Hidden Enemy: Underlayment Issues
Perhaps the most misunderstood aspect of a tile roof is the underlayment. Many homeowners believe the tiles keep the water out. In reality, the underlayment is the primary waterproofing layer.
What is Underlayment?
Underlayment is a membrane installed directly onto the roof deck (the plywood) before the tiles are laid. Historically, this was made of asphalt-saturated felt paper (tar paper). Modern roofs often use synthetic materials or peel-and-stick self-adhered membranes, which offer superior durability.
The “Shedding” vs. “Waterproof” Concept
Tiles are “water-shedding.” They block the bulk of the rain and direct it down the roof. However, wind-driven rain can get under the tiles. The underlayment is the “waterproof” barrier that catches this water and drains it off the roof.
Why Underlayment Fails
While concrete and clay tiles can last 50-100 years, traditional asphalt felt underlayment typically lasts only 20-30 years in Florida’s heat. This creates a discrepancy: the tiles look fine, but the roof is leaking.
- Heat and Age: The intense heat in an attic bakes the underlayment from below, while the sun heats the tiles from above. Over time, the oils in the asphalt dry out, making the paper brittle. It eventually cracks or crumbles.
- Debris Accumulation: Debris that gets under the tiles can trap moisture against the underlayment, accelerating rot.
- UV Exposure: As mentioned, if a tile cracks or slips, the sun hits the underlayment directly, destroying it in a matter of months.
The Consequence: When the underlayment fails, you have a leak, even if your tiles look perfect from the street. This is why “tile roof repair” often actually means “underlayment replacement.”
The Tile Roof Repair Process
Repairing a tile roof is surgical work. It requires precision, the right tools, and a deep understanding of how the tiles interlock. Here is what you can expect when you hire a professional.
Step 1: Comprehensive Assessment
A qualified roofer will inspect the roof to identify not just the visible broken tiles but the source of any leaks. This involves checking the attic for water stains and carefully lifting tiles in suspect areas to inspect the underlayment.
Step 2: Replacing Cracked Tiles
For simple surface damage where the underlayment is intact:
- Matching: The hardest part is often finding a matching tile. Styles and colors change over decades. A good roofer has access to “boneyards” of discontinued tiles. If a match isn’t found, they may swap a tile from a hidden area of your roof to the visible area and put the new (mismatched) tile in the hidden spot.
- Removal: The broken tile is carefully lifted. If it’s nailed, the nail must be extracted or cut without damaging the surrounding tiles.
- Installation: The new tile is slid into place. Professionals use specialized adhesives or clips to secure the new tile without needing to drive a nail through the face, which could cause leaks.
Step 3: The “Lift and Relay” (Underlayment Repair)
If the underlayment is damaged or has reached the end of its life, a “lift and relay” is necessary. This is a major repair often performed on sections of the roof or the entire roof.
- Removal: The tiles in the affected area are carefully removed and stacked.
- Inspection: The roof deck is inspected for rotten wood, which is replaced if found.
- New Underlayment: The old, deteriorated felt is stripped away. New, high-quality underlayment (often a self-adhered, high-temp modified bitumen membrane) is installed.
- Re-installation: The original tiles are re-installed over the new underlayment. This saves the cost of buying new tiles while giving the roof a new 30+ year waterproof lifespan.
Step 4: Valley and Flashing Restoration
During a repair, valleys are often cleared of debris. If the metal is rusted, the tiles on either side are removed, and new copper or galvanized metal flashing is installed. The valley is then “sealed” properly to ensure water flows freely.
Step 5: Mortar Repair
On many tile roofs, mortar (cement) is used on the hip and ridge caps (the peaks of the roof) to hold the tiles in place and seal gaps. Over time, this mortar cracks and falls out. A repair involves removing loose mortar and repacking the joints with new, weather-resistant mortar or modern flexible adhesives that won’t crack as easily.
You can see examples of these meticulous repairs in our project gallery.
The Cost of Tile Roof Repair
Tile roof repairs are generally more expensive than shingle repairs due to the labor involved and the cost of materials. However, repairing is almost always more cost-effective than a full replacement if the tiles are in good condition.
Factors Influencing Cost
- Type of Tile: Clay tiles are more fragile and expensive than concrete tiles. Slate is the most expensive.
- Scope of Damage: Replacing 10 cracked tiles is a minor cost. Performing a “lift and relay” on a large section of the roof is a significant construction project.
- Roof Pitch and Height: Steeper and higher roofs require more safety equipment and time, increasing labor costs.
- Accessibility: If the damaged area is hard to reach without walking on (and potentially breaking) other tiles, the job takes longer.
Estimated Price Ranges
- Minor Repairs: Replacing a few broken tiles or fixing a small leak area typically ranges from $500 to $1,500.
- Valley Repair: Re-lining a valley usually costs between $20 to $30 per linear foot, plus labor.
- Lift and Relay: This is priced similarly to a new roof installation but minus the cost of the tiles. It can range from $5 to $9 per square foot depending on complexity.
The Cost of Waiting
Ignoring a cracked tile or a small leak is a gamble that rarely pays off. Water intrusion in a tile roof can travel extensively along the underlayment before entering the home, rotting large sections of plywood decking and trusses in the process. The cost to repair structural rot is astronomical compared to the cost of replacing a few tiles or patching underlayment early.
If you suspect damage, contact us immediately for a quote. Visit HW Roofing to learn more about our services.
Choosing the Right Professional for Tile Roofs
Not every roofer is a tile roofer. Walking on a tile roof without breaking it requires specific training and experience. Using the wrong repair methods—like using tar to patch a tile—can ruin the aesthetic and functionality of the roof.
What to Look For:
- Specific Experience: Ask the contractor how many tile roofs they repair annually.
- Knowledge of Materials: They should be able to explain the difference between concrete and clay tile maintenance.
- Warranty: A reputable roofer will offer a warranty on the repair area.
- Licensed and Insured: Ensure they carry liability and workers’ compensation insurance. Tile roofing is heavy, dangerous work.
At HW Roofing, we specialize in the nuances of tile roof systems. We understand that your roof is a significant investment, and our goal is to extend its life through precision roof repairs and maintenance.
Maintenance: Extending the Life of Your Tile Roof
While repairs are sometimes inevitable, maintenance can delay them significantly.
- Annual Inspections: Have a professional inspect your roof once a year. They can spot slipped tiles, cracked mortar, or blocked valleys that you can’t see from the ground.
- Keep it Clean: Algae and moss love the porous surface of concrete tiles. While mostly cosmetic, heavy growth can hold moisture. Periodic soft-washing (never high-pressure washing) by a professional can keep the roof looking new and functioning well.
- Tree Management: Keep branches trimmed at least 6-10 feet away from the roof to prevent impact damage and reduce debris accumulation.
- Gutter Cleaning: Clogged gutters can cause water to back up under the eaves, rotting the fascia and the edge of the roof deck.
Conclusion: Preserve the Elegance and Integrity of Your Home
A tile roof is a premium feature that offers superior protection and beauty for Florida homes. However, its longevity depends on the health of the system as a whole—tiles, underlayment, flashing, and fasteners.
Don’t let a few cracked tiles or an aging underlayment compromise the safety of your home. By addressing issues promptly with professional repairs, you can ensure your tile roof continues to perform for decades. Whether you need a simple tile replacement or a comprehensive leak investigation, expert help is just a click away.
Ready to restore your roof? Visit our contact us page to schedule your inspection today. Protect your sanctuary with the quality care it deserves.
Frequently Asked Questions About Tile Roof Repair
Can I walk on my tile roof to fix it myself?
It is highly discouraged. Tile roofs are slippery, steep, and fragile. Walking on them incorrectly can cause extensive breakage, creating more leaks than you started with. It is also a significant safety hazard. Leave this to professionals who know where to step to distribute weight safely.
How do I match my old tiles?
Roofing professionals have networks of suppliers and salvage yards (“boneyards”) where they source discontinued tiles. If an exact match isn’t possible, we can often take tiles from a less visible part of your roof (like the back) to use for the repair, and place the new, slightly different tiles in the hidden area.
Is a “lift and relay” worth it?
Yes. If your tiles are in good condition (which they often are, as concrete and clay last a long time) but your underlayment is failing, a lift and relay is the most cost-effective solution. It restores the waterproofing integrity of your roof for significantly less than the cost of a total replacement involving new tiles.
How long does a tile roof repair take?
Minor repairs, like replacing a few tiles, can be done in a few hours. A valley repair might take a day. A larger lift and relay project can take several days to a week, depending on the size of the section being repaired.
Will my insurance cover tile roof repair?
It depends on the cause of the damage. If the damage is due to a sudden event like a storm, fallen tree, or hail, it is often covered. Issues related to age, wear and tear, or lack of maintenance are typically not covered. We recommend consulting with your insurance adjuster and a professional roofer to assess the situation